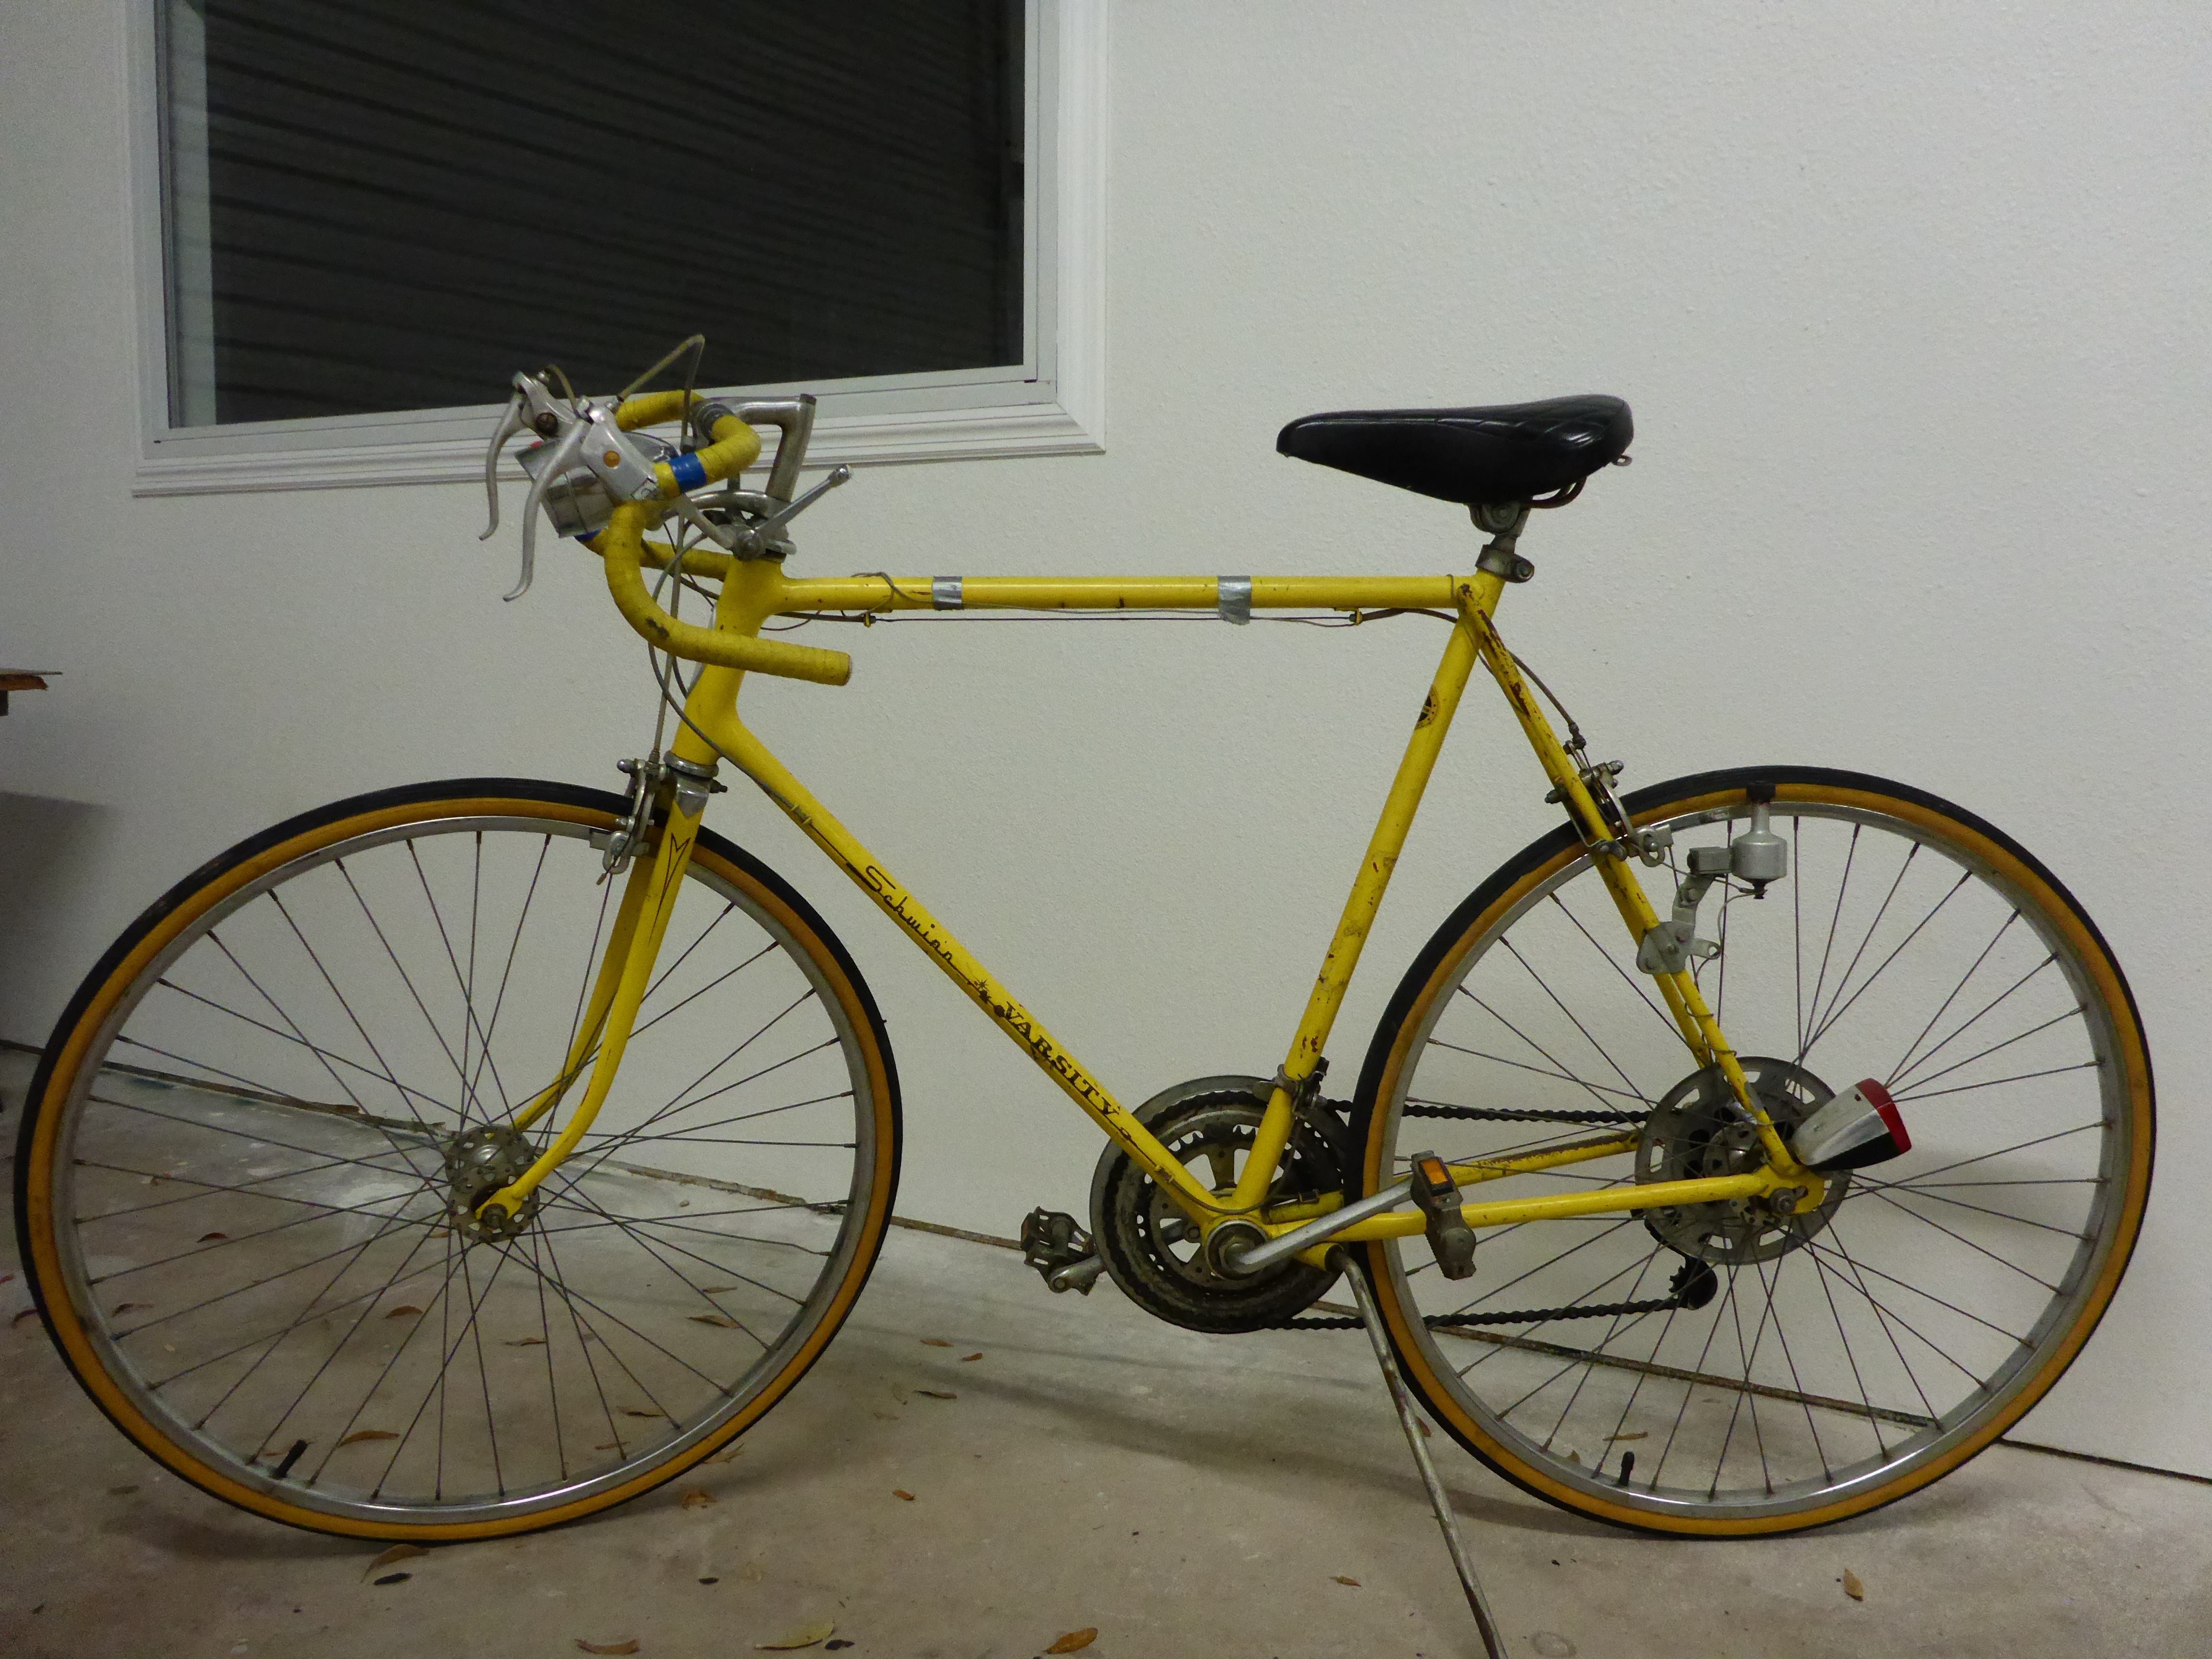
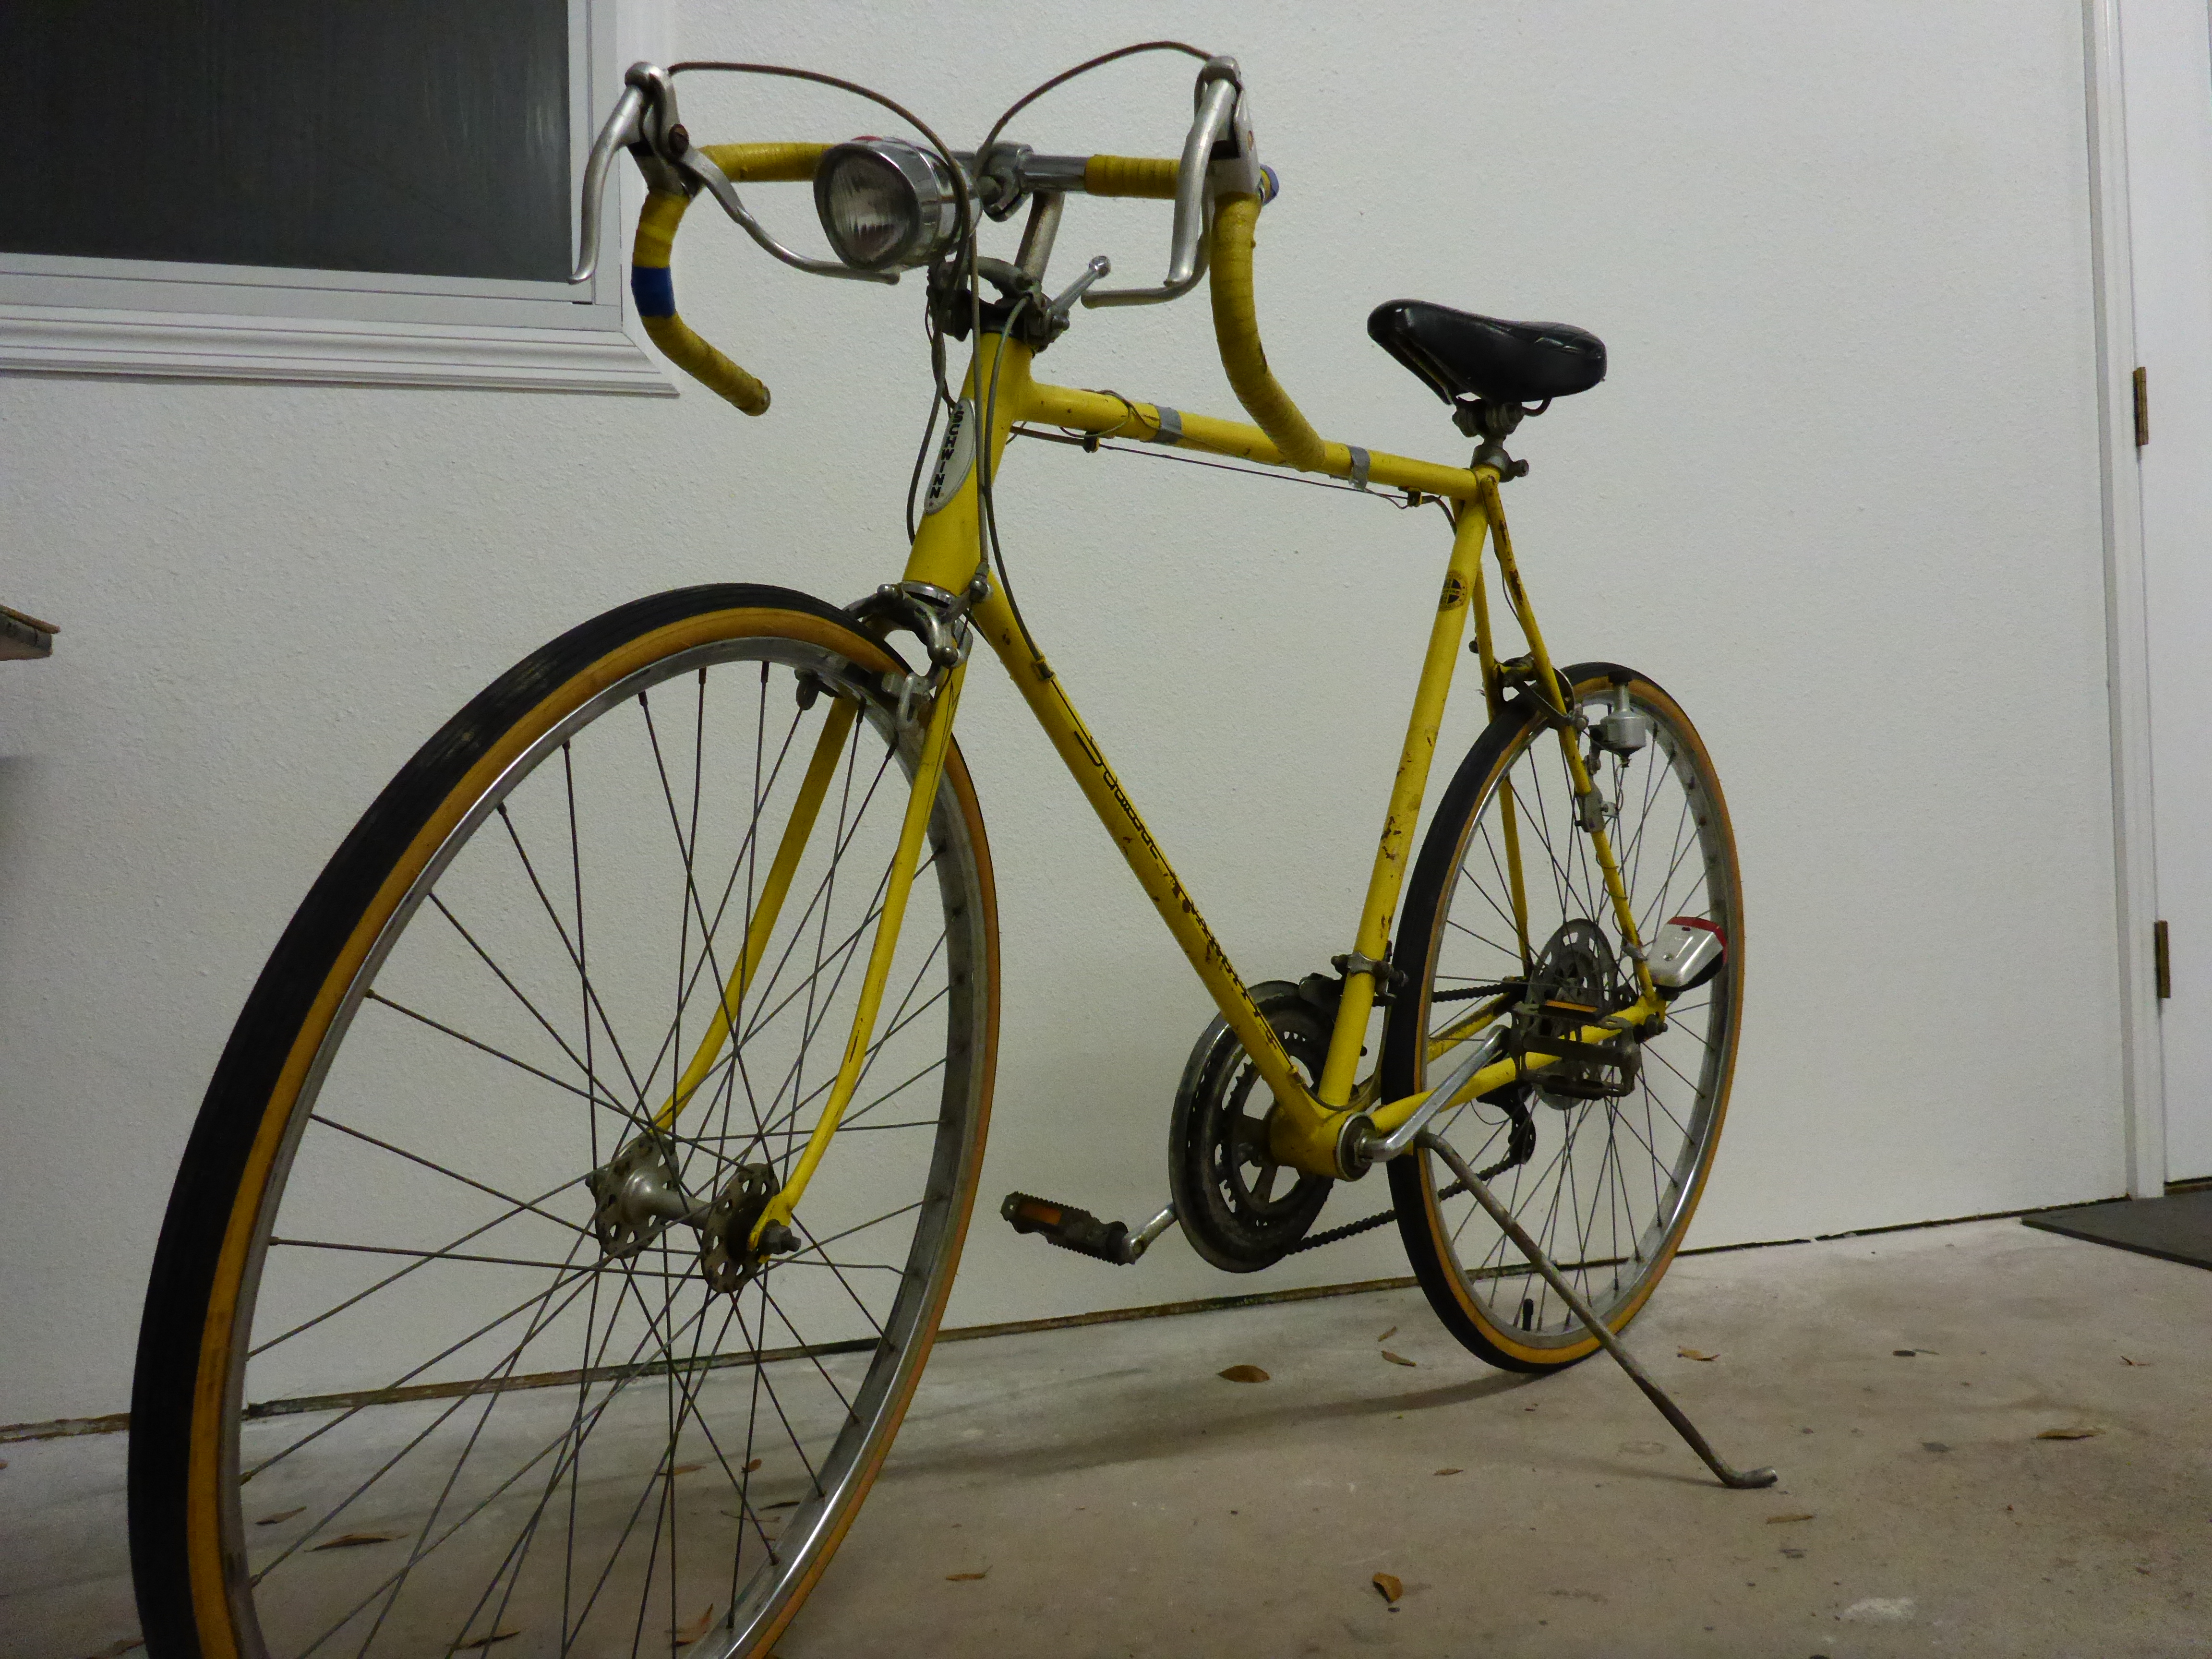
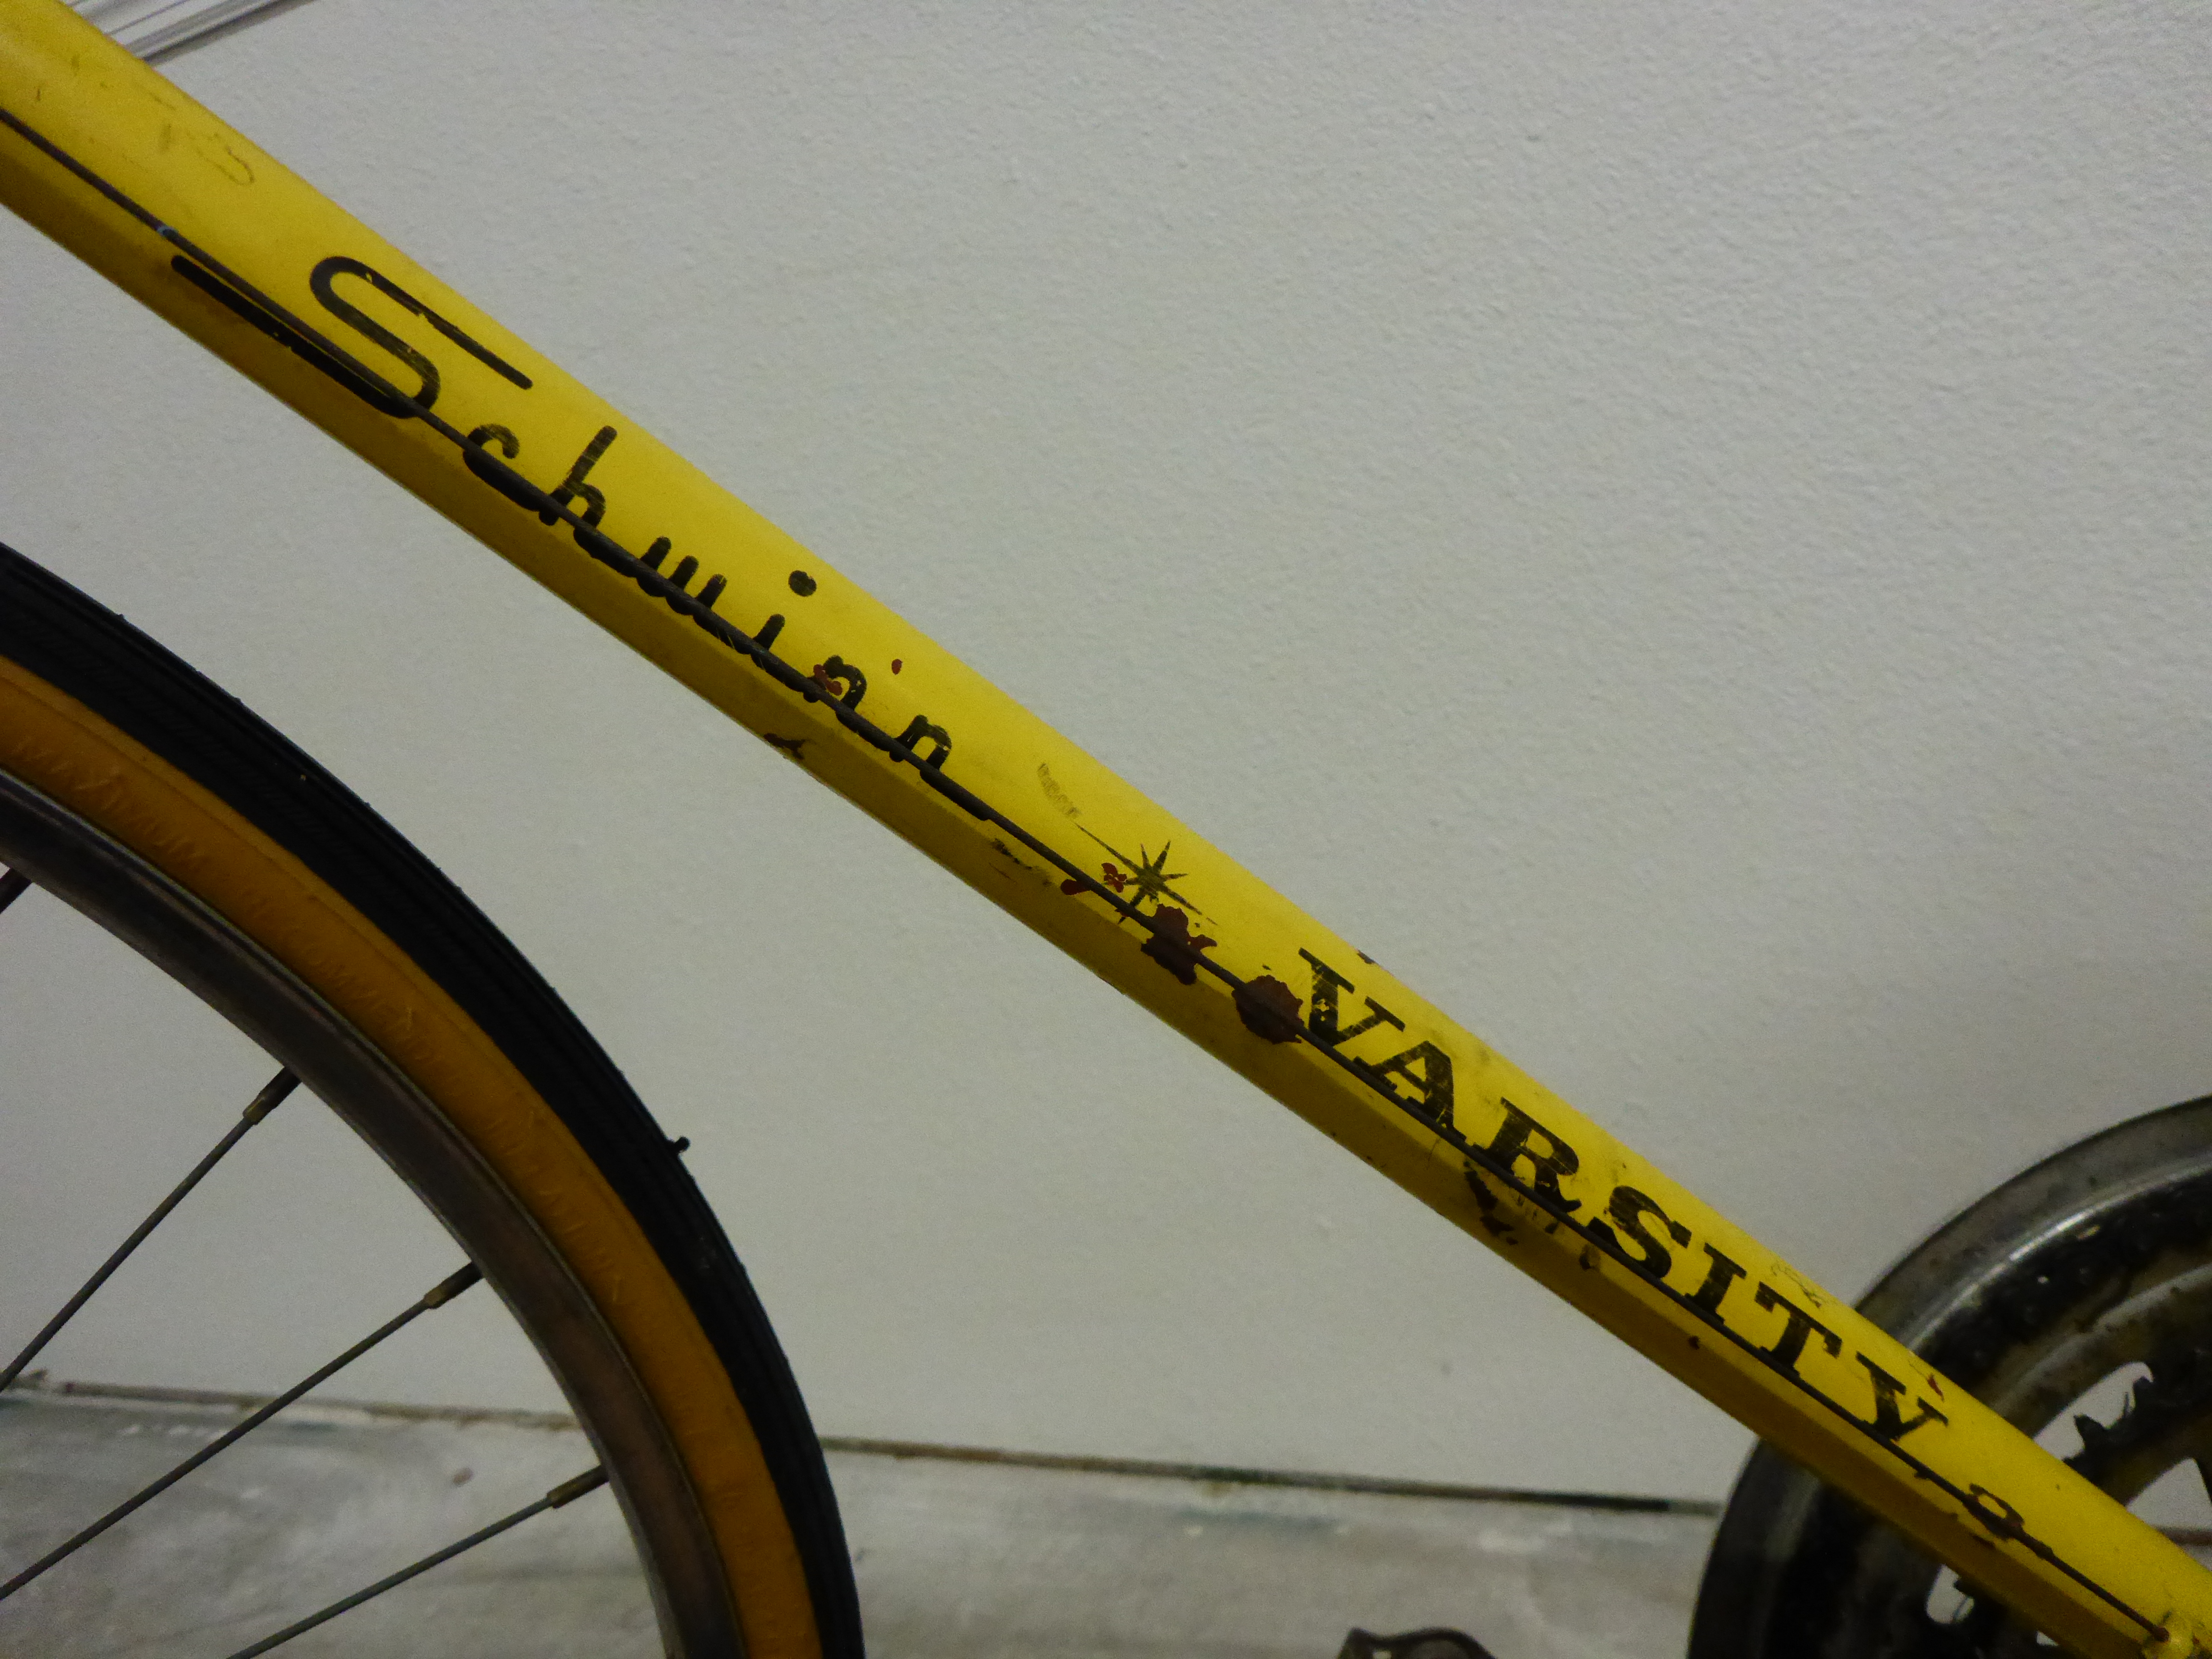
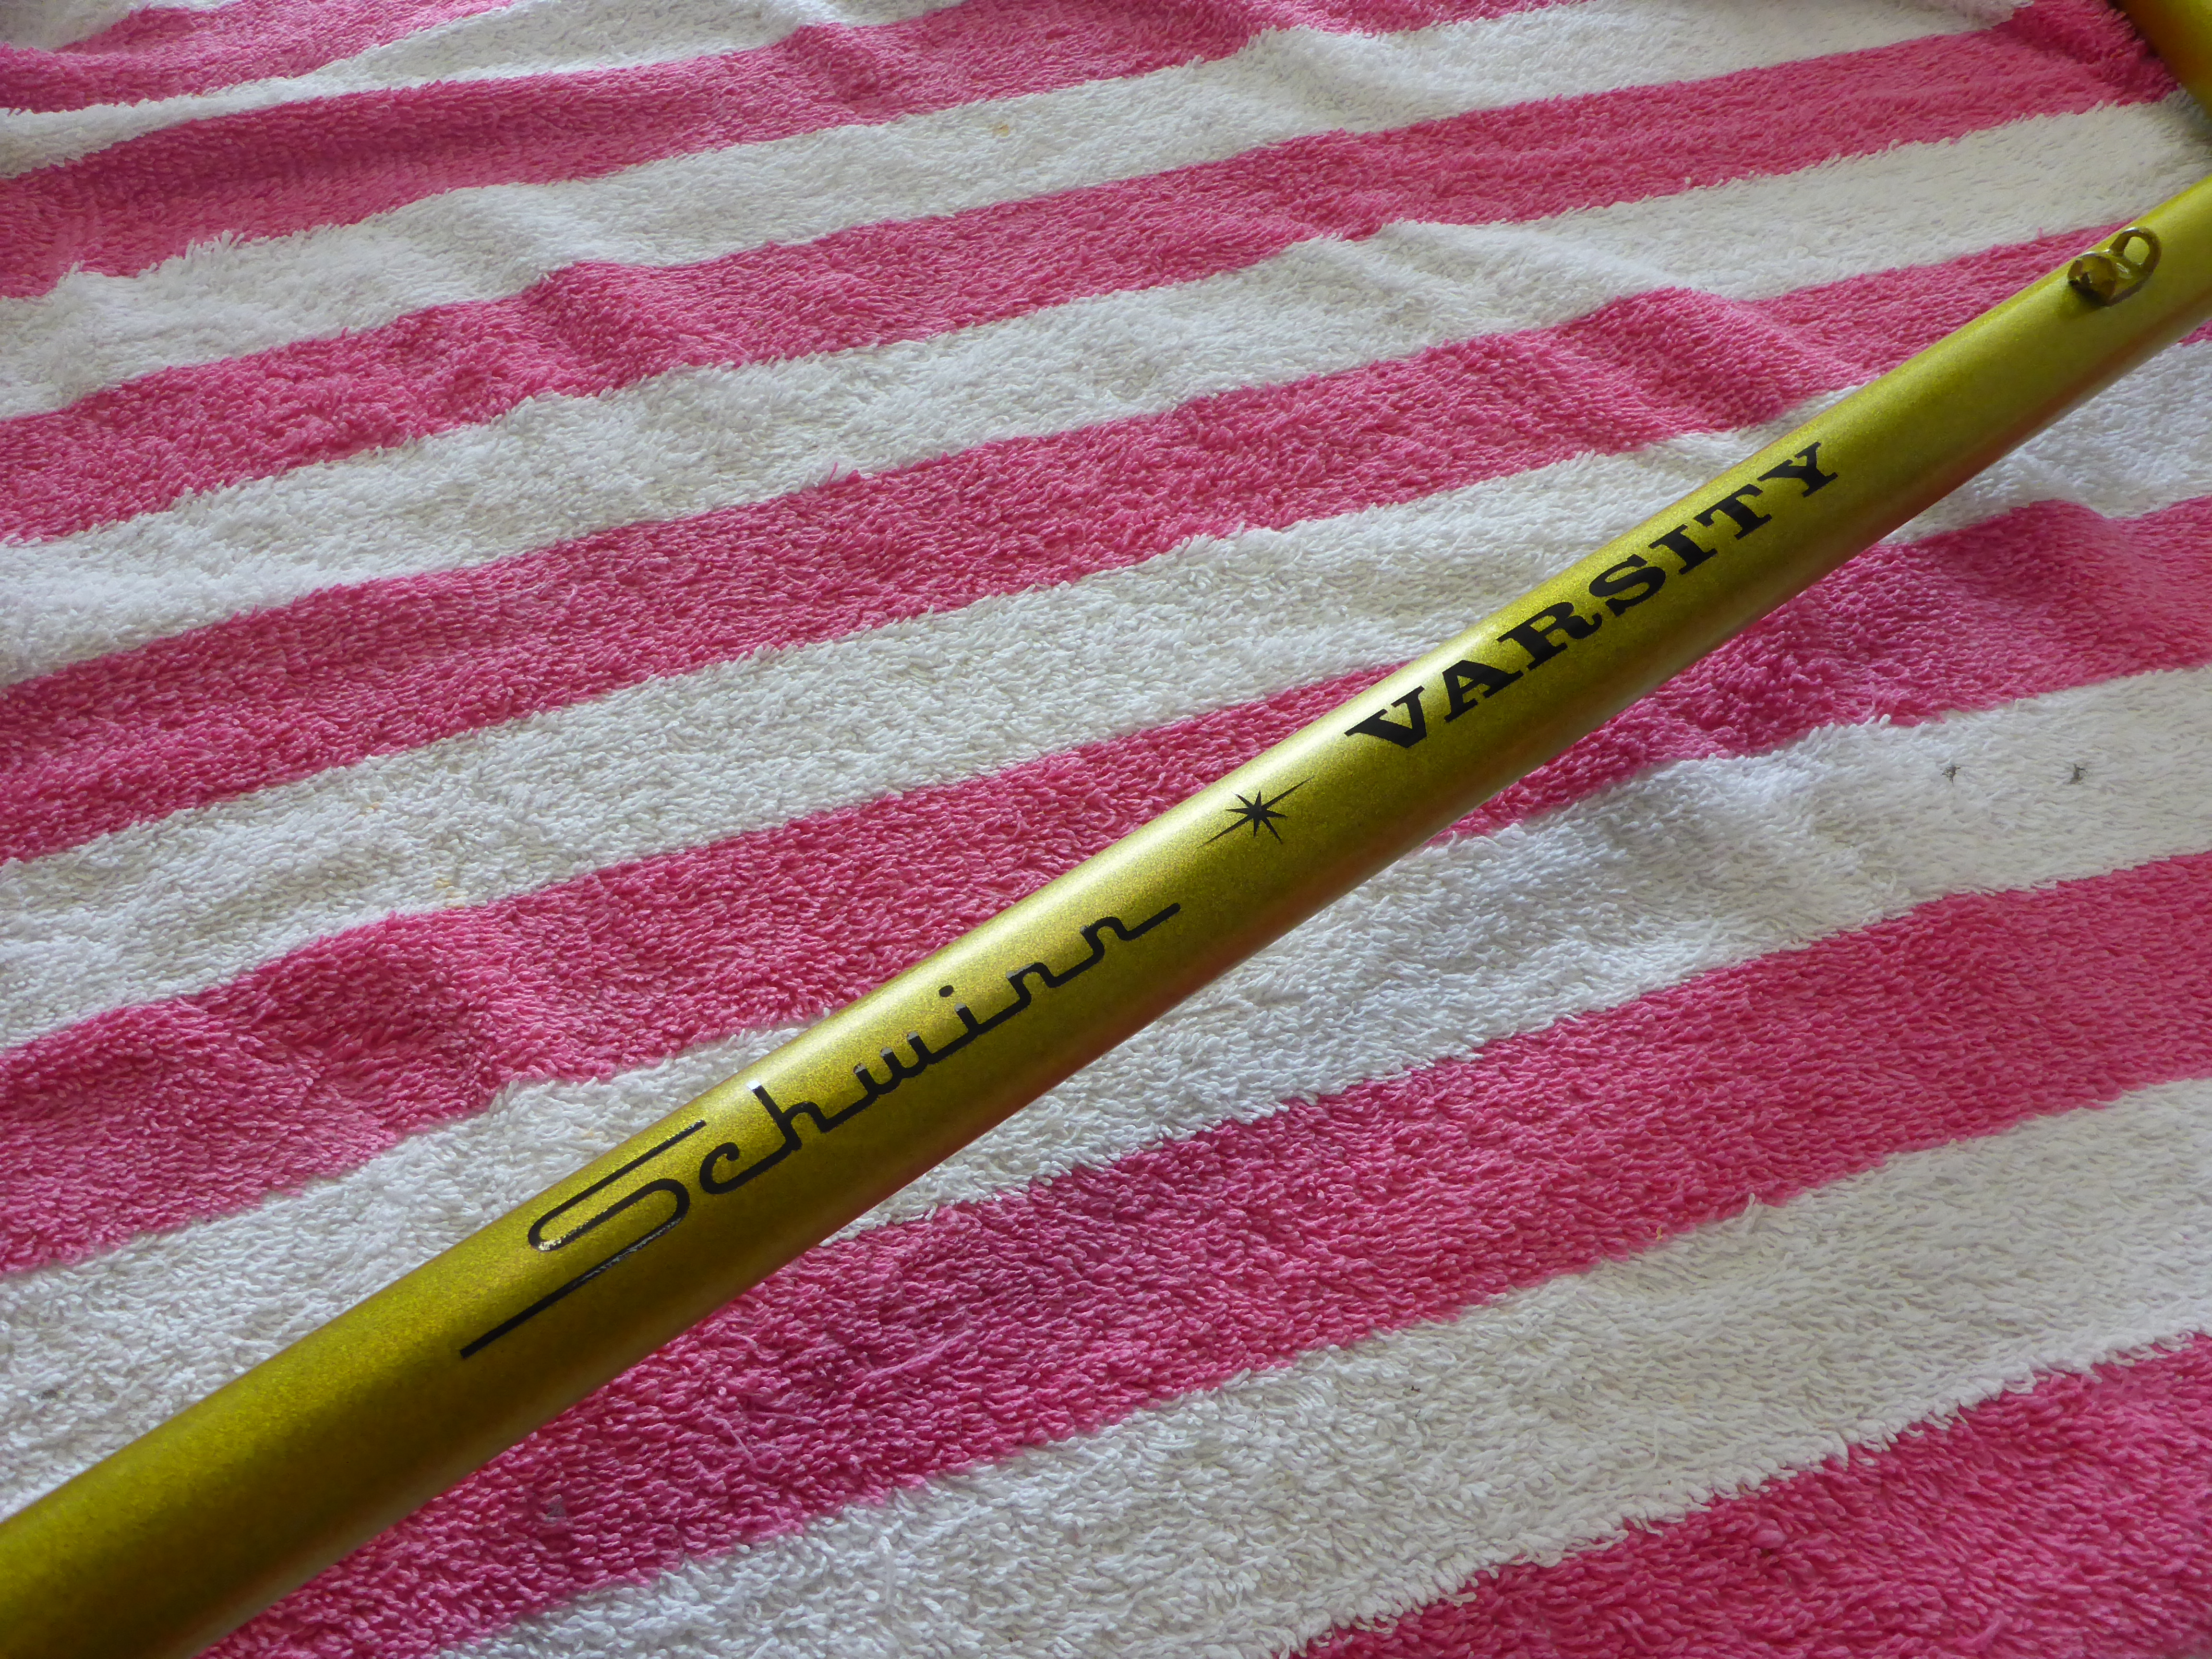
1970 Schwinn Varsity
When my uncle passed away in mid 2016, he left behind a house full of heirlooms for our family to sort through. After walking through the entire house and nothing catching my attention, I wandered out to the shed in the back yard and found an old beat up 1970 Schwinn Varsity tucked away in the corner. I hadn’t had a bicycle since I was a kid. This bicycle clearly belonged to my Uncle Pat. I wanted this bicycle. More than that: I wanted to have Uncle Pat’s bike and restore it in his memory.
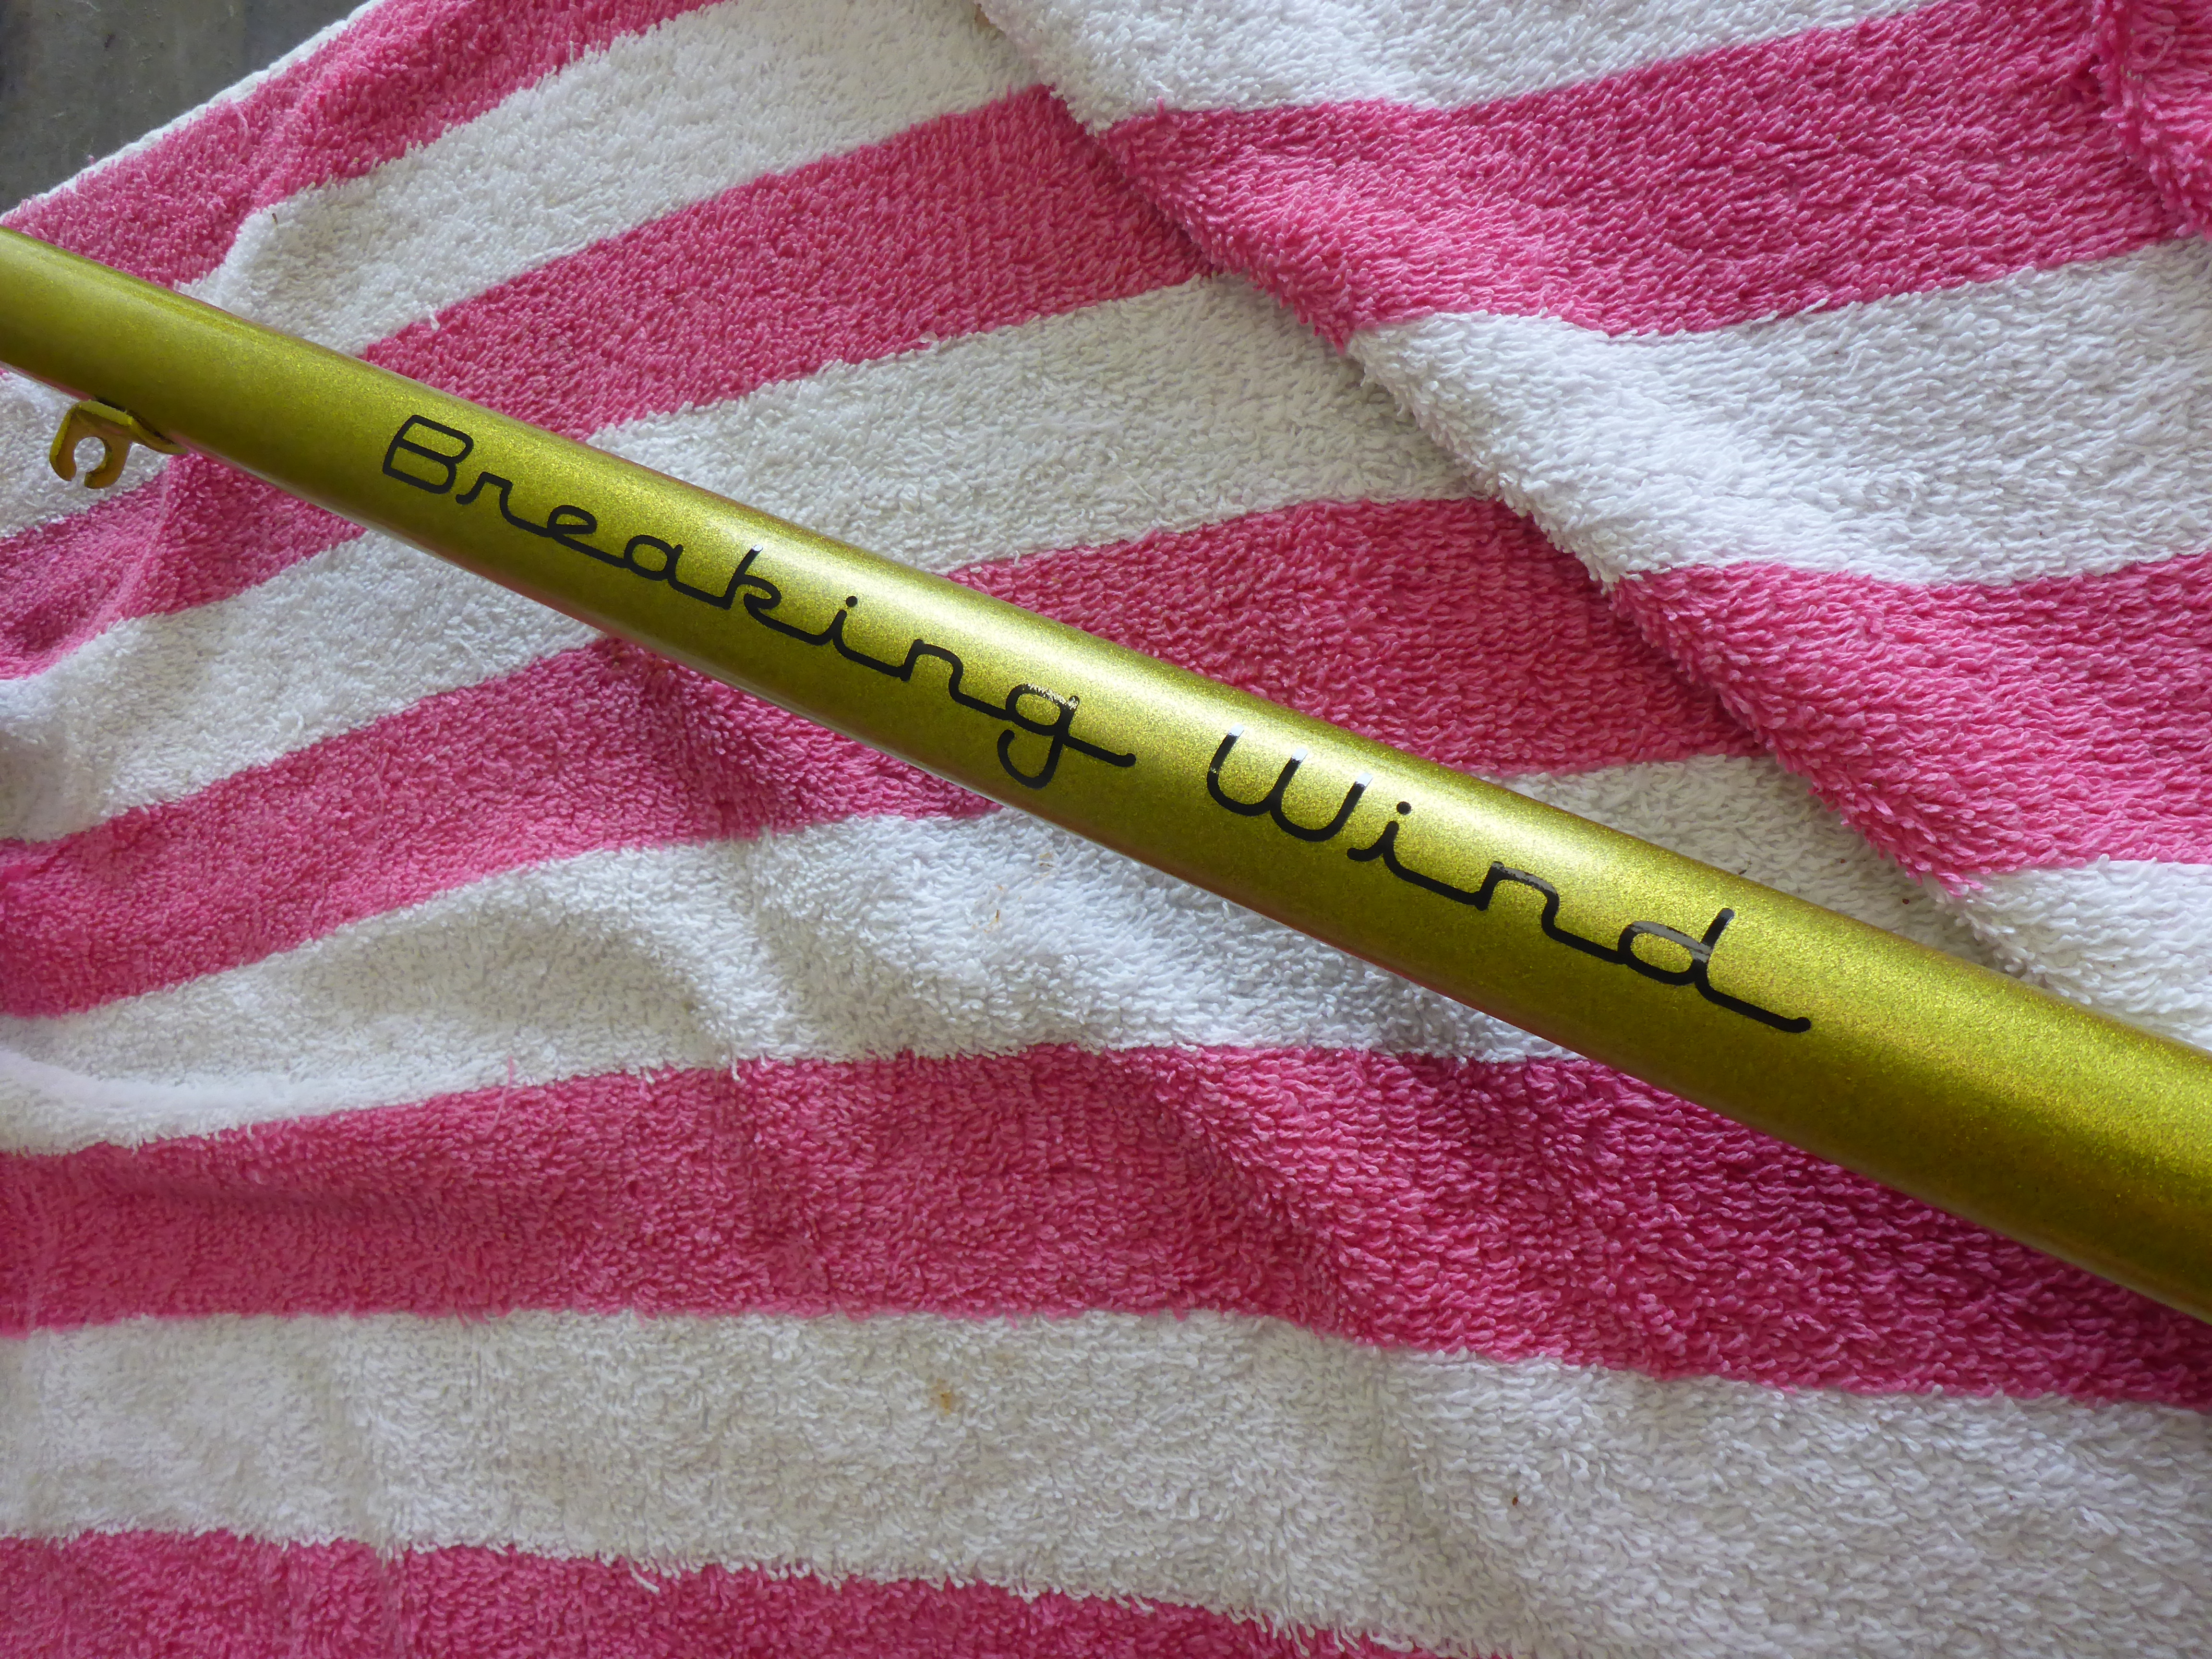
The bicycle was up in Michigan and I live in Florida so I had to patiently wait several months until my Uncle Rick was able to make the trip south in his RV. He visited my mom in my hometown to deliver furniture and drop off Uncle Pat’s bike. I then took a trip across the state to my mom’s to pick it up and bring it back to my shop. From family member to family member, this bicycle had traveled long and far to assume my ownership. I revealed my plans of a restoration tribute build in a discussion with Mom & Uncle Rick of an appropriate project name. Since my interactions with Uncle Pat were mostly limited to my early childhood, one particular wonderful laughter-filled memory that shined through all the fog was his enjoyment of fart jokes. Uncle Pat’s signature move was lifting his leg, passing gas, and shouting “DIG IT!” … Yup, that’s Uncle Pat all right. My mom and Rick laughed, smiled, (might have gotten a little teary), and agreed on the name: and thus Project Breaking Wind was born.
Here she is, in all of her glory. Uncle Pat’s 1970 Schwinn Varsity, in the original 1970 patina as she arrived at Superior Mobile. Used. Battered. Enjoyed. Sentimental. Perfect in every respect. And we’re about to go on a journey of rediscovery together


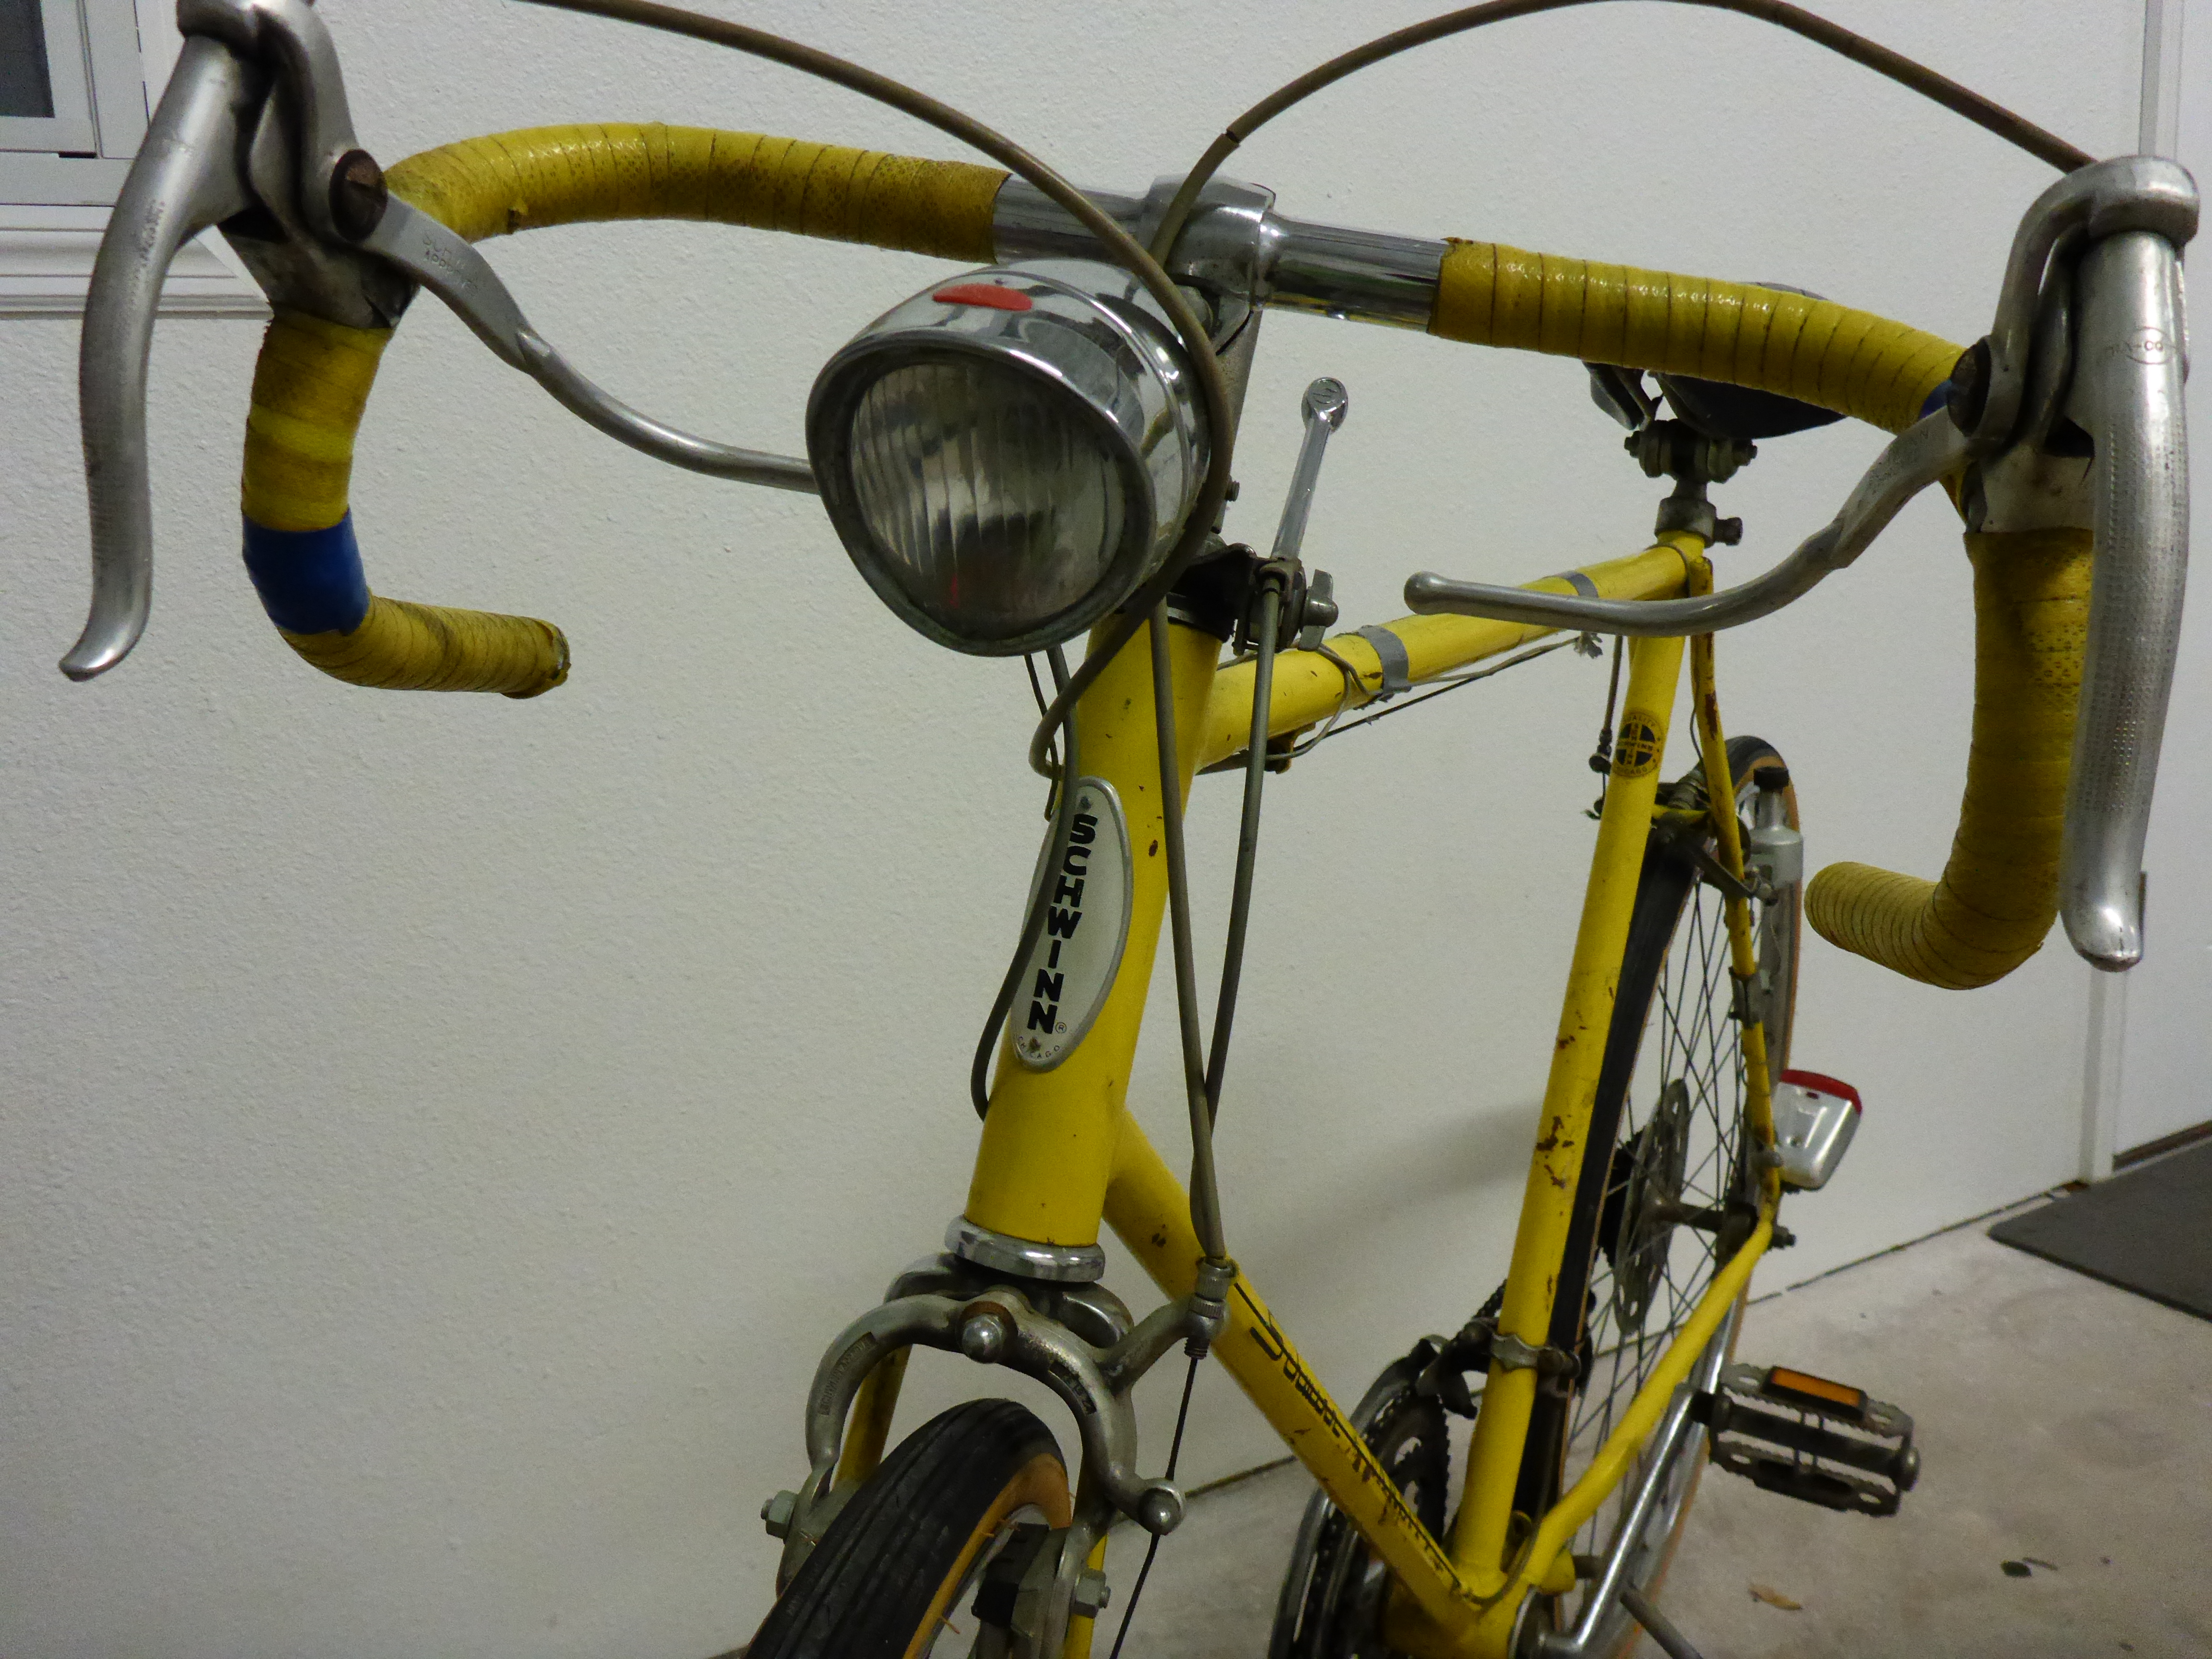
I’m in love with this bike. I’d always wanted a Schwinn and now I had one that had a lot of sentimental meaning to me. What a perfect combination!
Now let’s make this relationship between man & bike even more meaningful. Time to put the Superior Mobile by 13 flair on this heirloomed classic and bring it up to modern day showroom quality.
I employed the assistance of Brad over at Tarpon Tom’s – a local bicycle specialty shop. Brad was of critical importance getting this job done correctly since he knew something I didn’t: anything and everything there is to know about bicycles! I was clueless, quite honestly, and he acted as my bike Sherpa. My virgin bike ride with Breaking Wind, a bit of a trial run to learn each other a bit more intimately, was from my shop down to Tarpon Tom’s via the Pinellas Trail. I explained the backstory, described my intentions, and looked for guidance/direction. I don’t blame Brad for his incredulous reaction — I hear it all the time in the car world: grandeur expensive extreme modification plans right after initial vehicle purchase. Yup, trust me, I know how I sounded. But the difference is: I do what I say I’m gonna do.
I bought a new bike seat as a measure of good faith that I would return with a large project underway. The plan was simple: do a full disassembly, powdercoat (or refinish) everything, Brad would reassemble, and I would ride a brand new custom 1970 Schwinn Varsity dedicated to my Uncle Pat. I like this plan a lot.
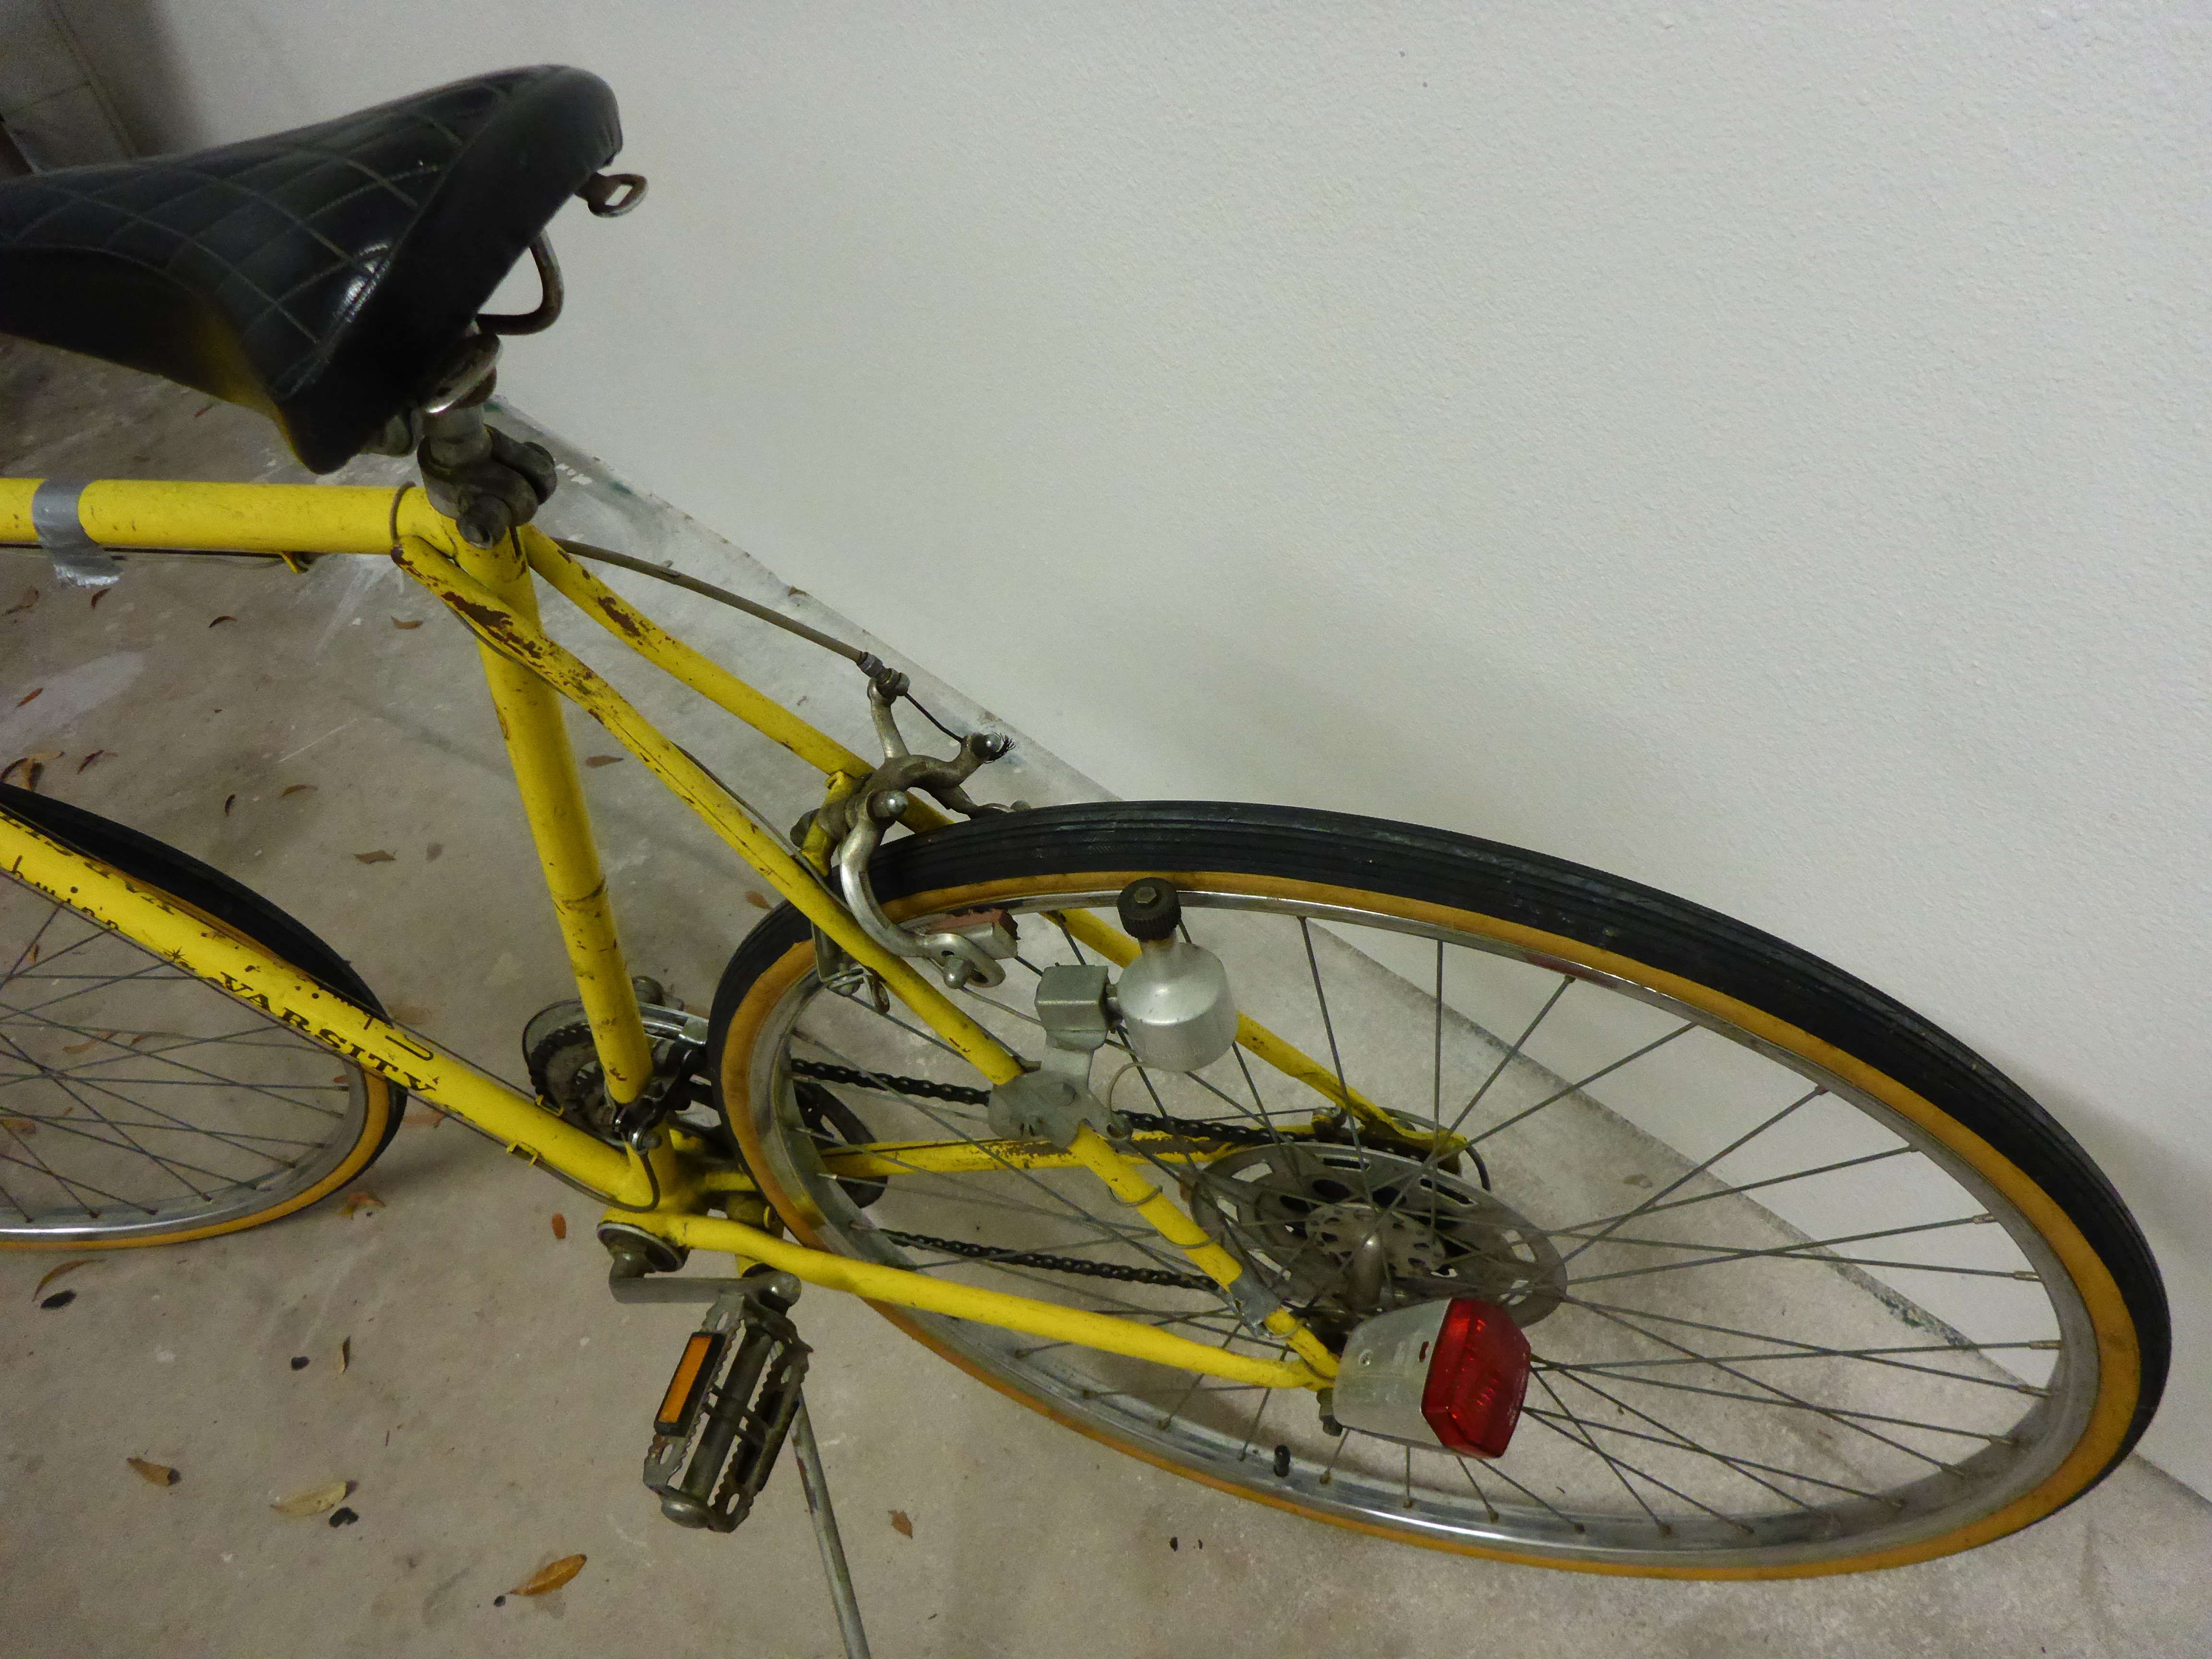
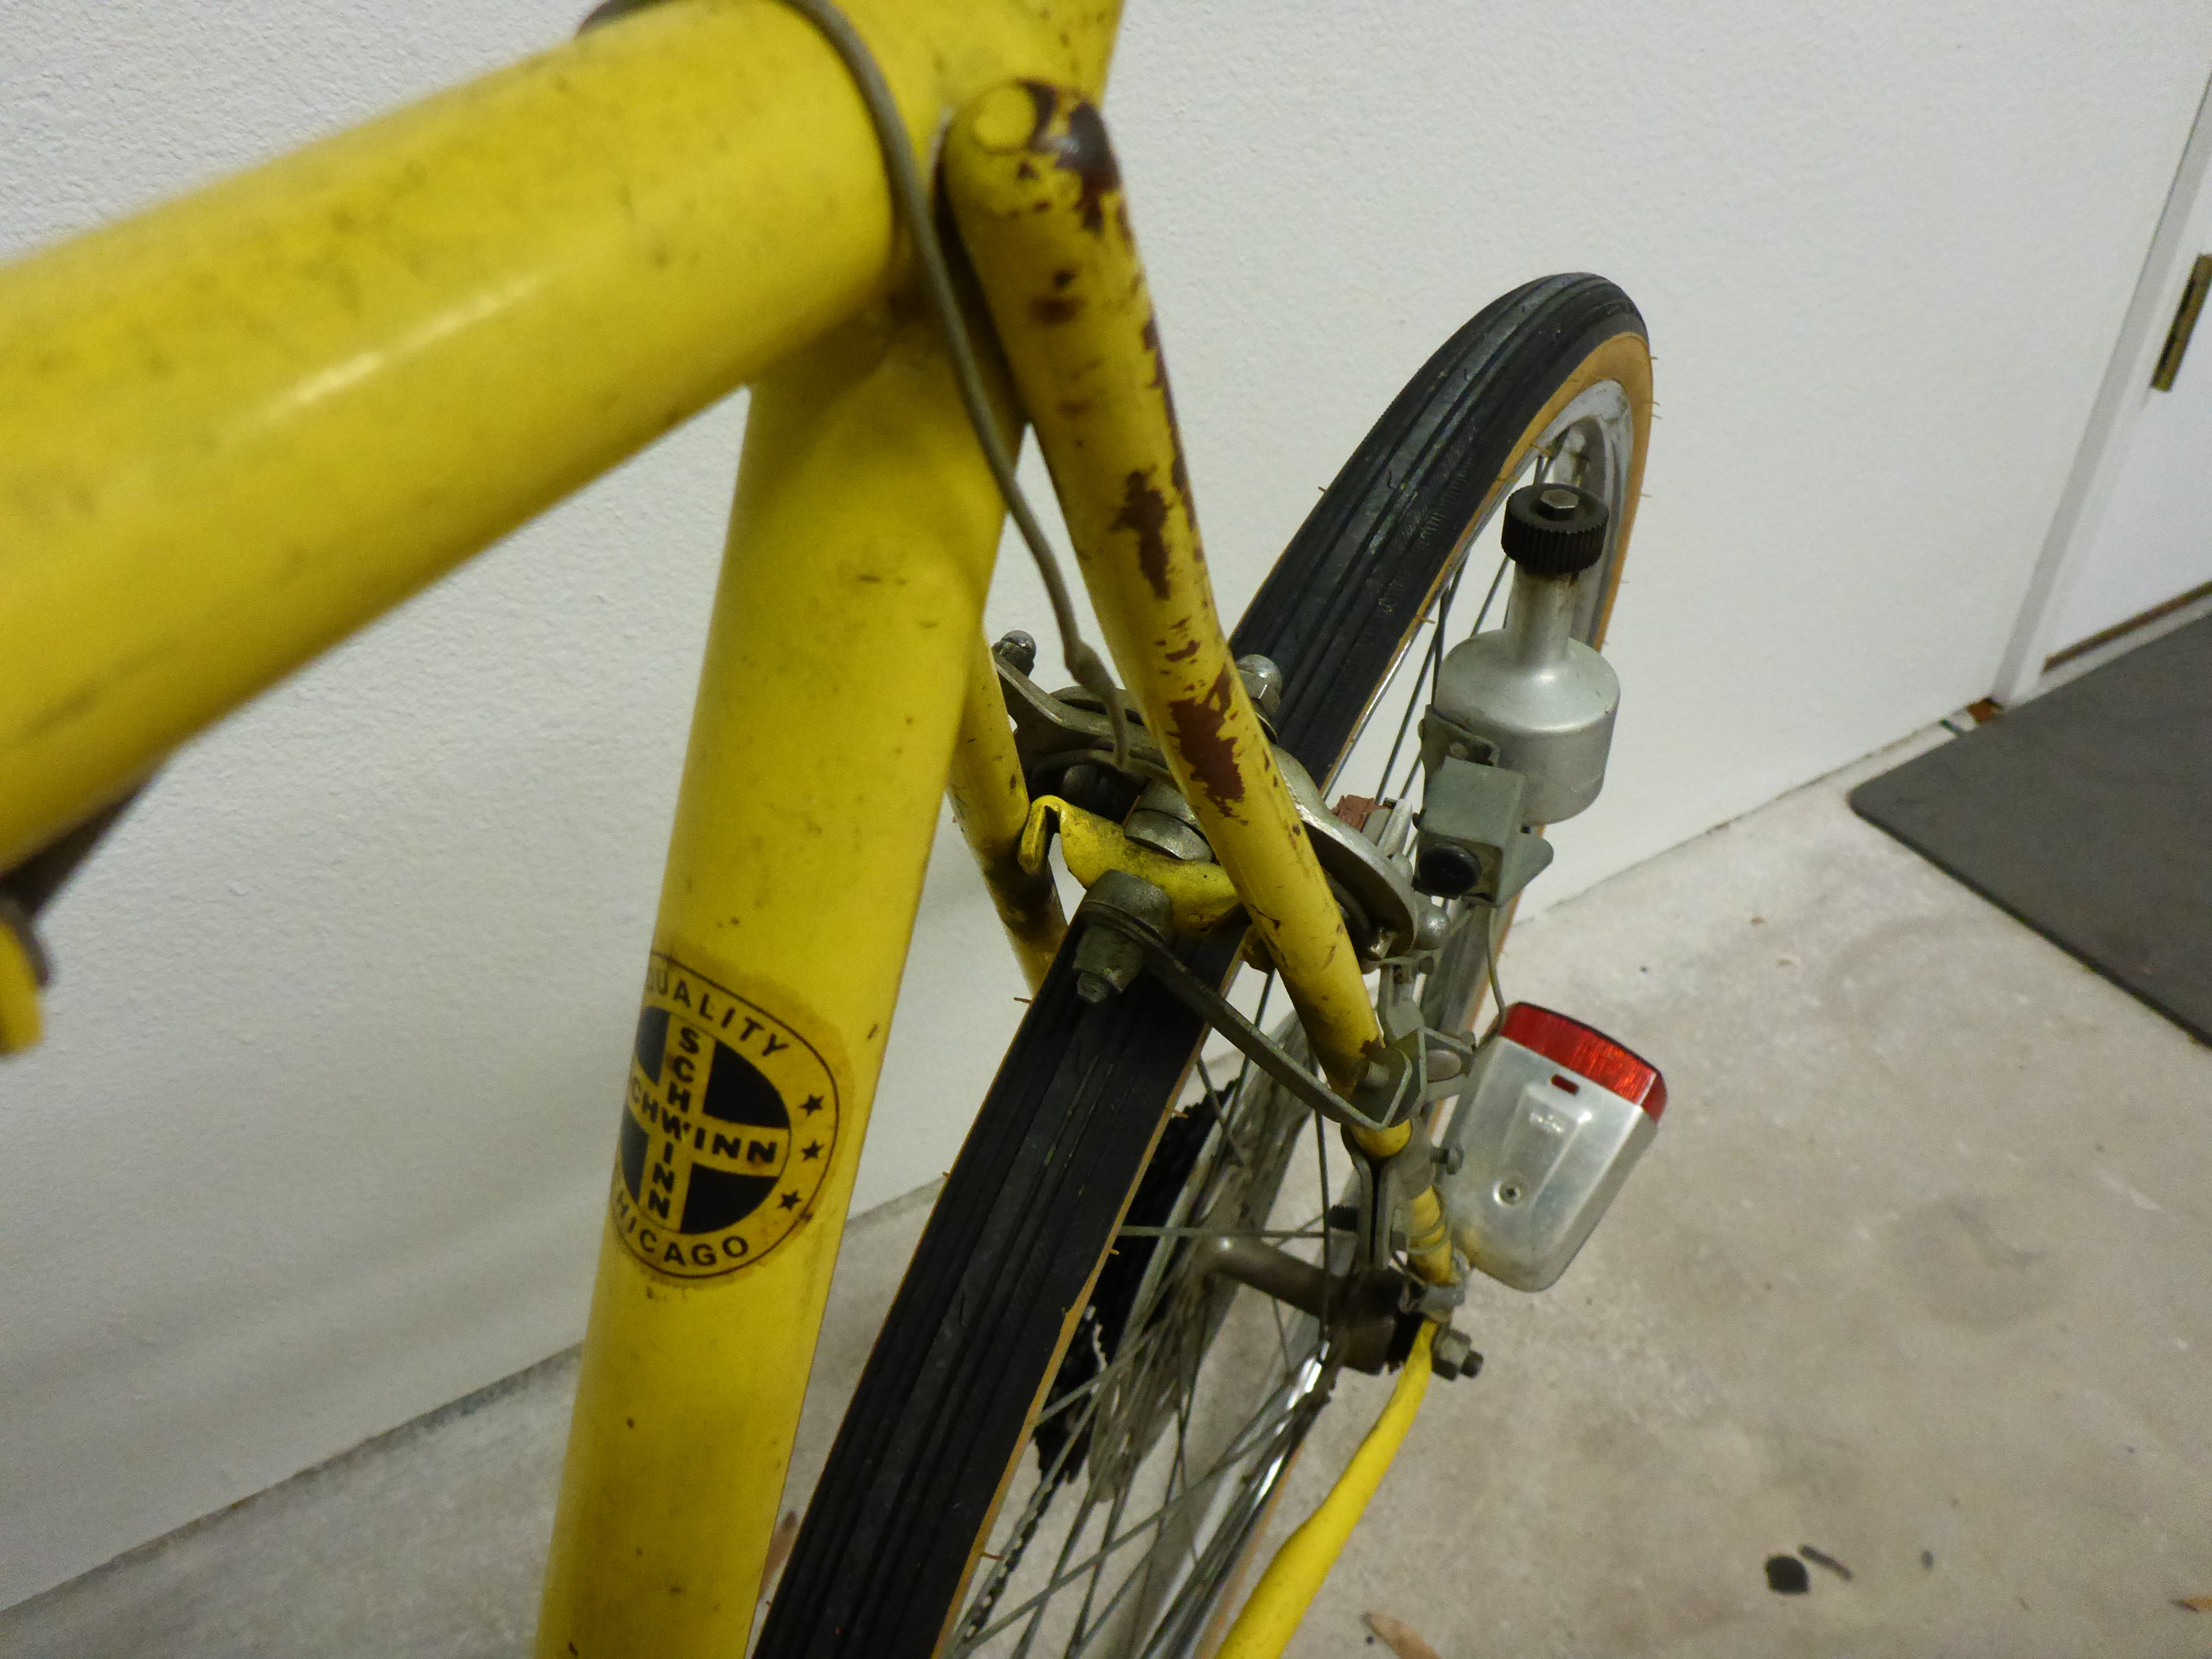
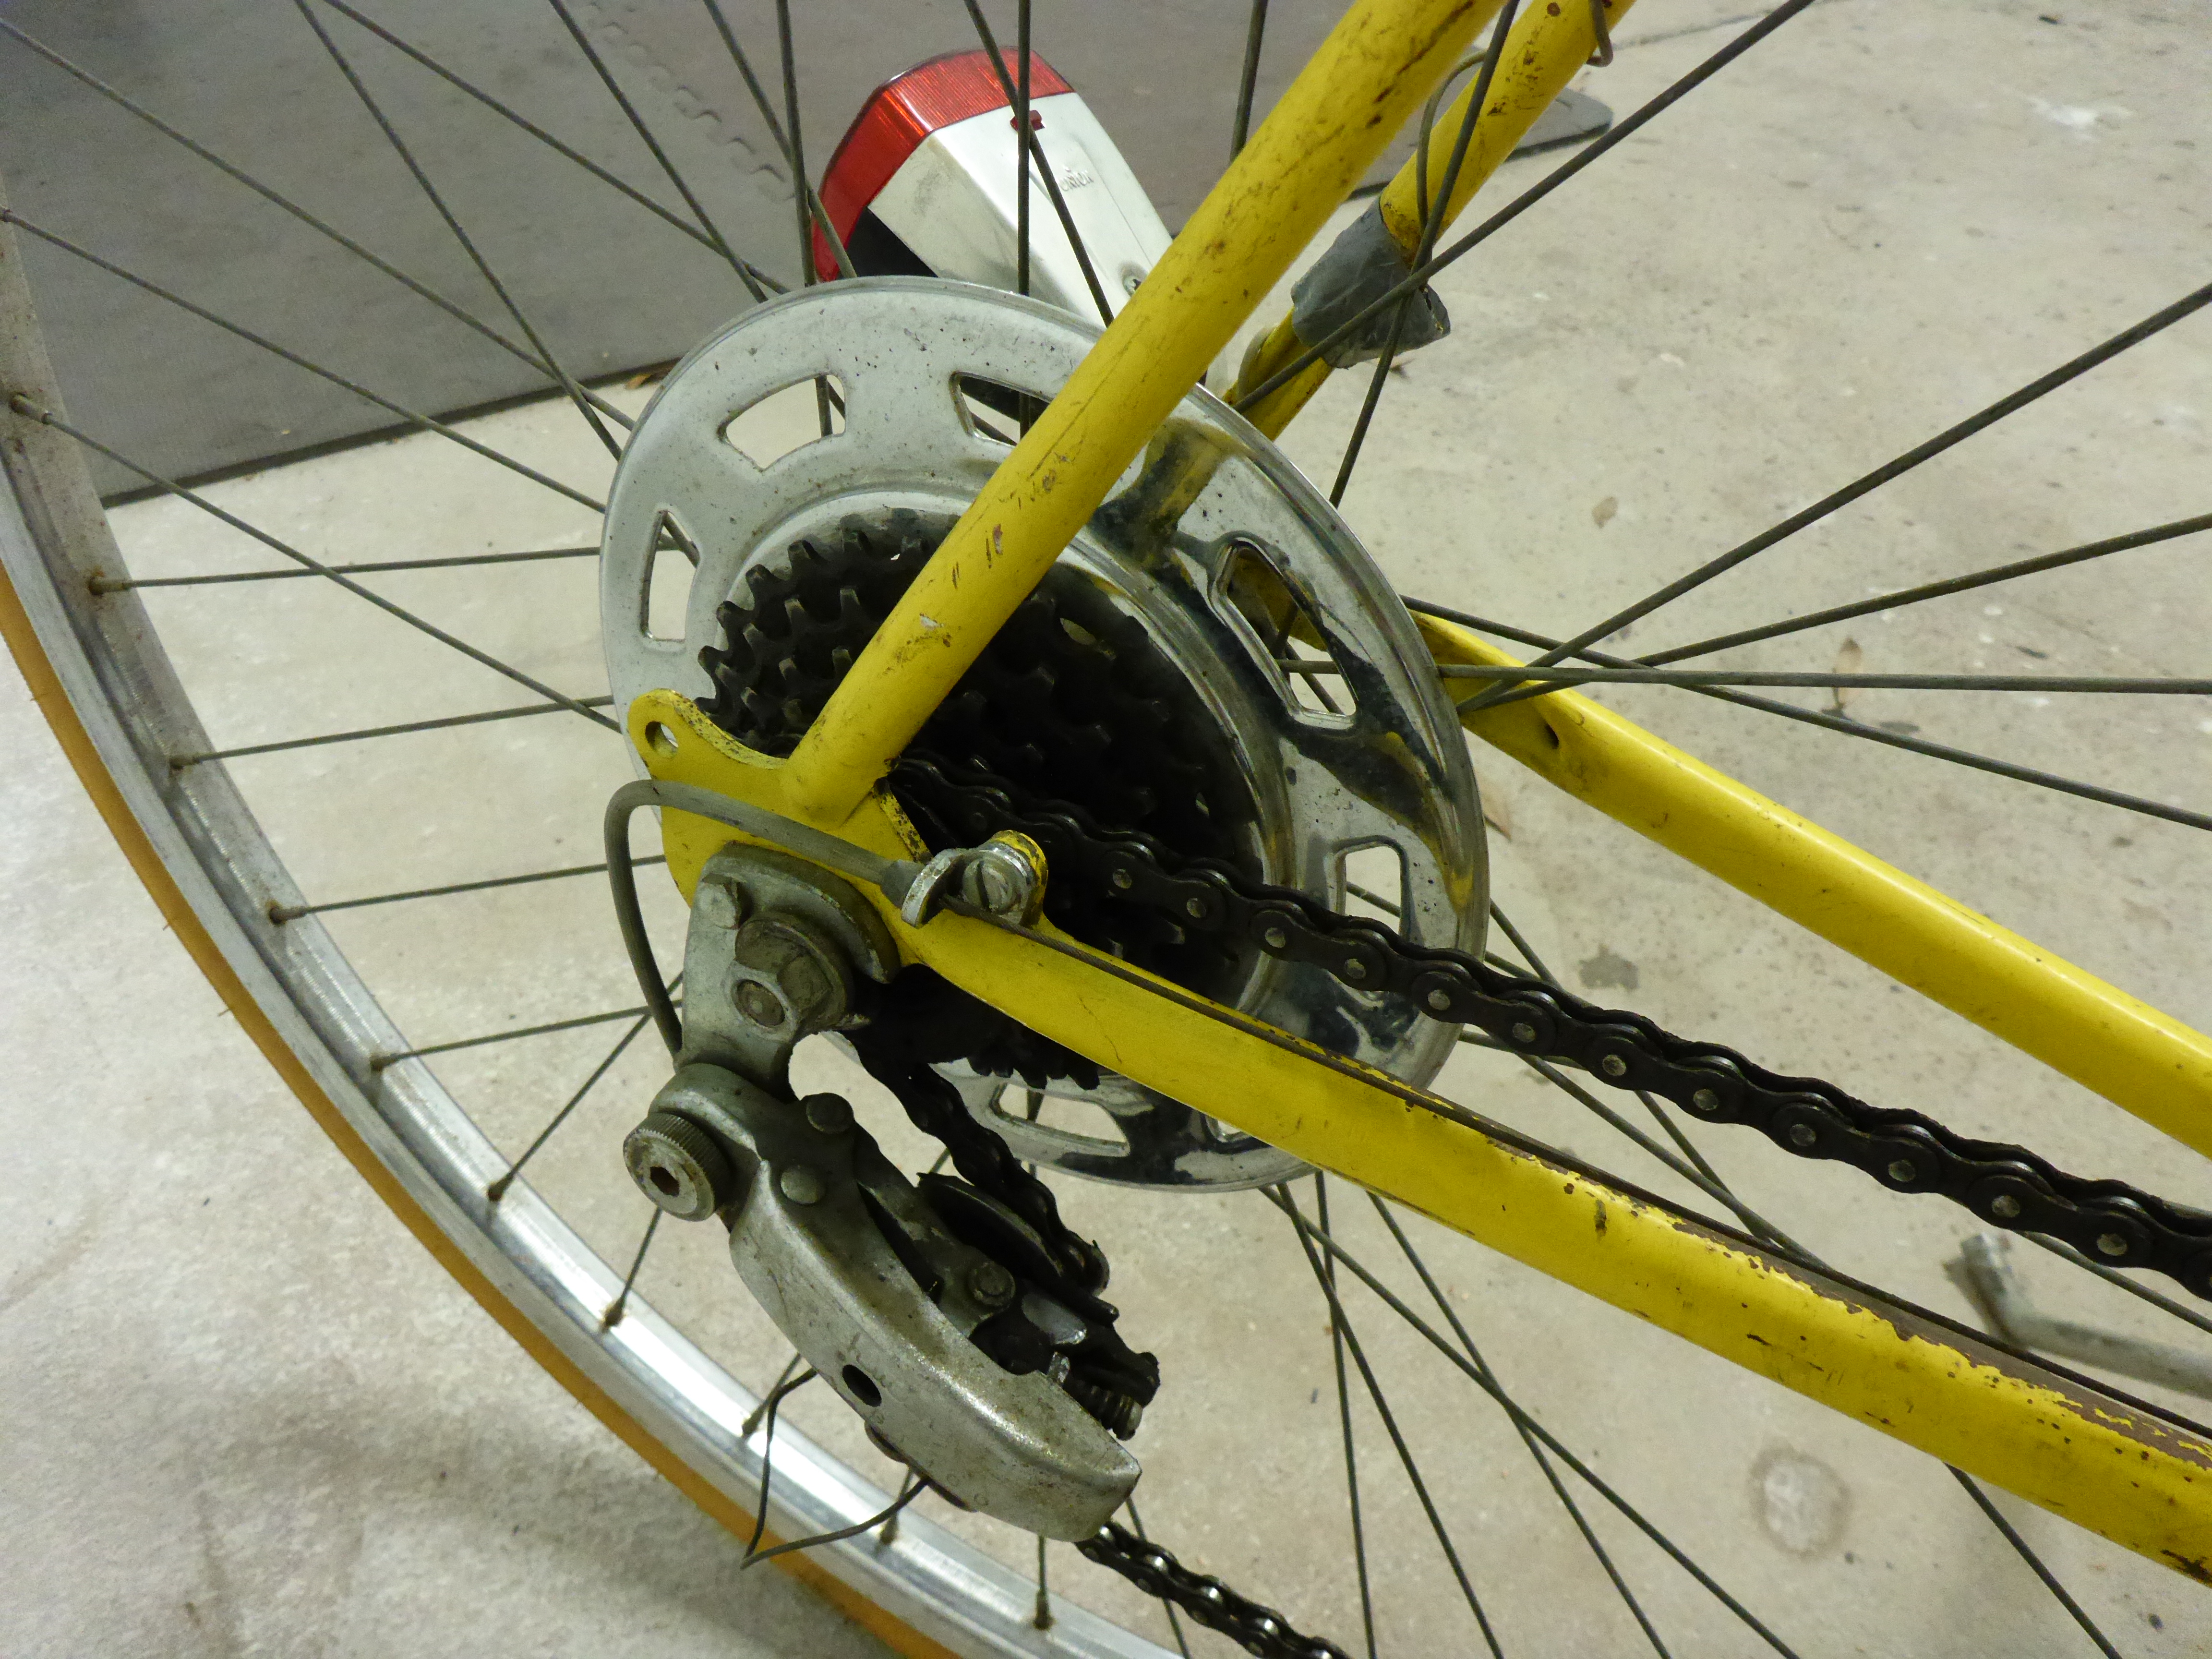
The first step was to get the wheels off. These were the good old fashioned original steel rims.
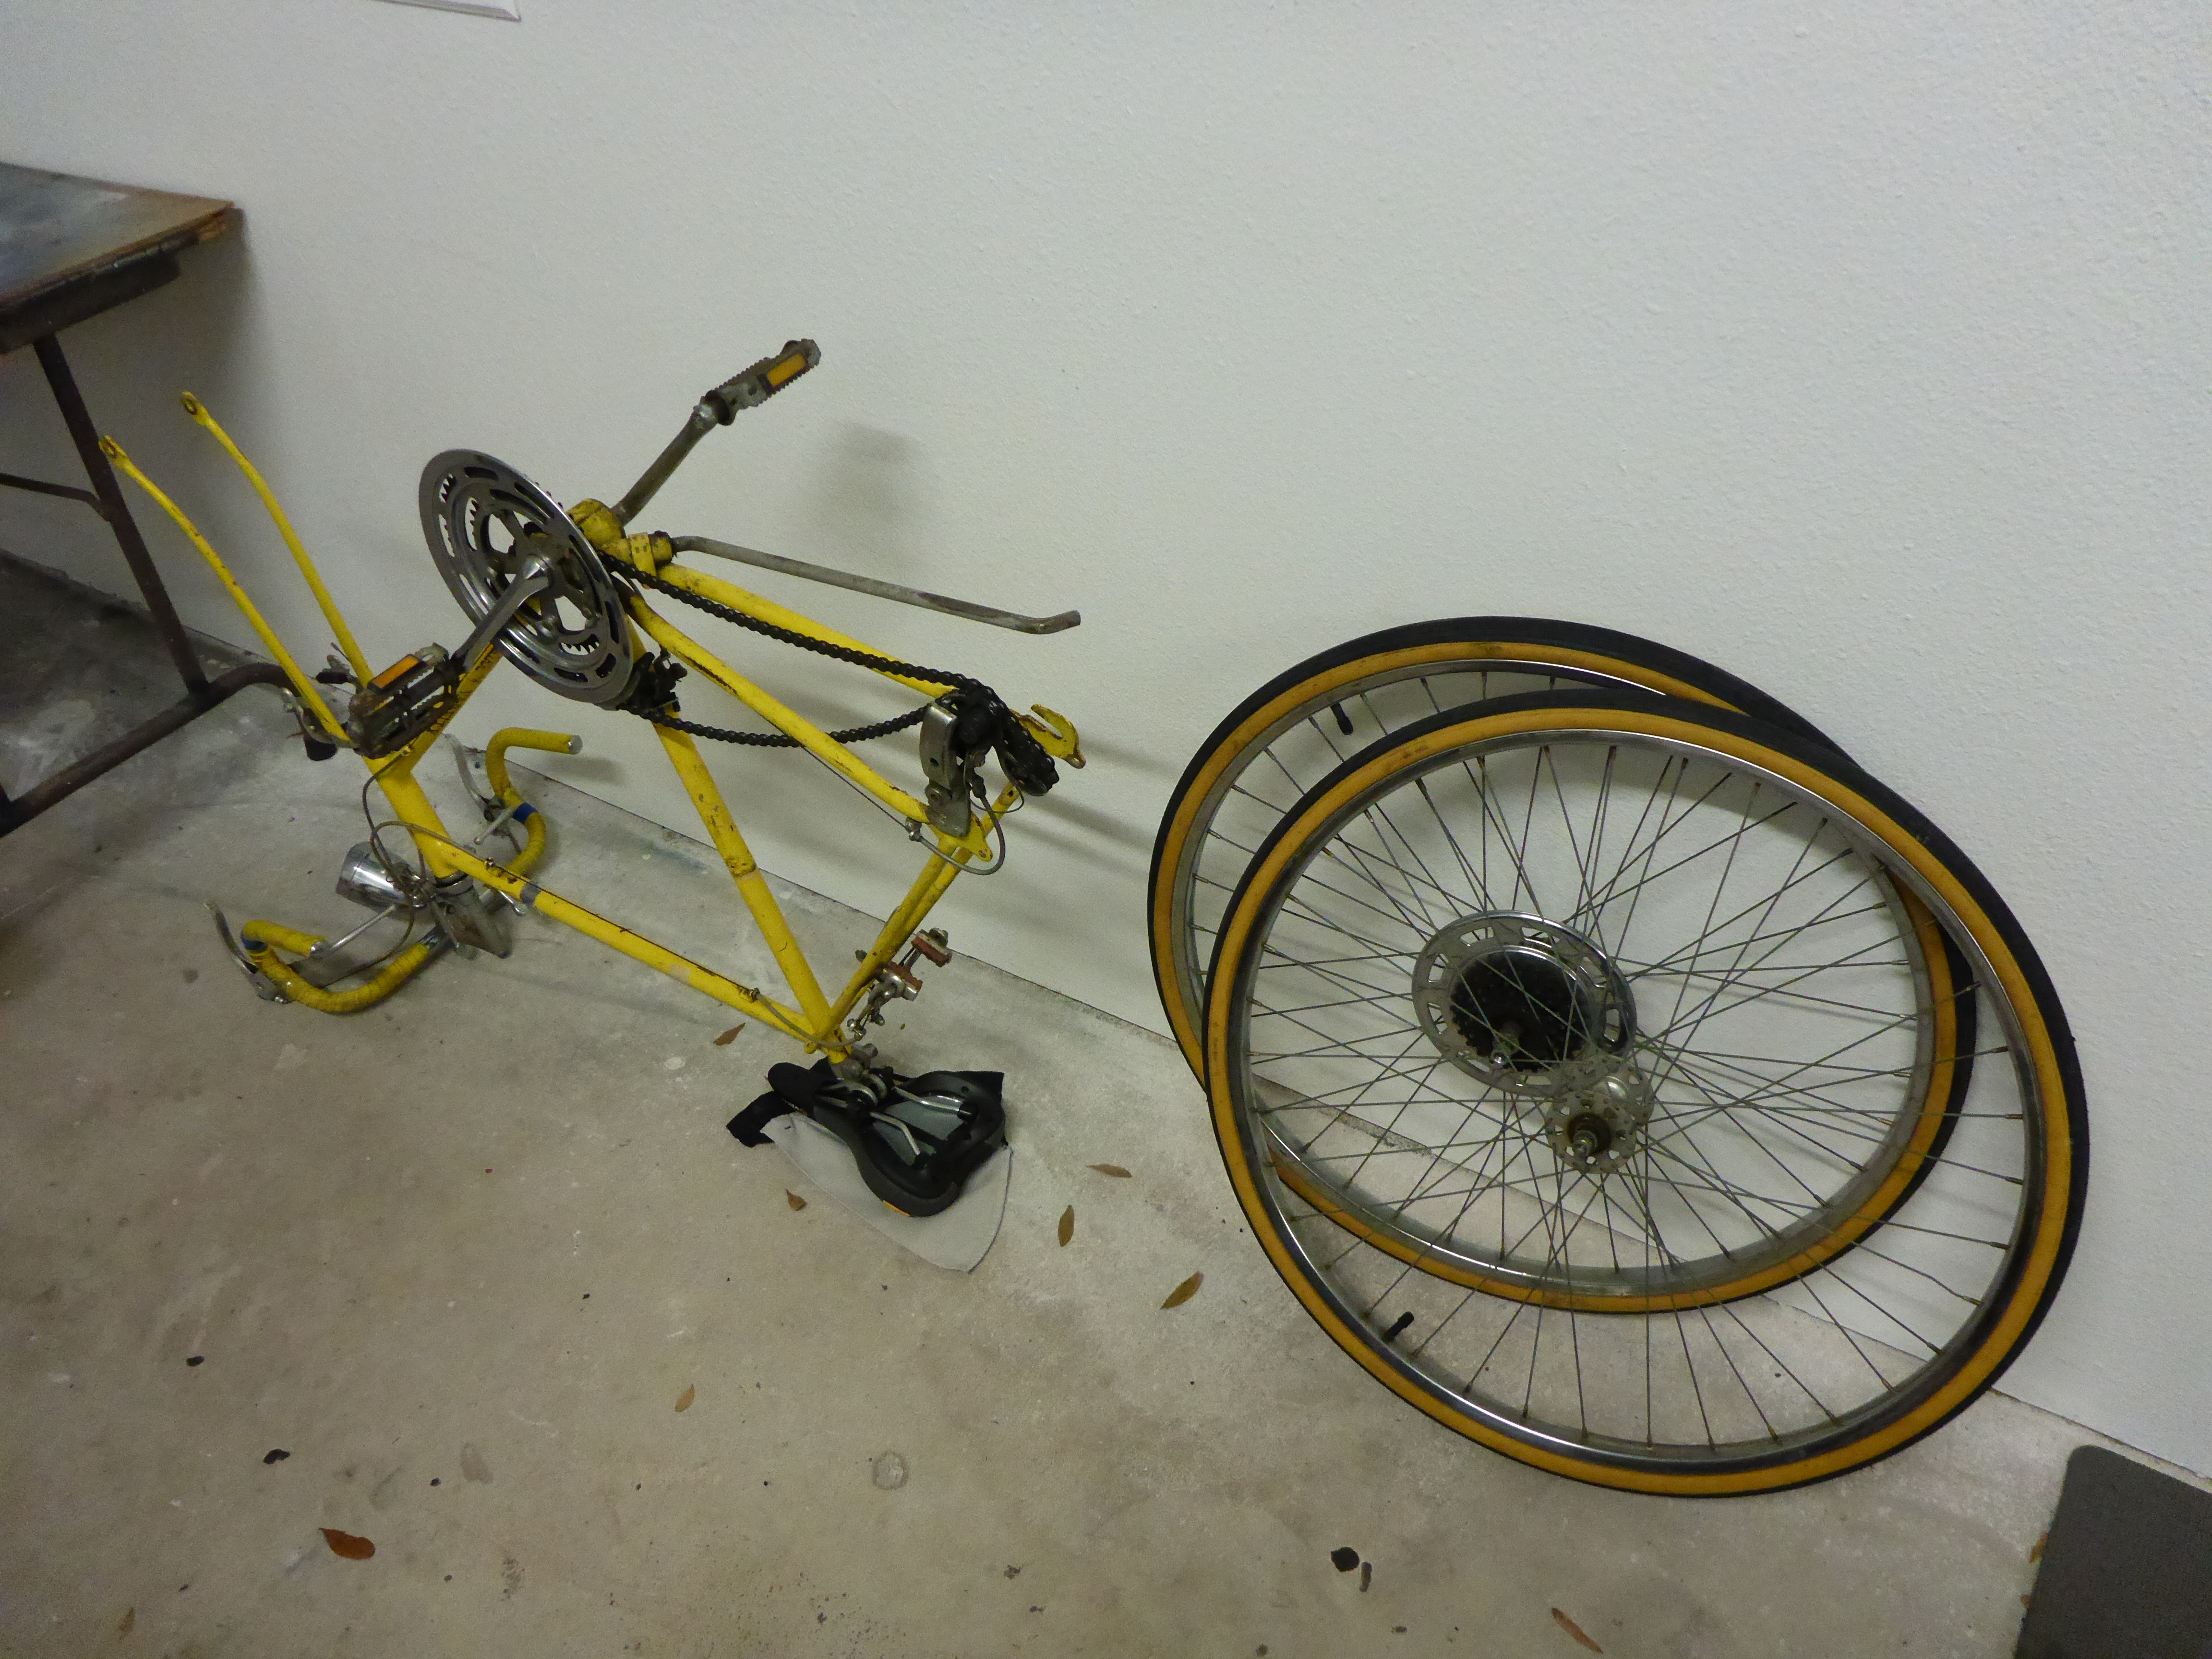
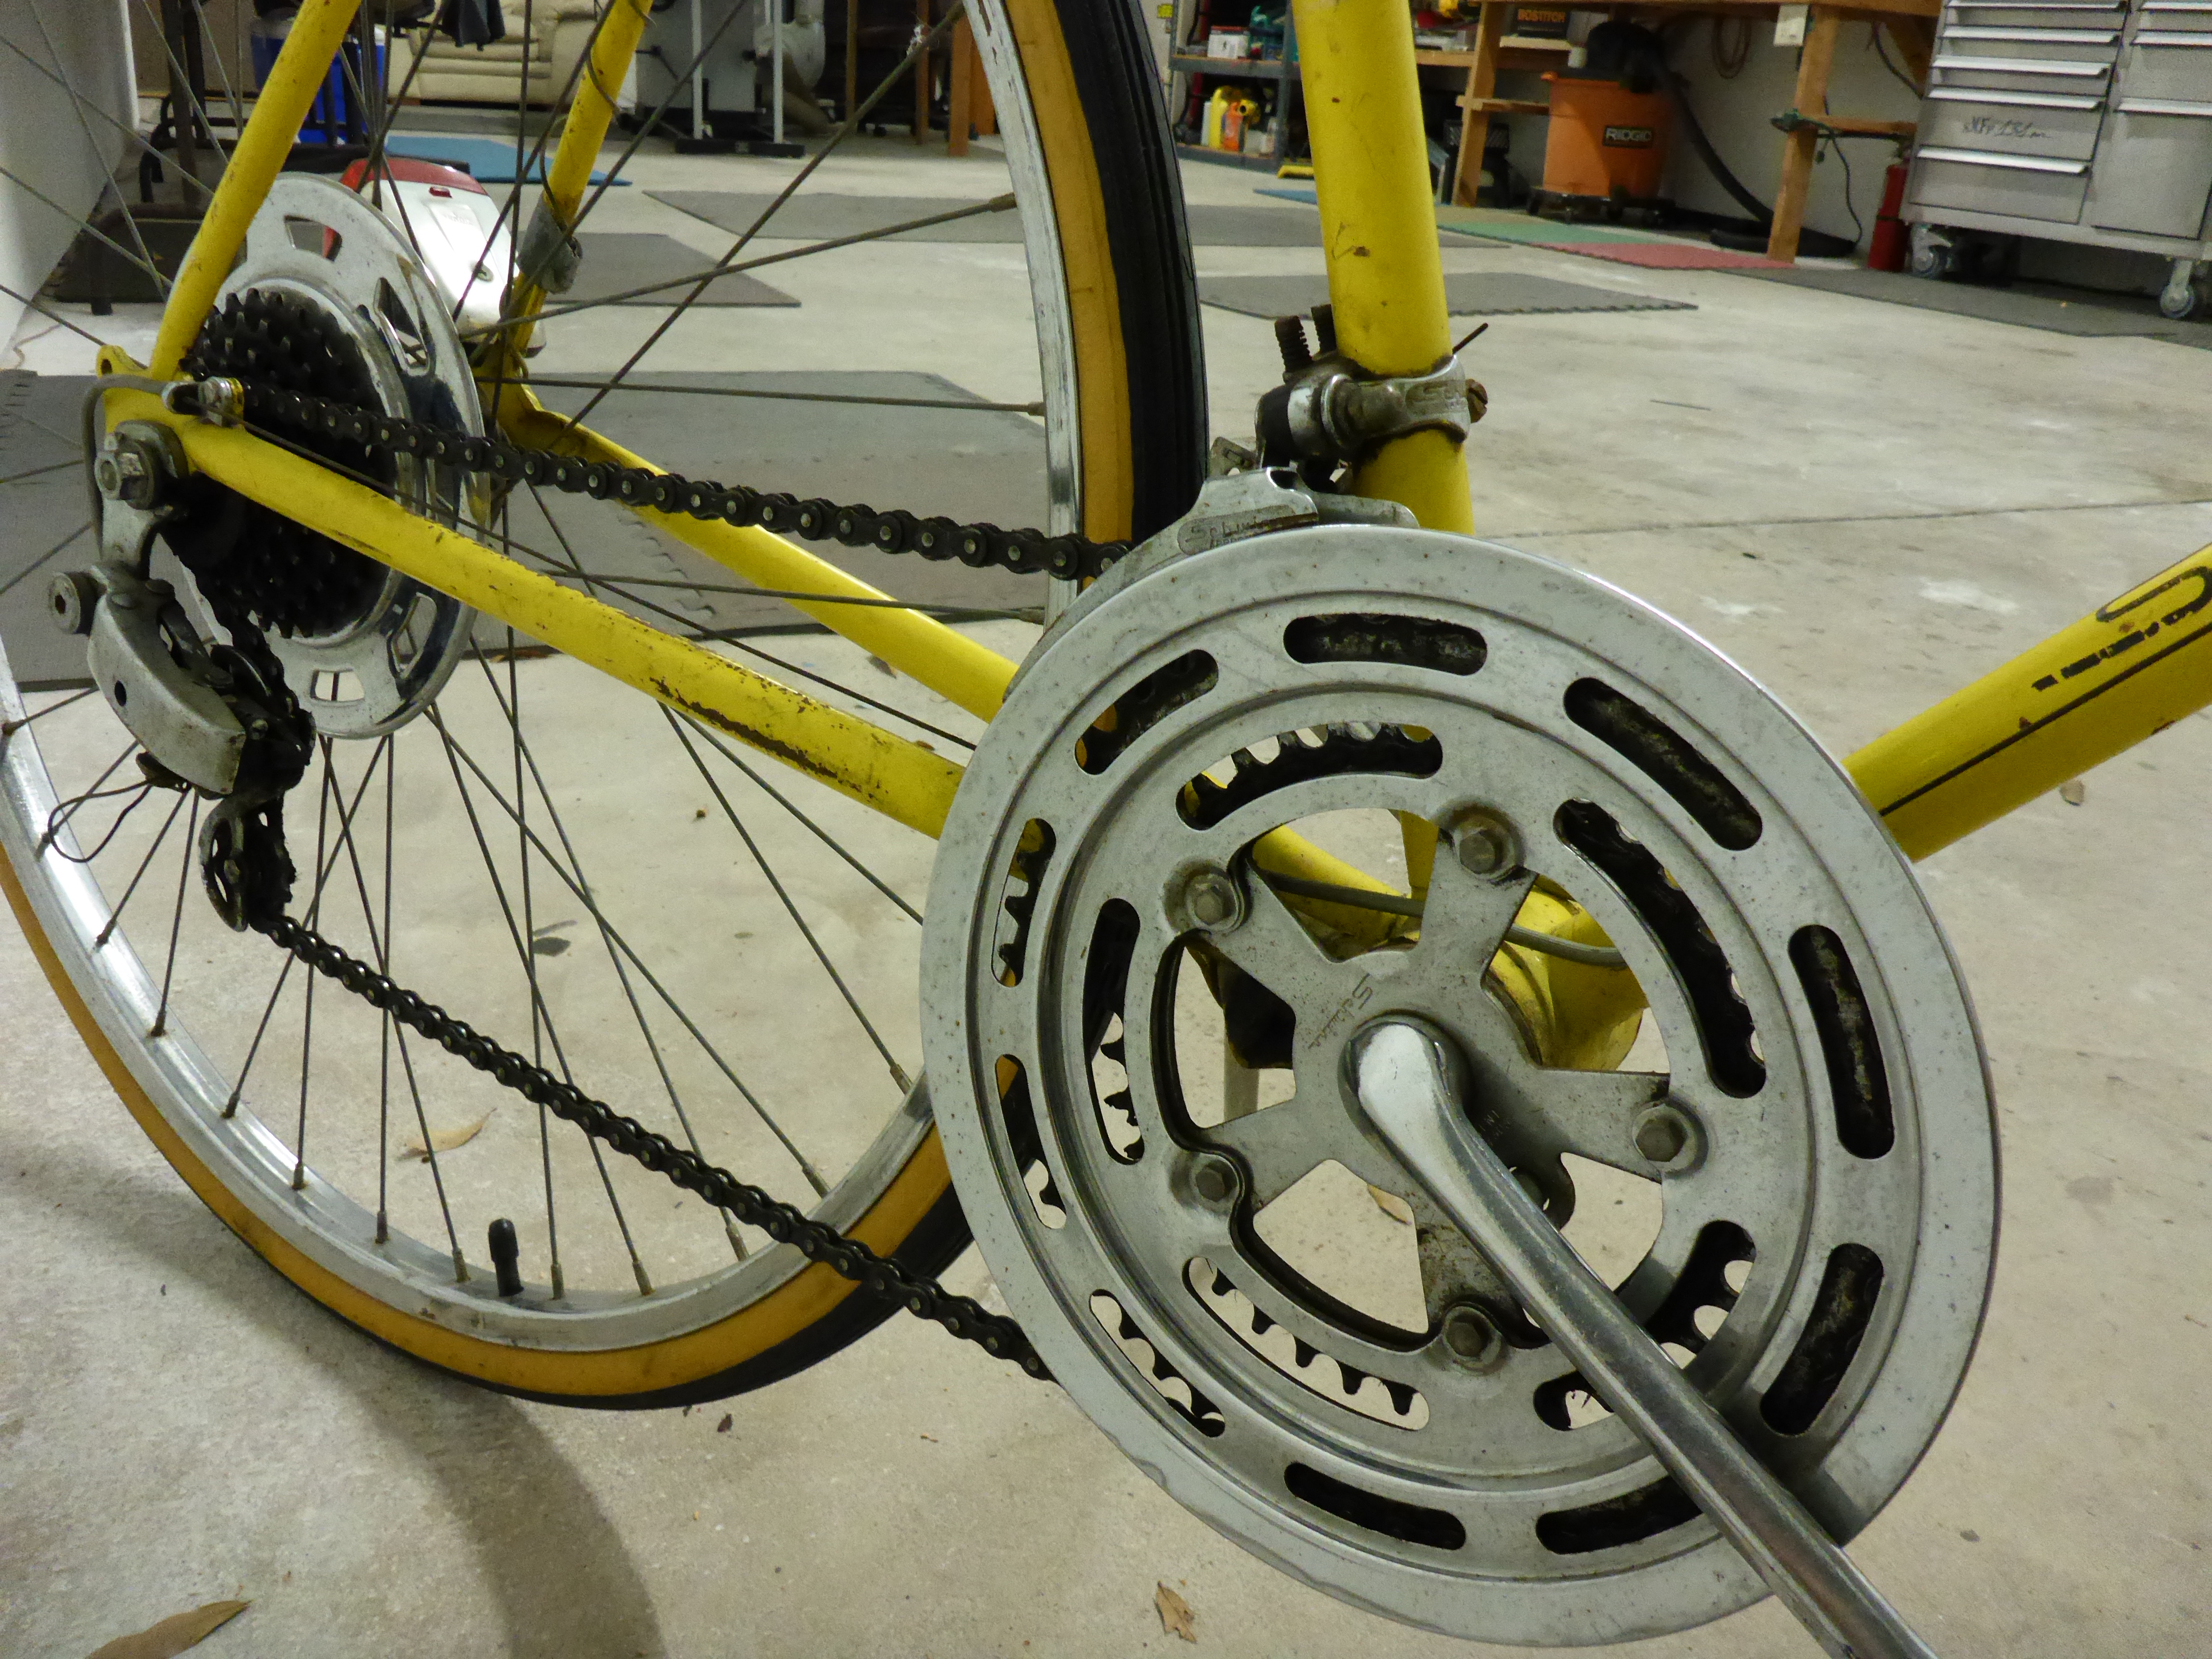
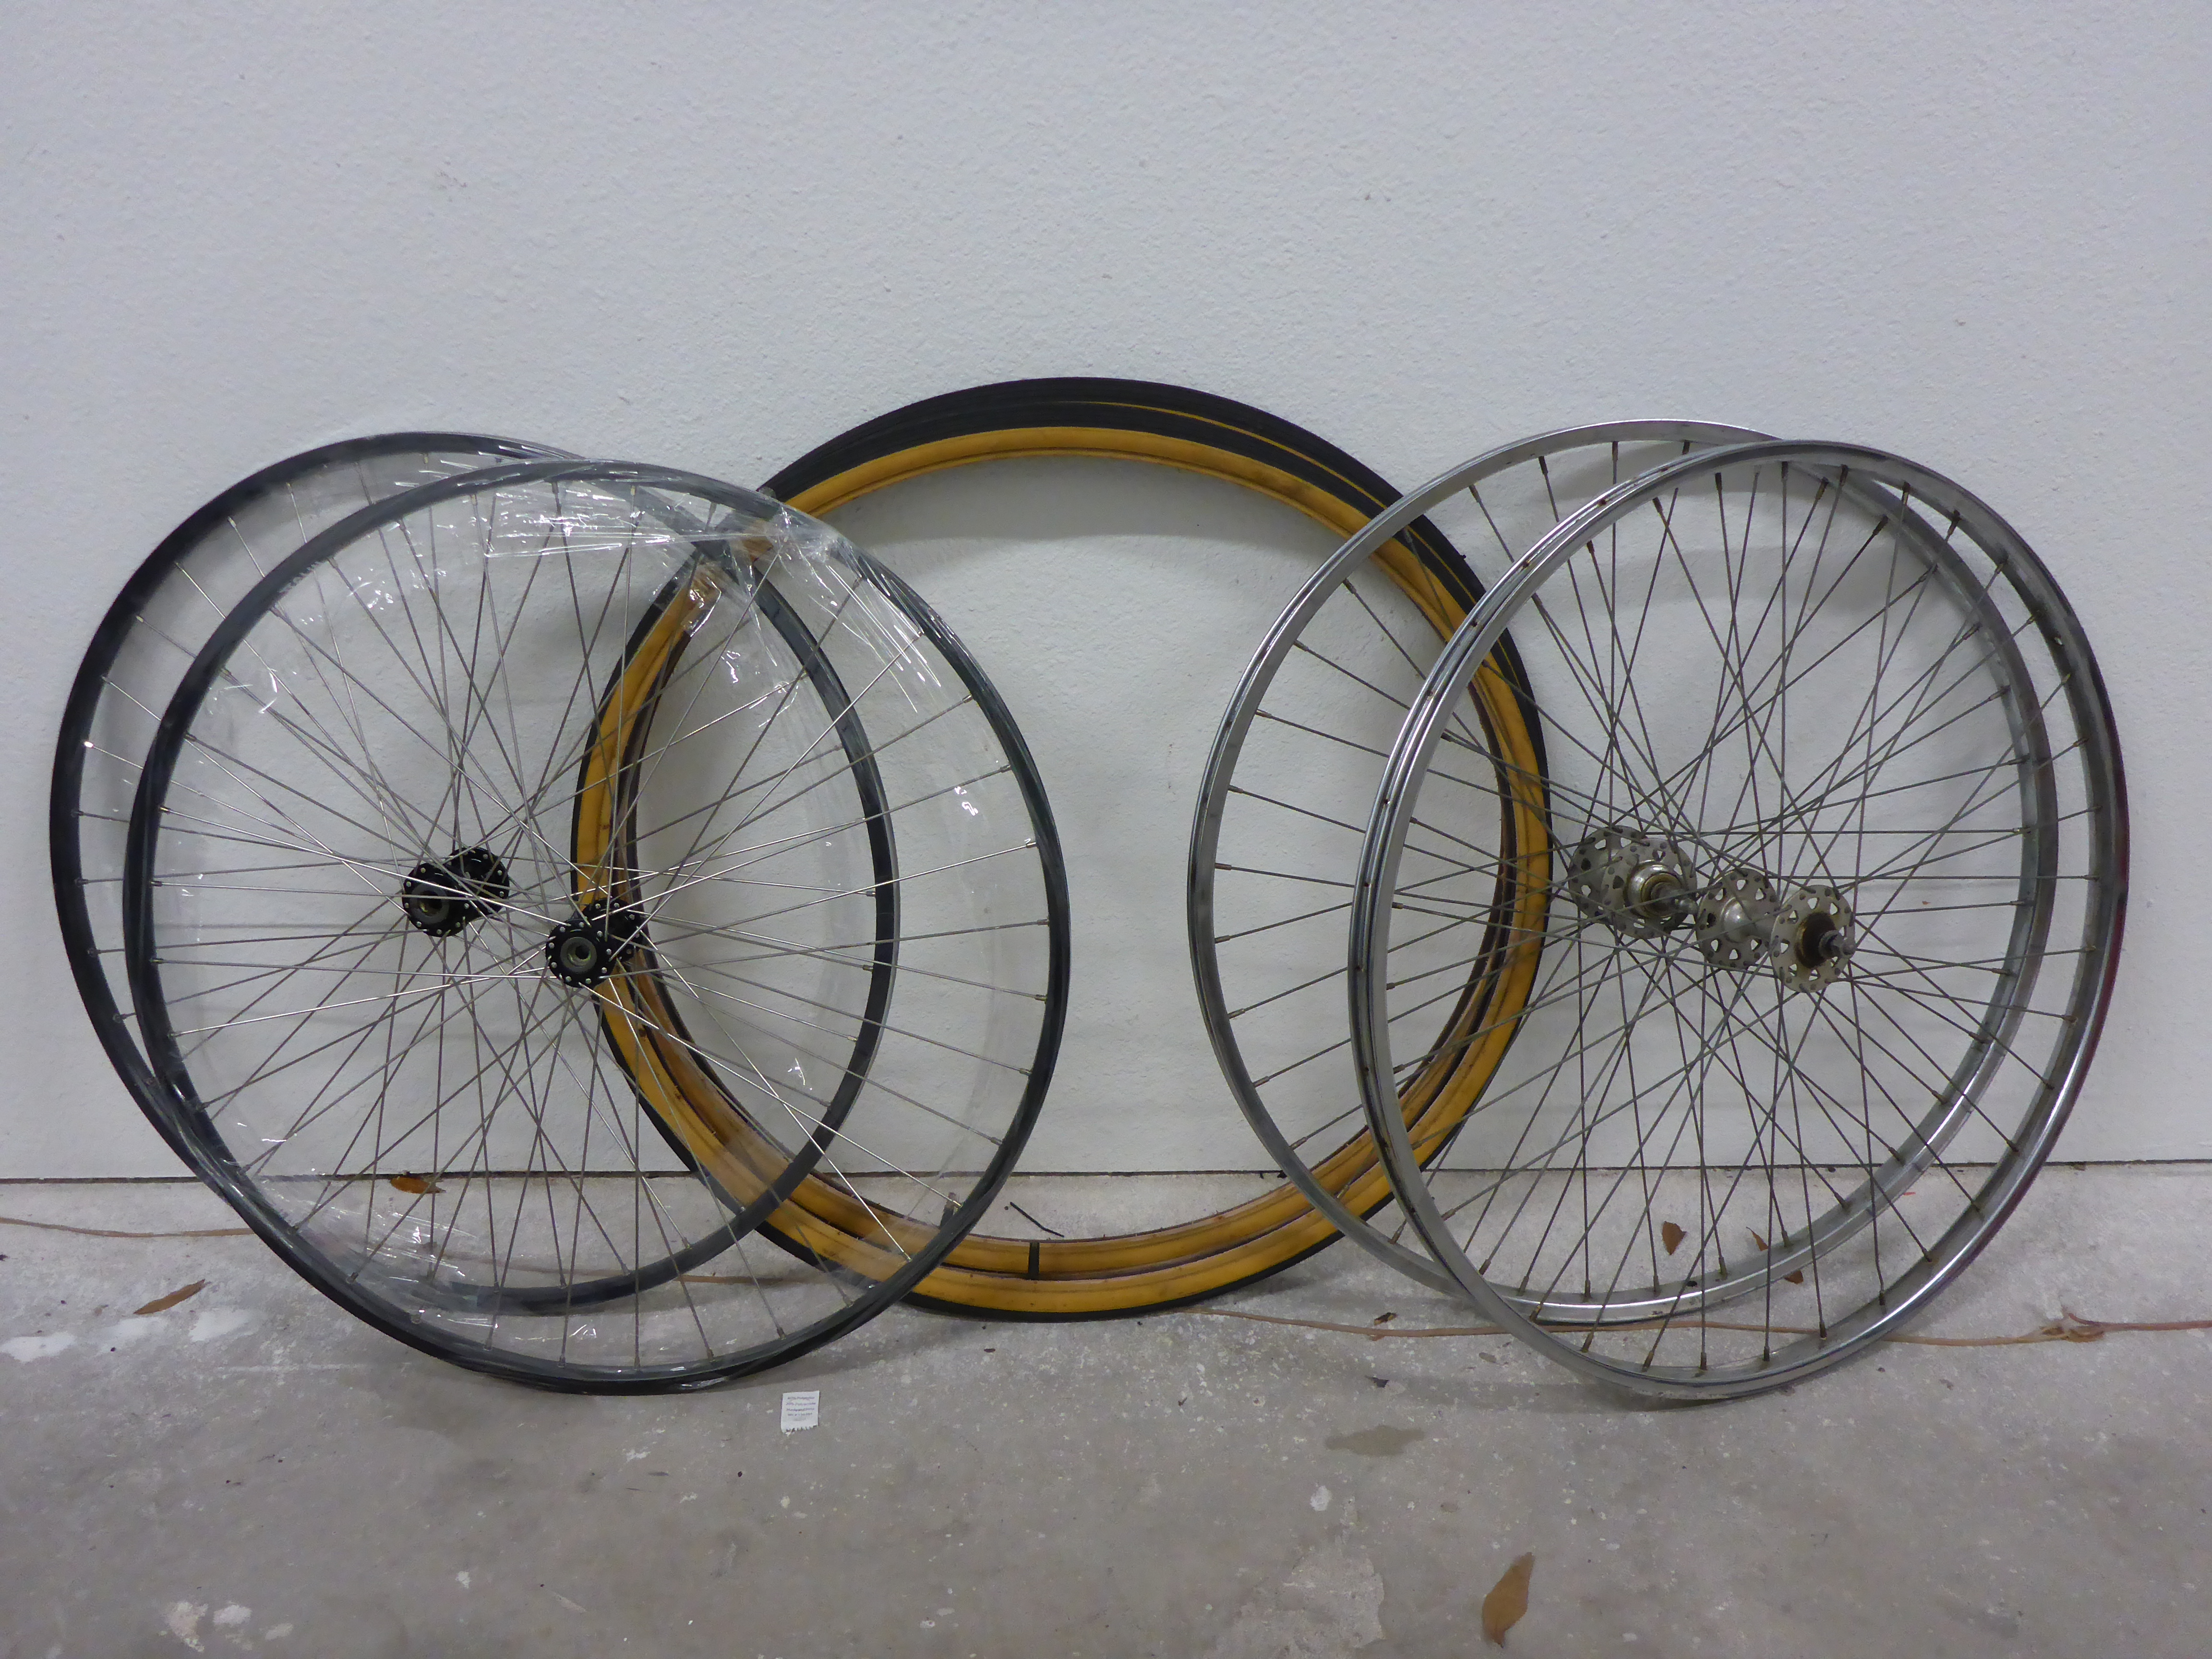
I wanted to stay as original as possible on this build so I requested that Brad try to true them and get the dings out. It didn’t take long for me to swallow a big pride pill and listen to Brad’s advice: the steel wheels gotta go! They were bent beyond reasonable repair, and it was time to buy new aluminum wheels. Okay. Traditional classic styling, yet utilizing better modern-day technology. I can accept that. Plus, those things had an 13 in the part number or something and that seemed like a good sign to me. Of course, I wouldn’t just let these beautiful steel spoked wheels go into the trash. Oh no. They went up onto Craigslist for free with an lengthy ad describing the backstory and requiring a full explanation of their future intended use to honor my uncle’s memory. They ended up going to a lady to be used in her eclectic garden as a plant hanging apparatus. Thanks Uncle Pat for contributing to art and nature!
I disassembled all I could on my own. There are a lot of new experiences in disassembling a classic bike as compared to installing car stereos or building headlights. It’s also quite an enjoyable process. It was fun to hit problems where I honestly had no idea how to proceed yet I always had the proper resources in order to overcome them. I brought a sorta-disassembled bicycle frame over to Brad to remove the chain from the derailer and frame.

While there, I also picked his brain about removing the kickstand from the frame and taking apart the pedals.
I did it! I did it! I got it all (mostly) apart! ::sweating profusely::

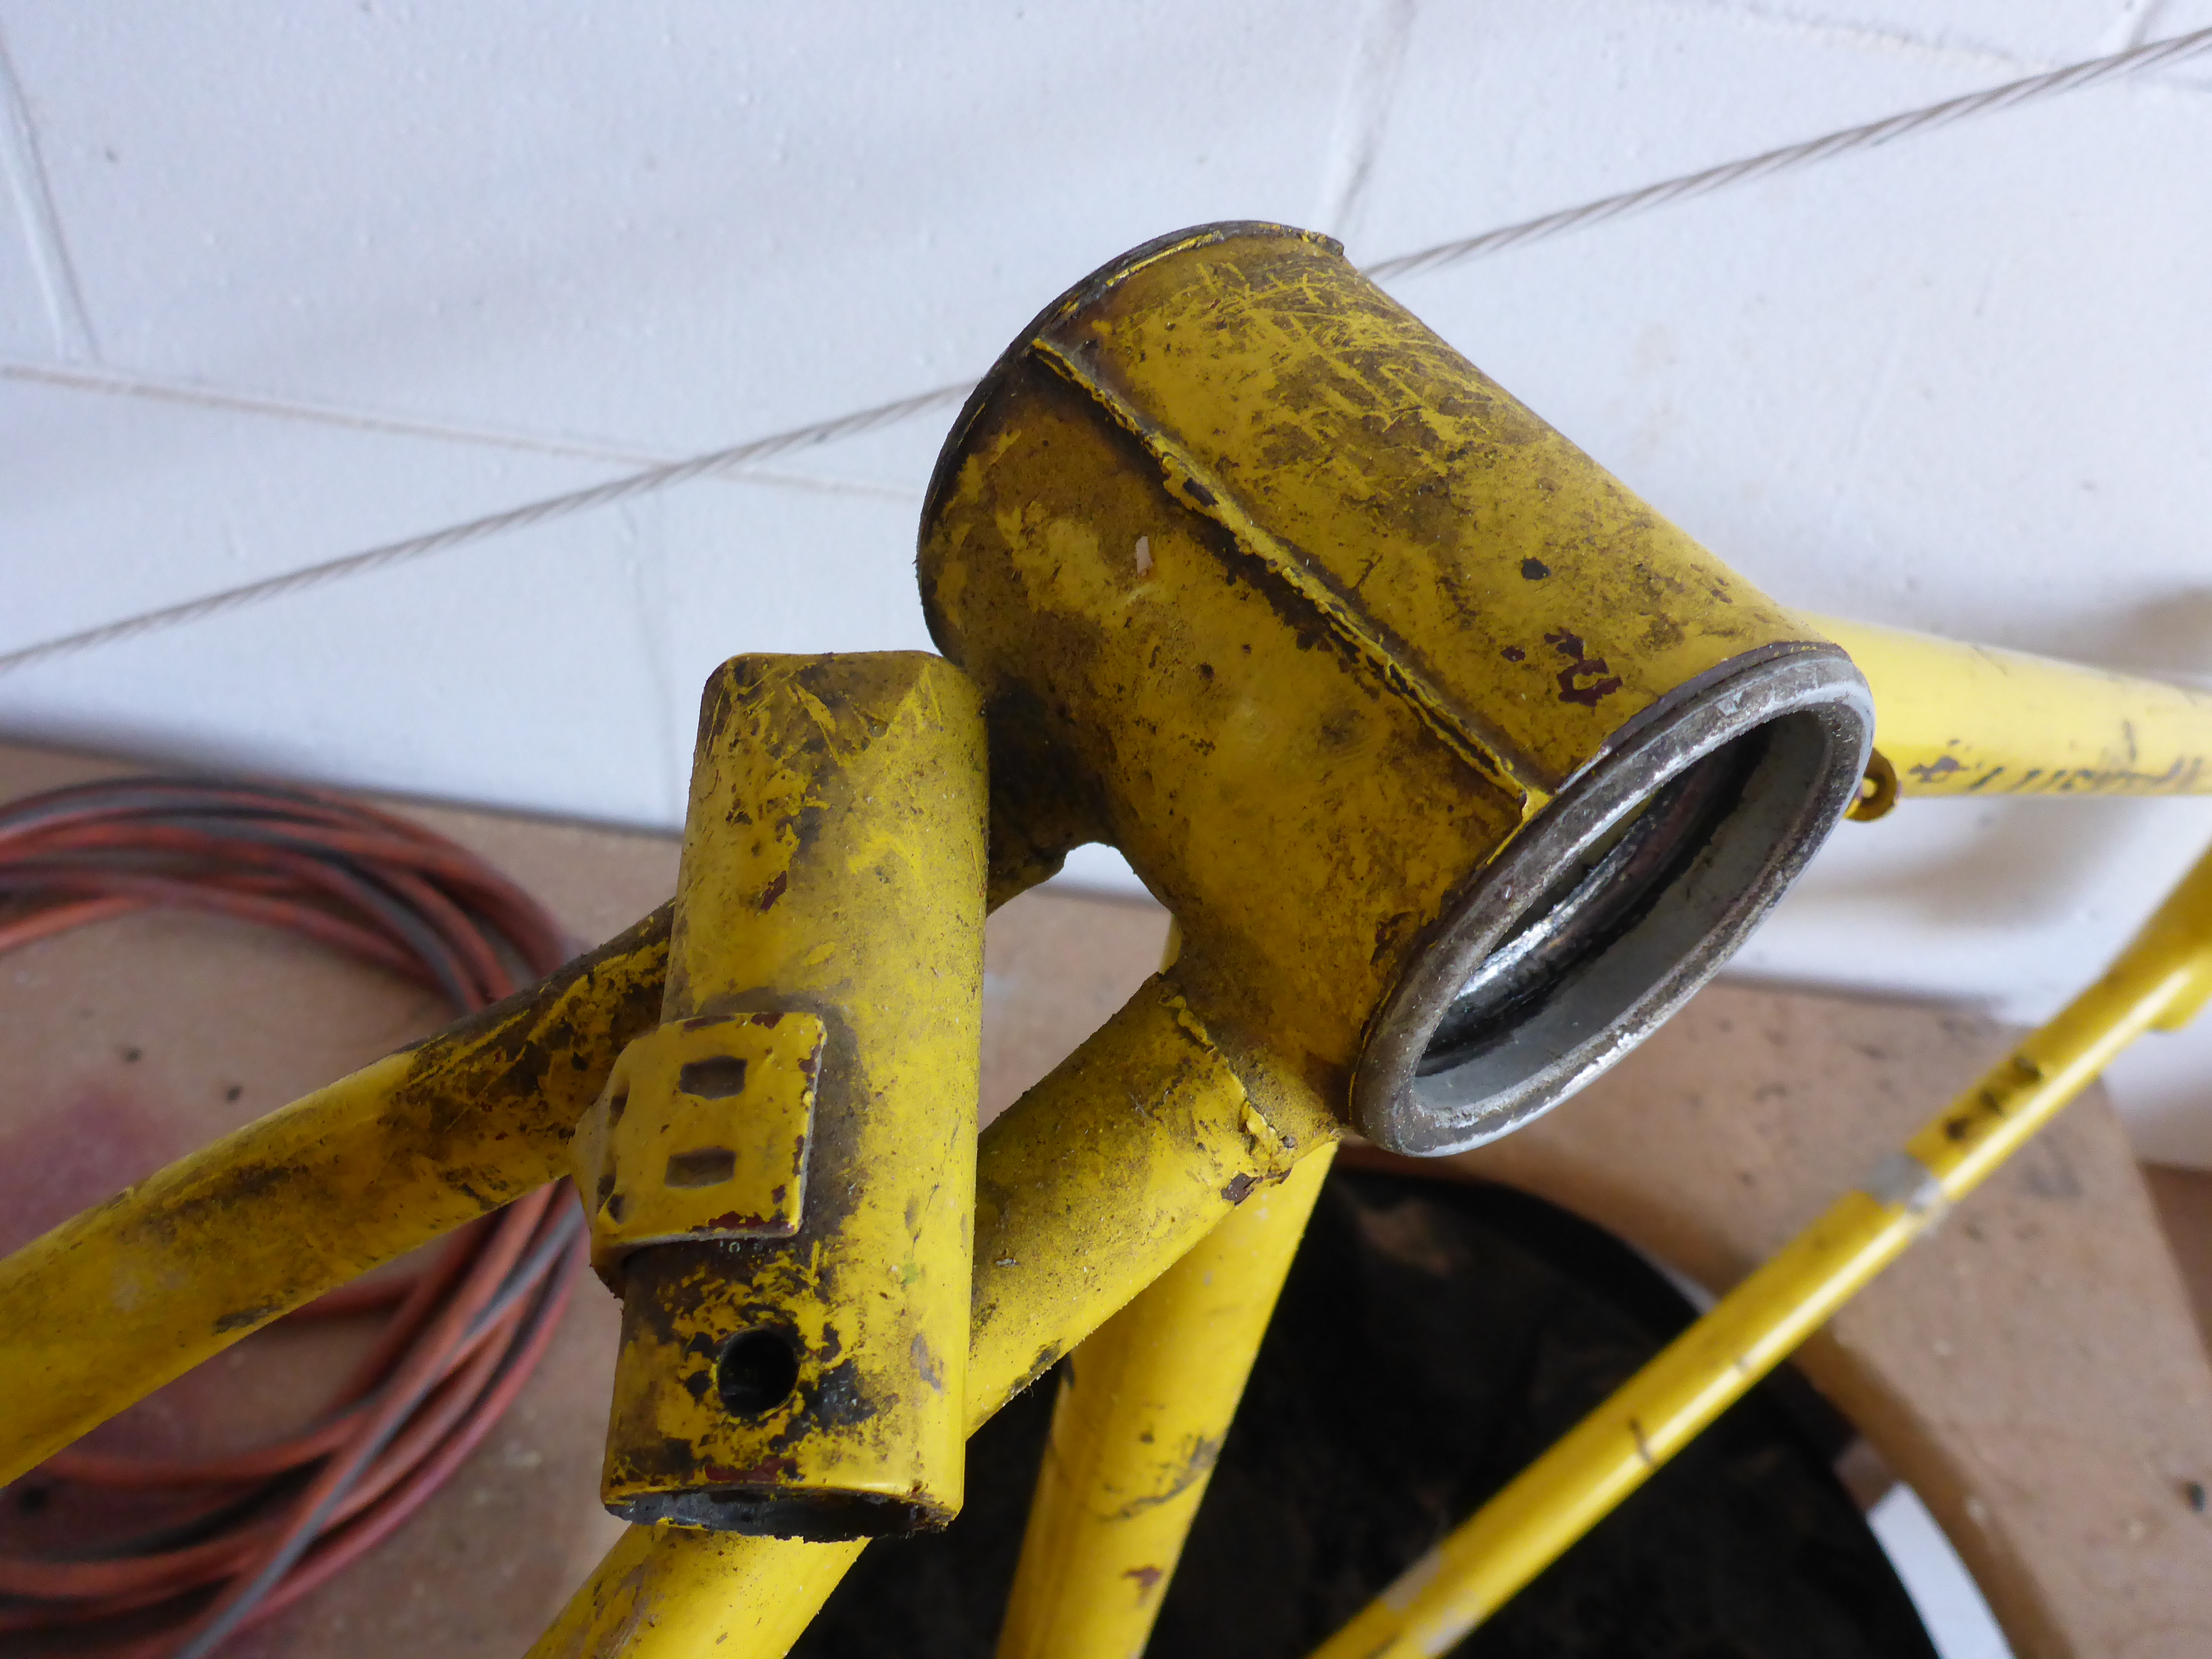
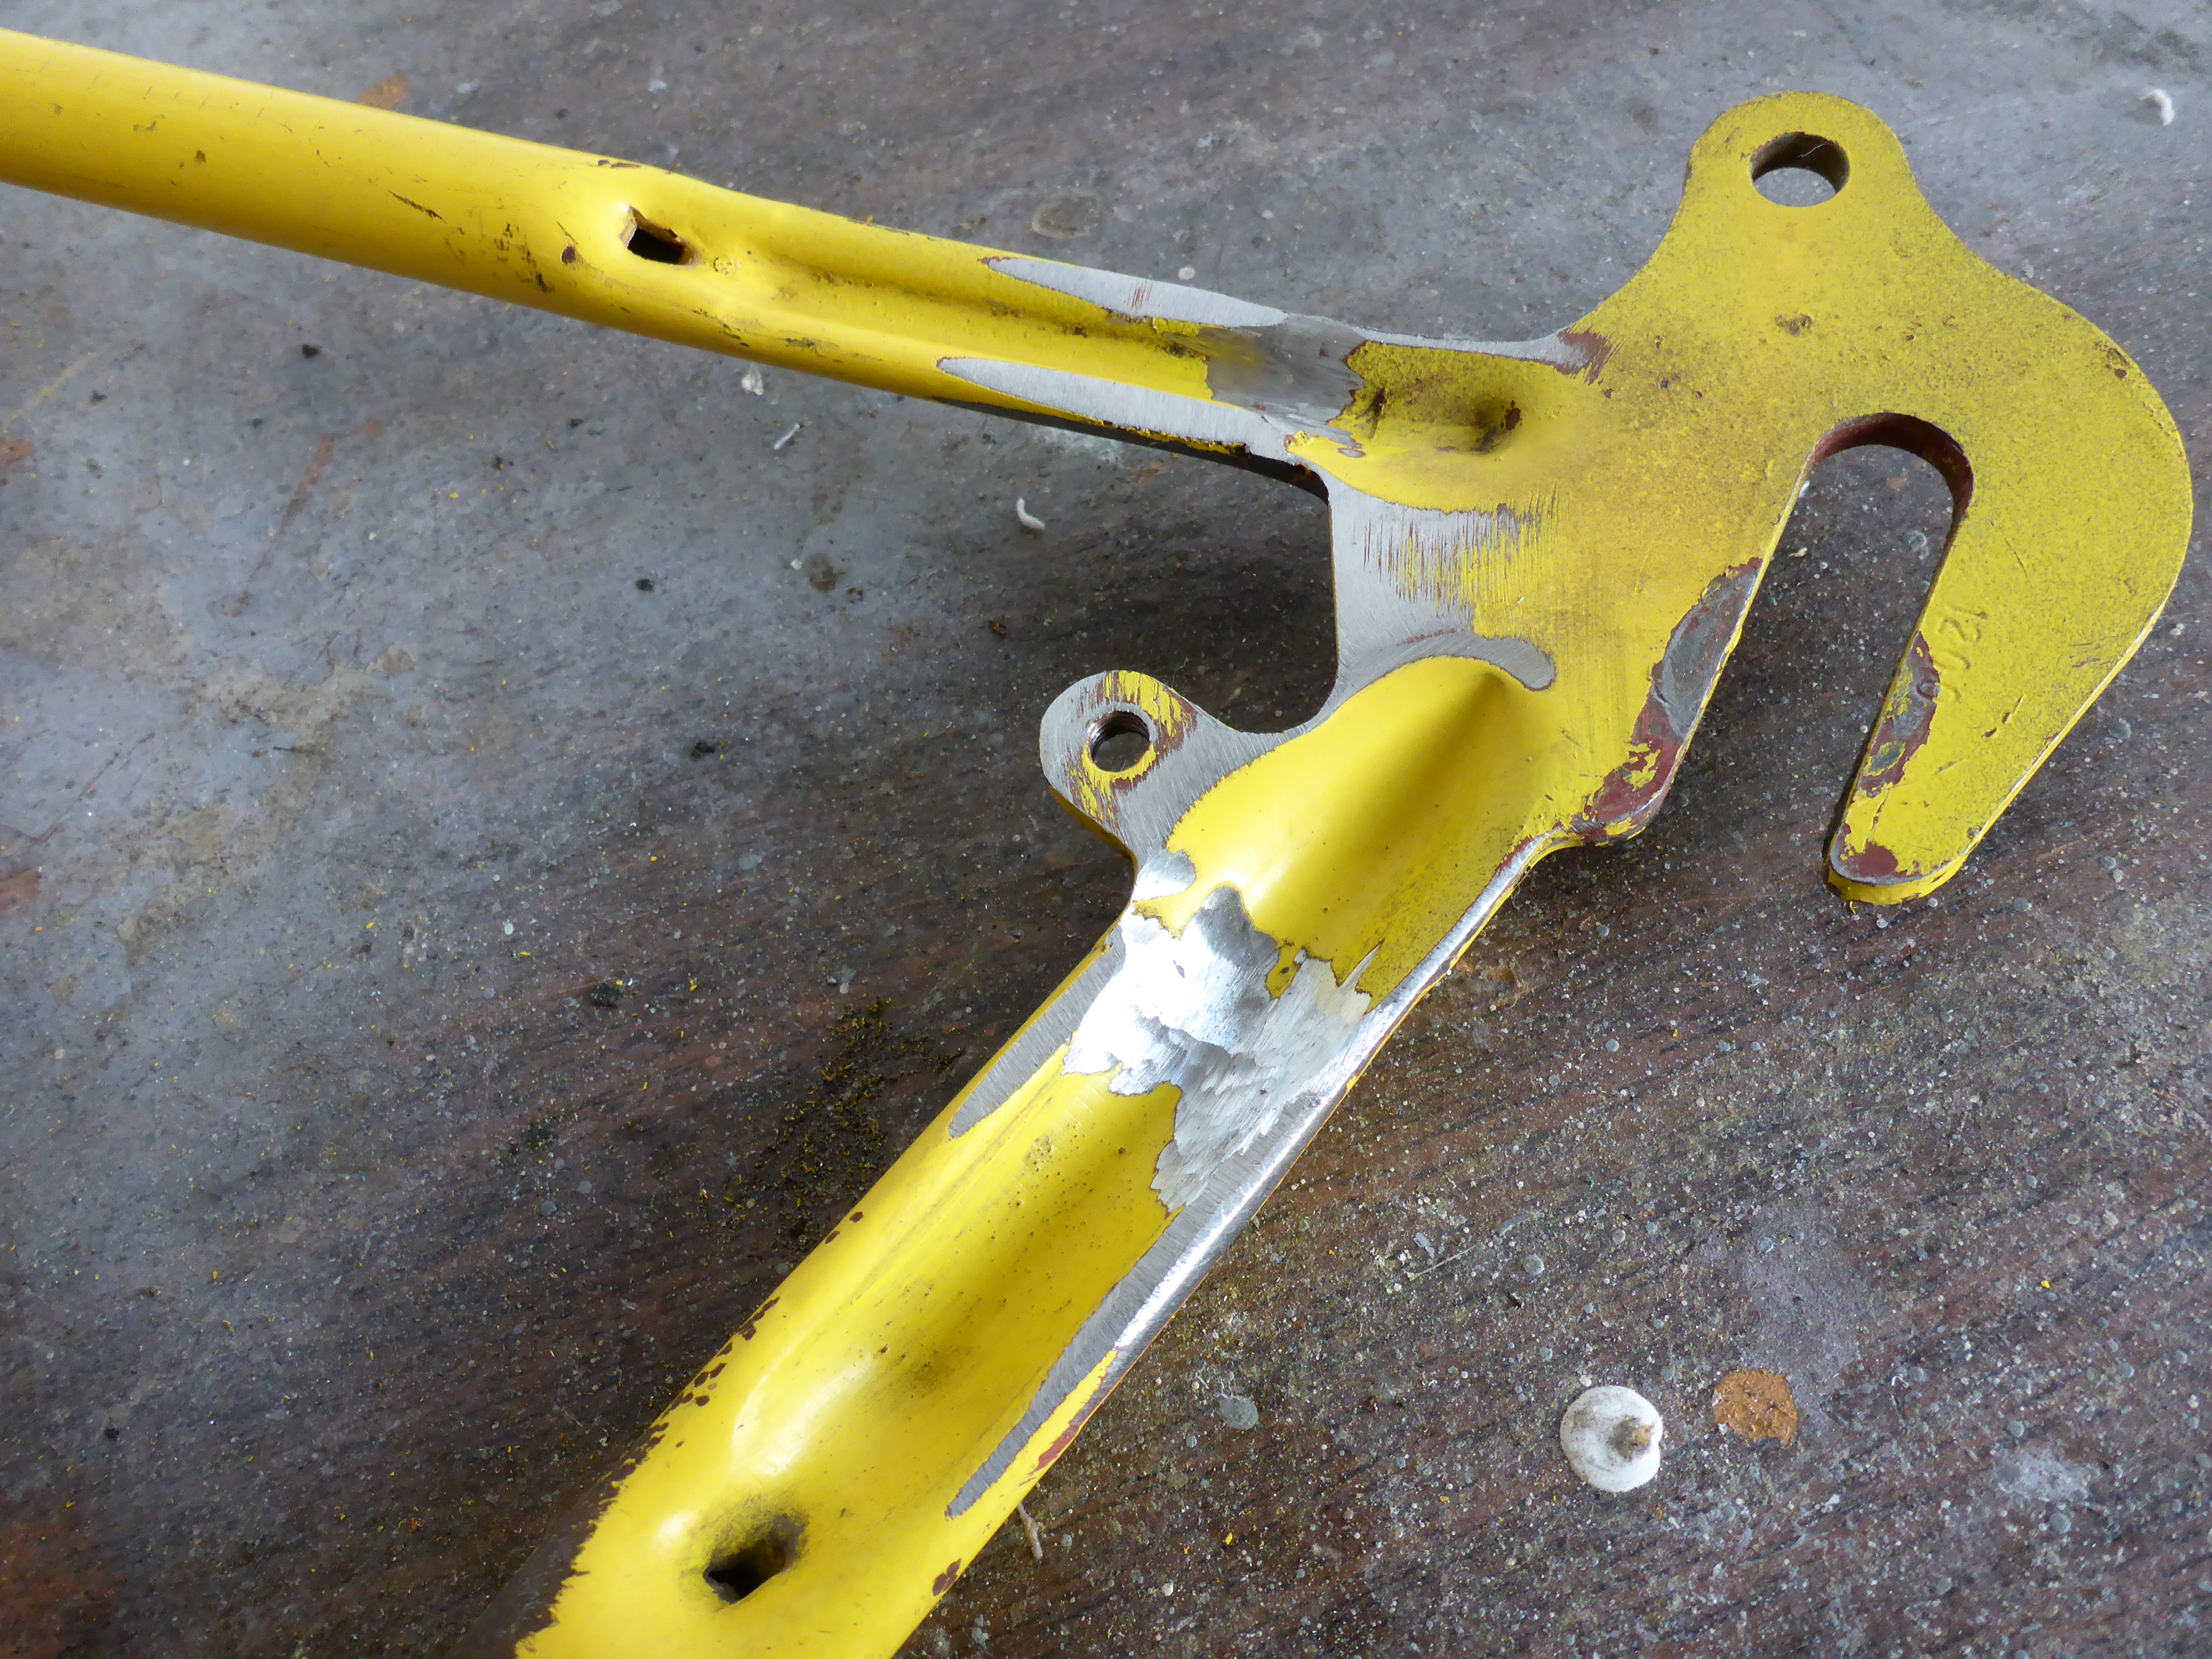
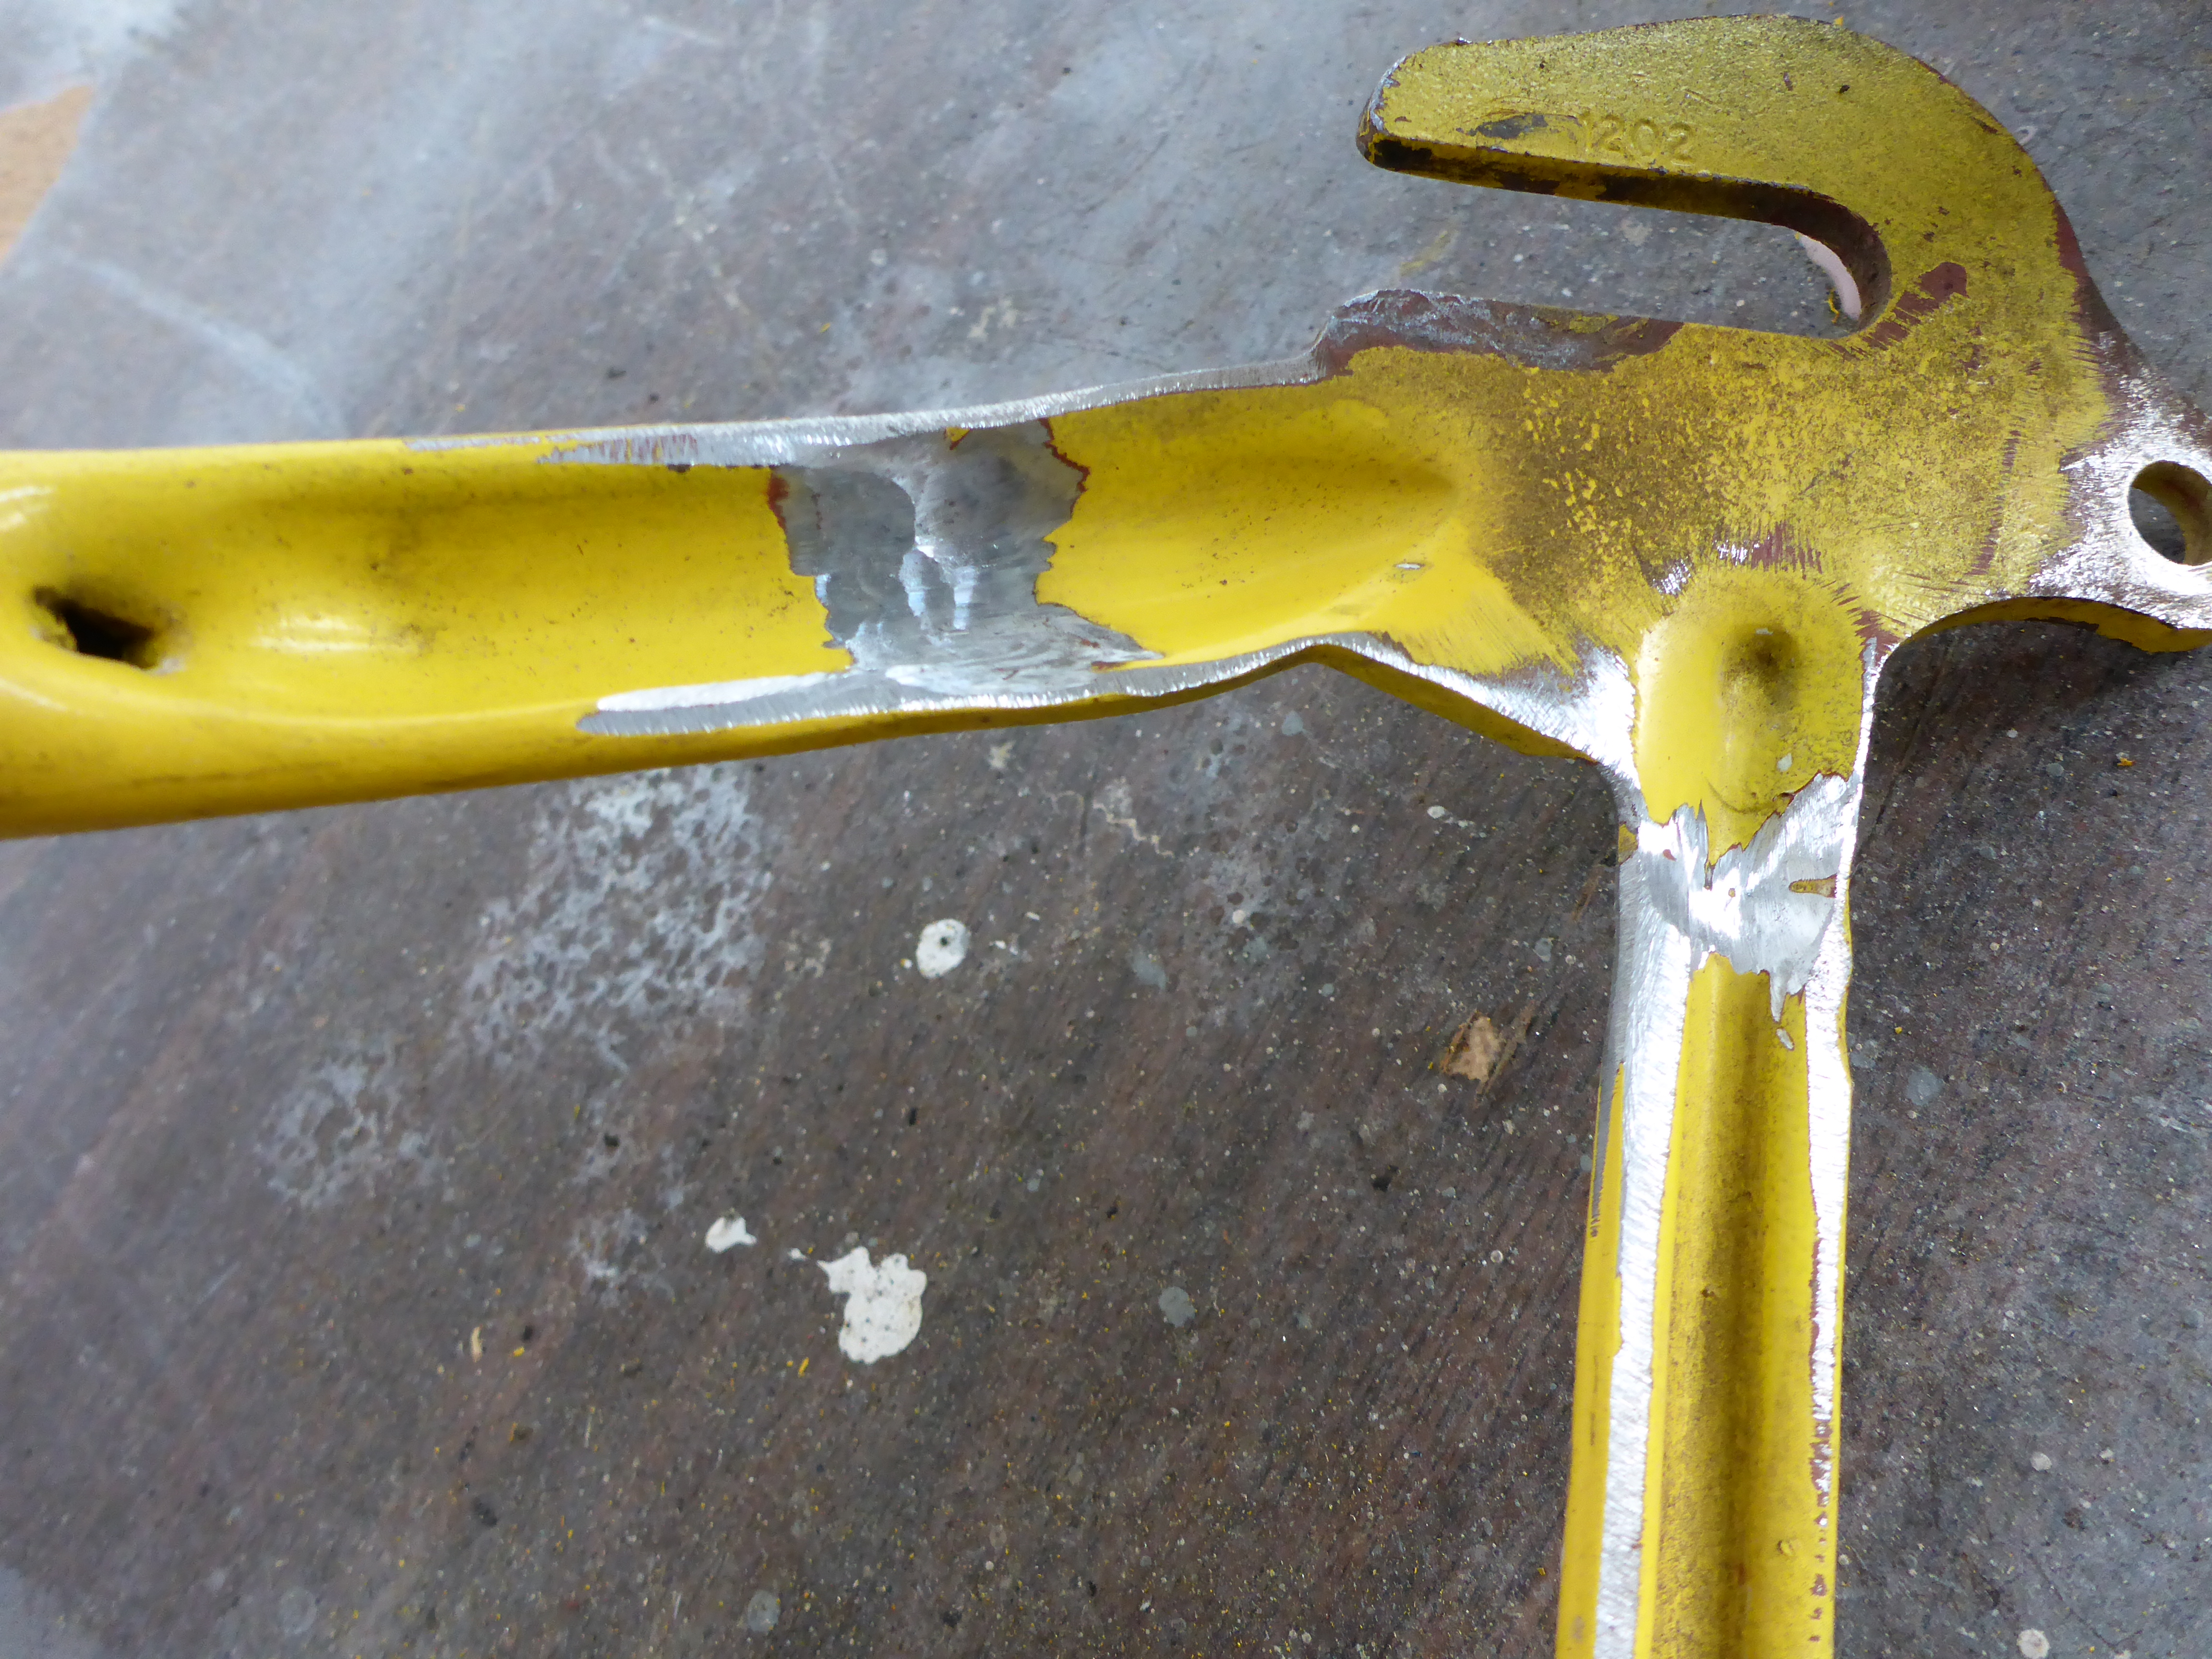
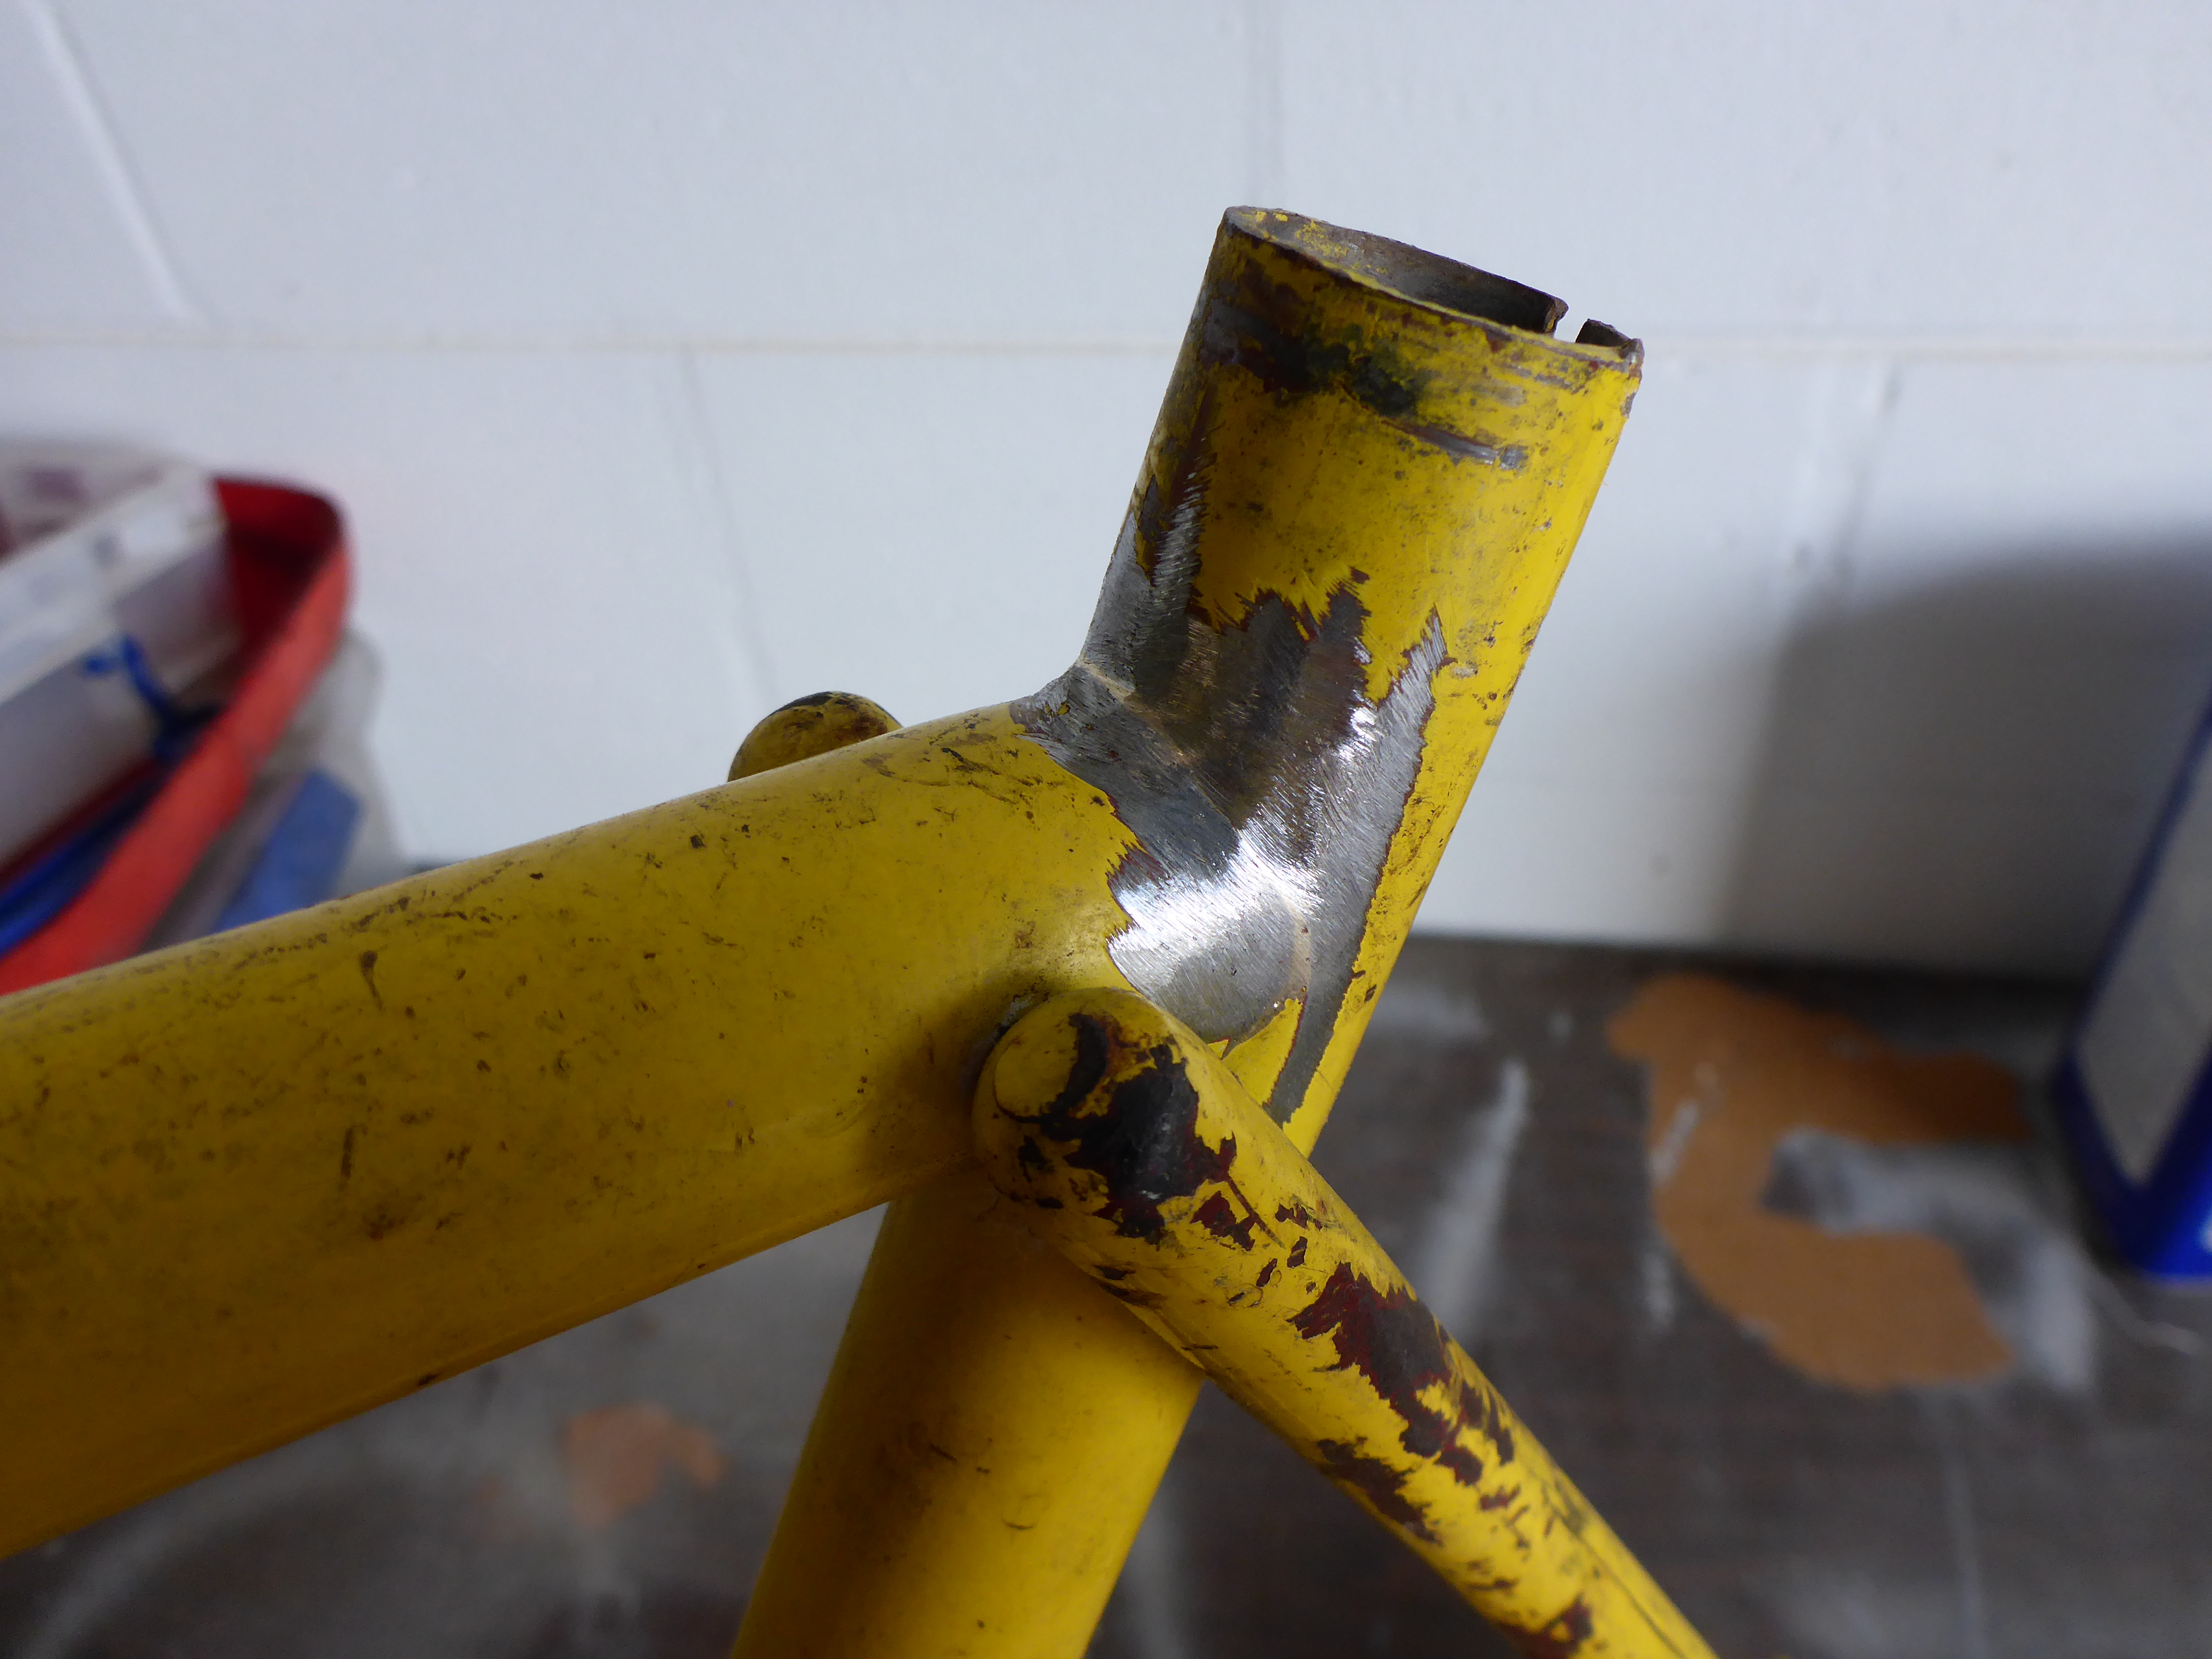
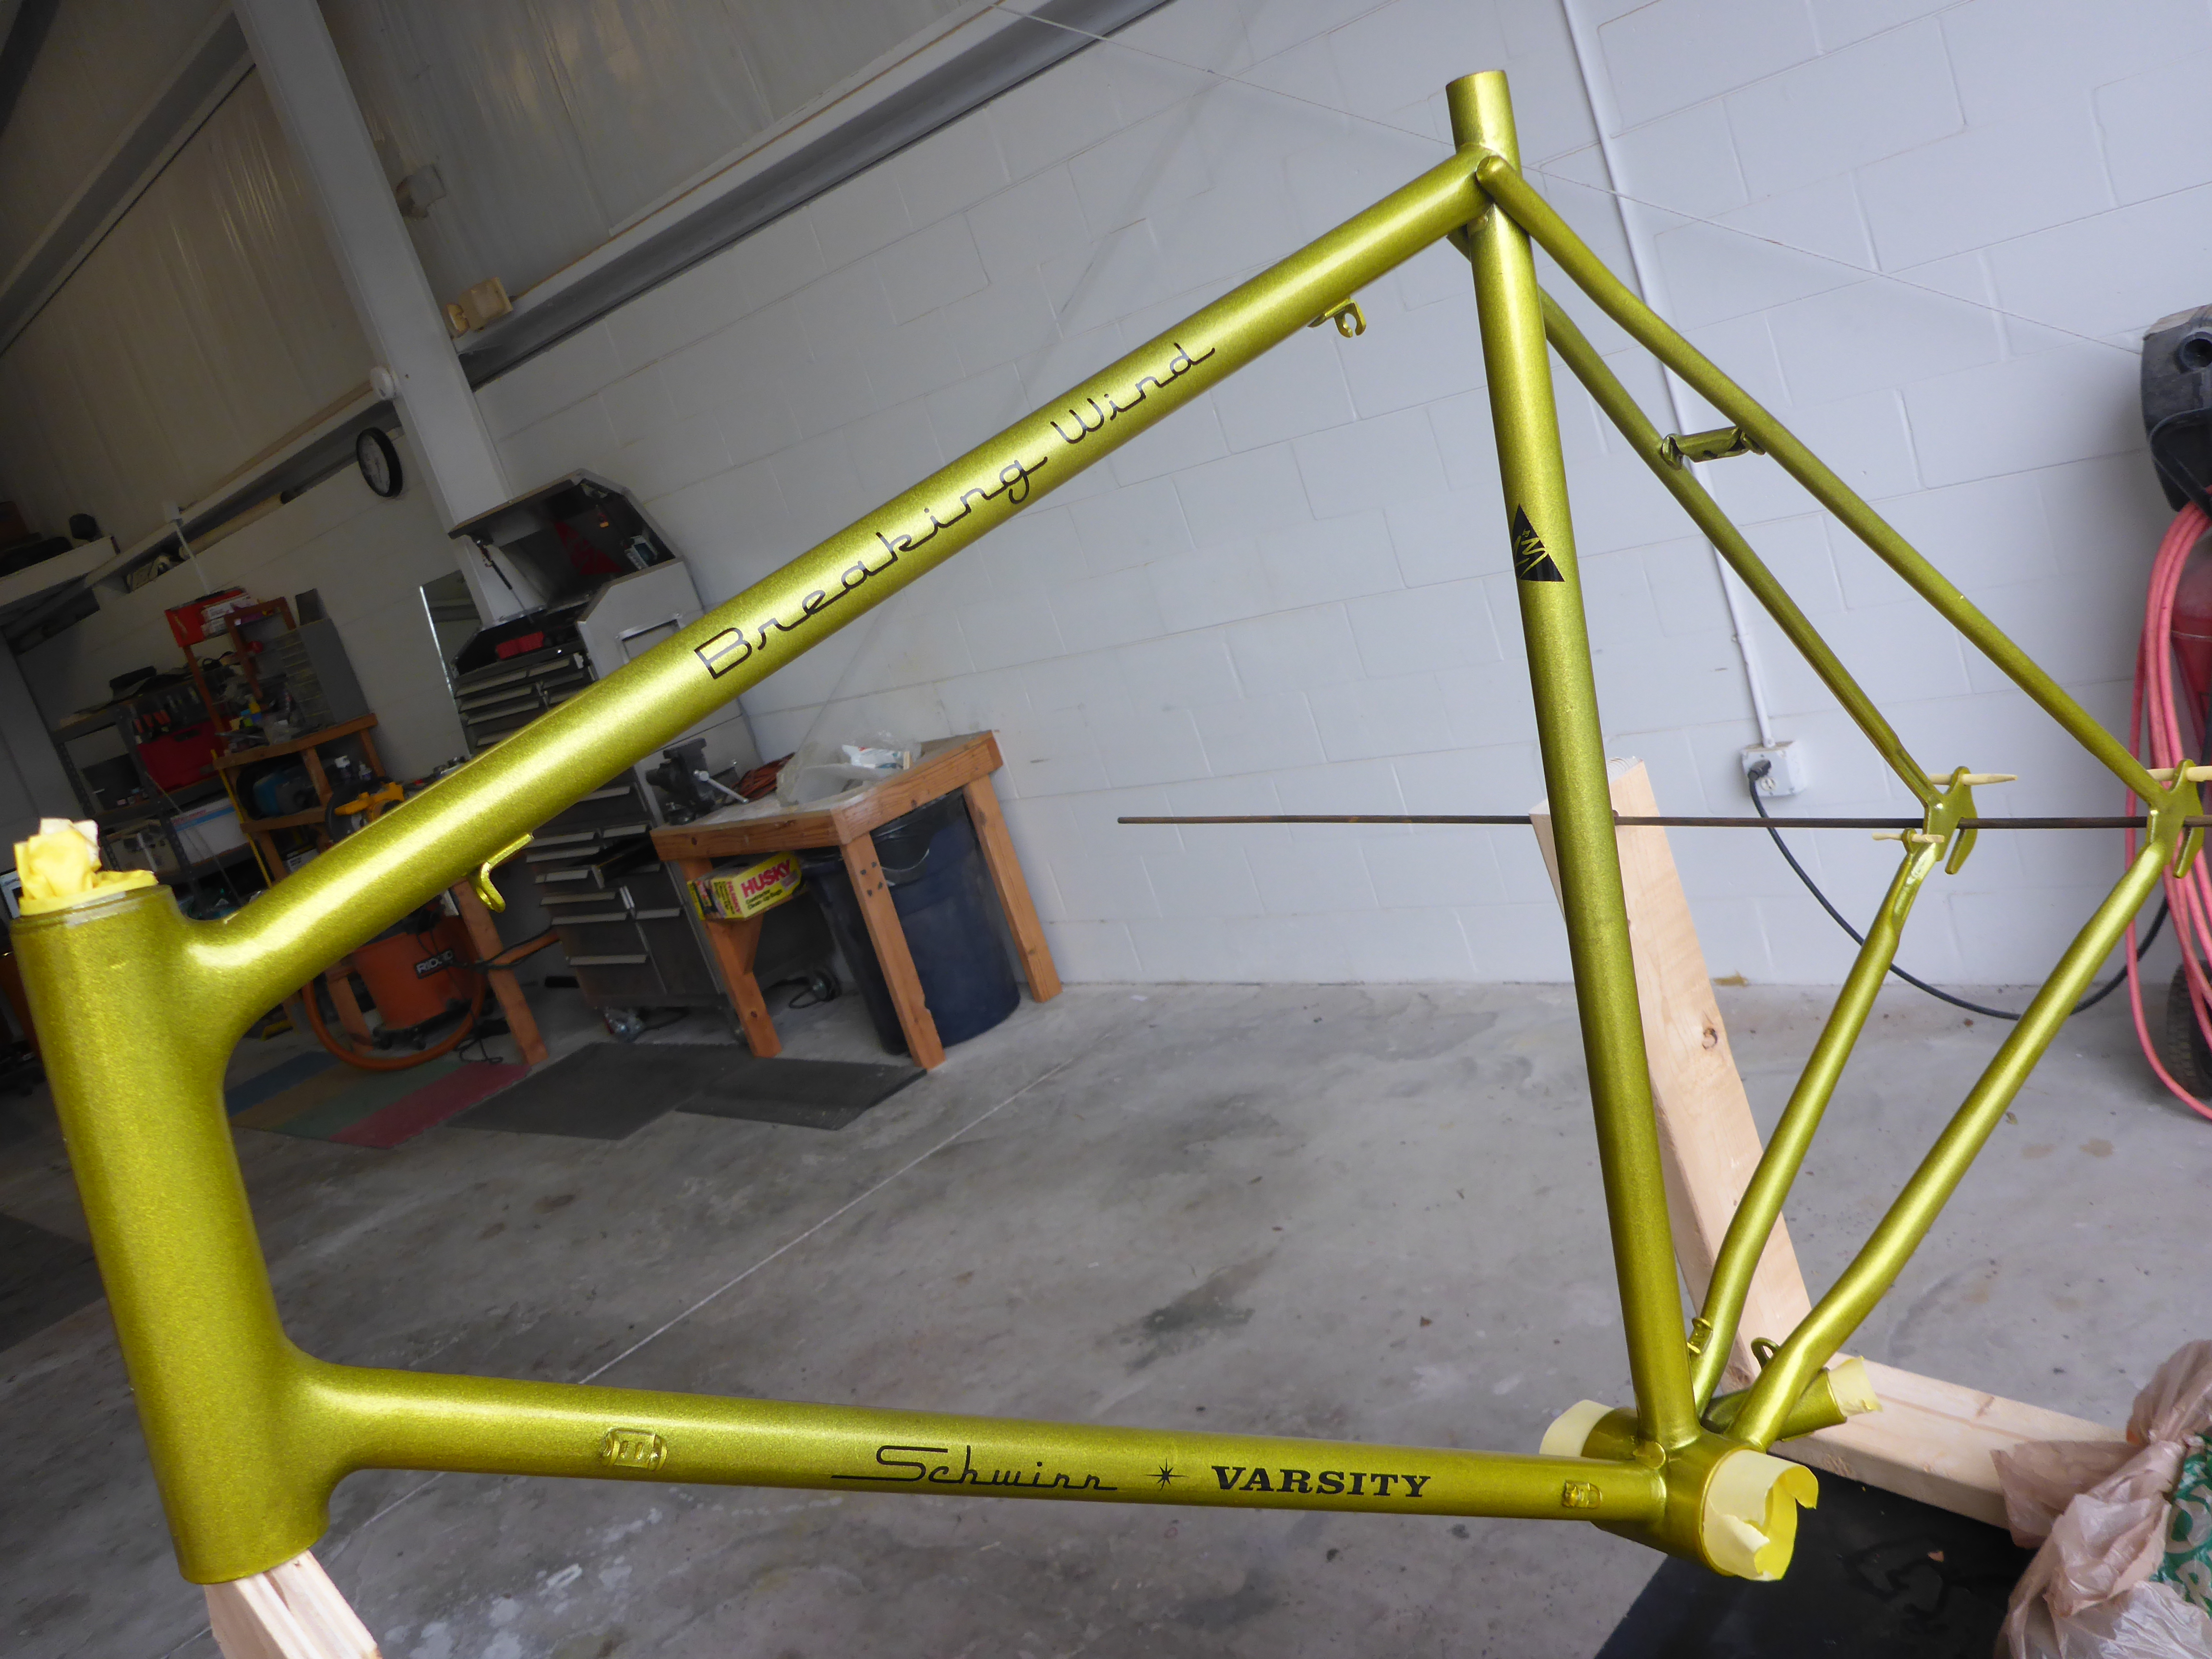
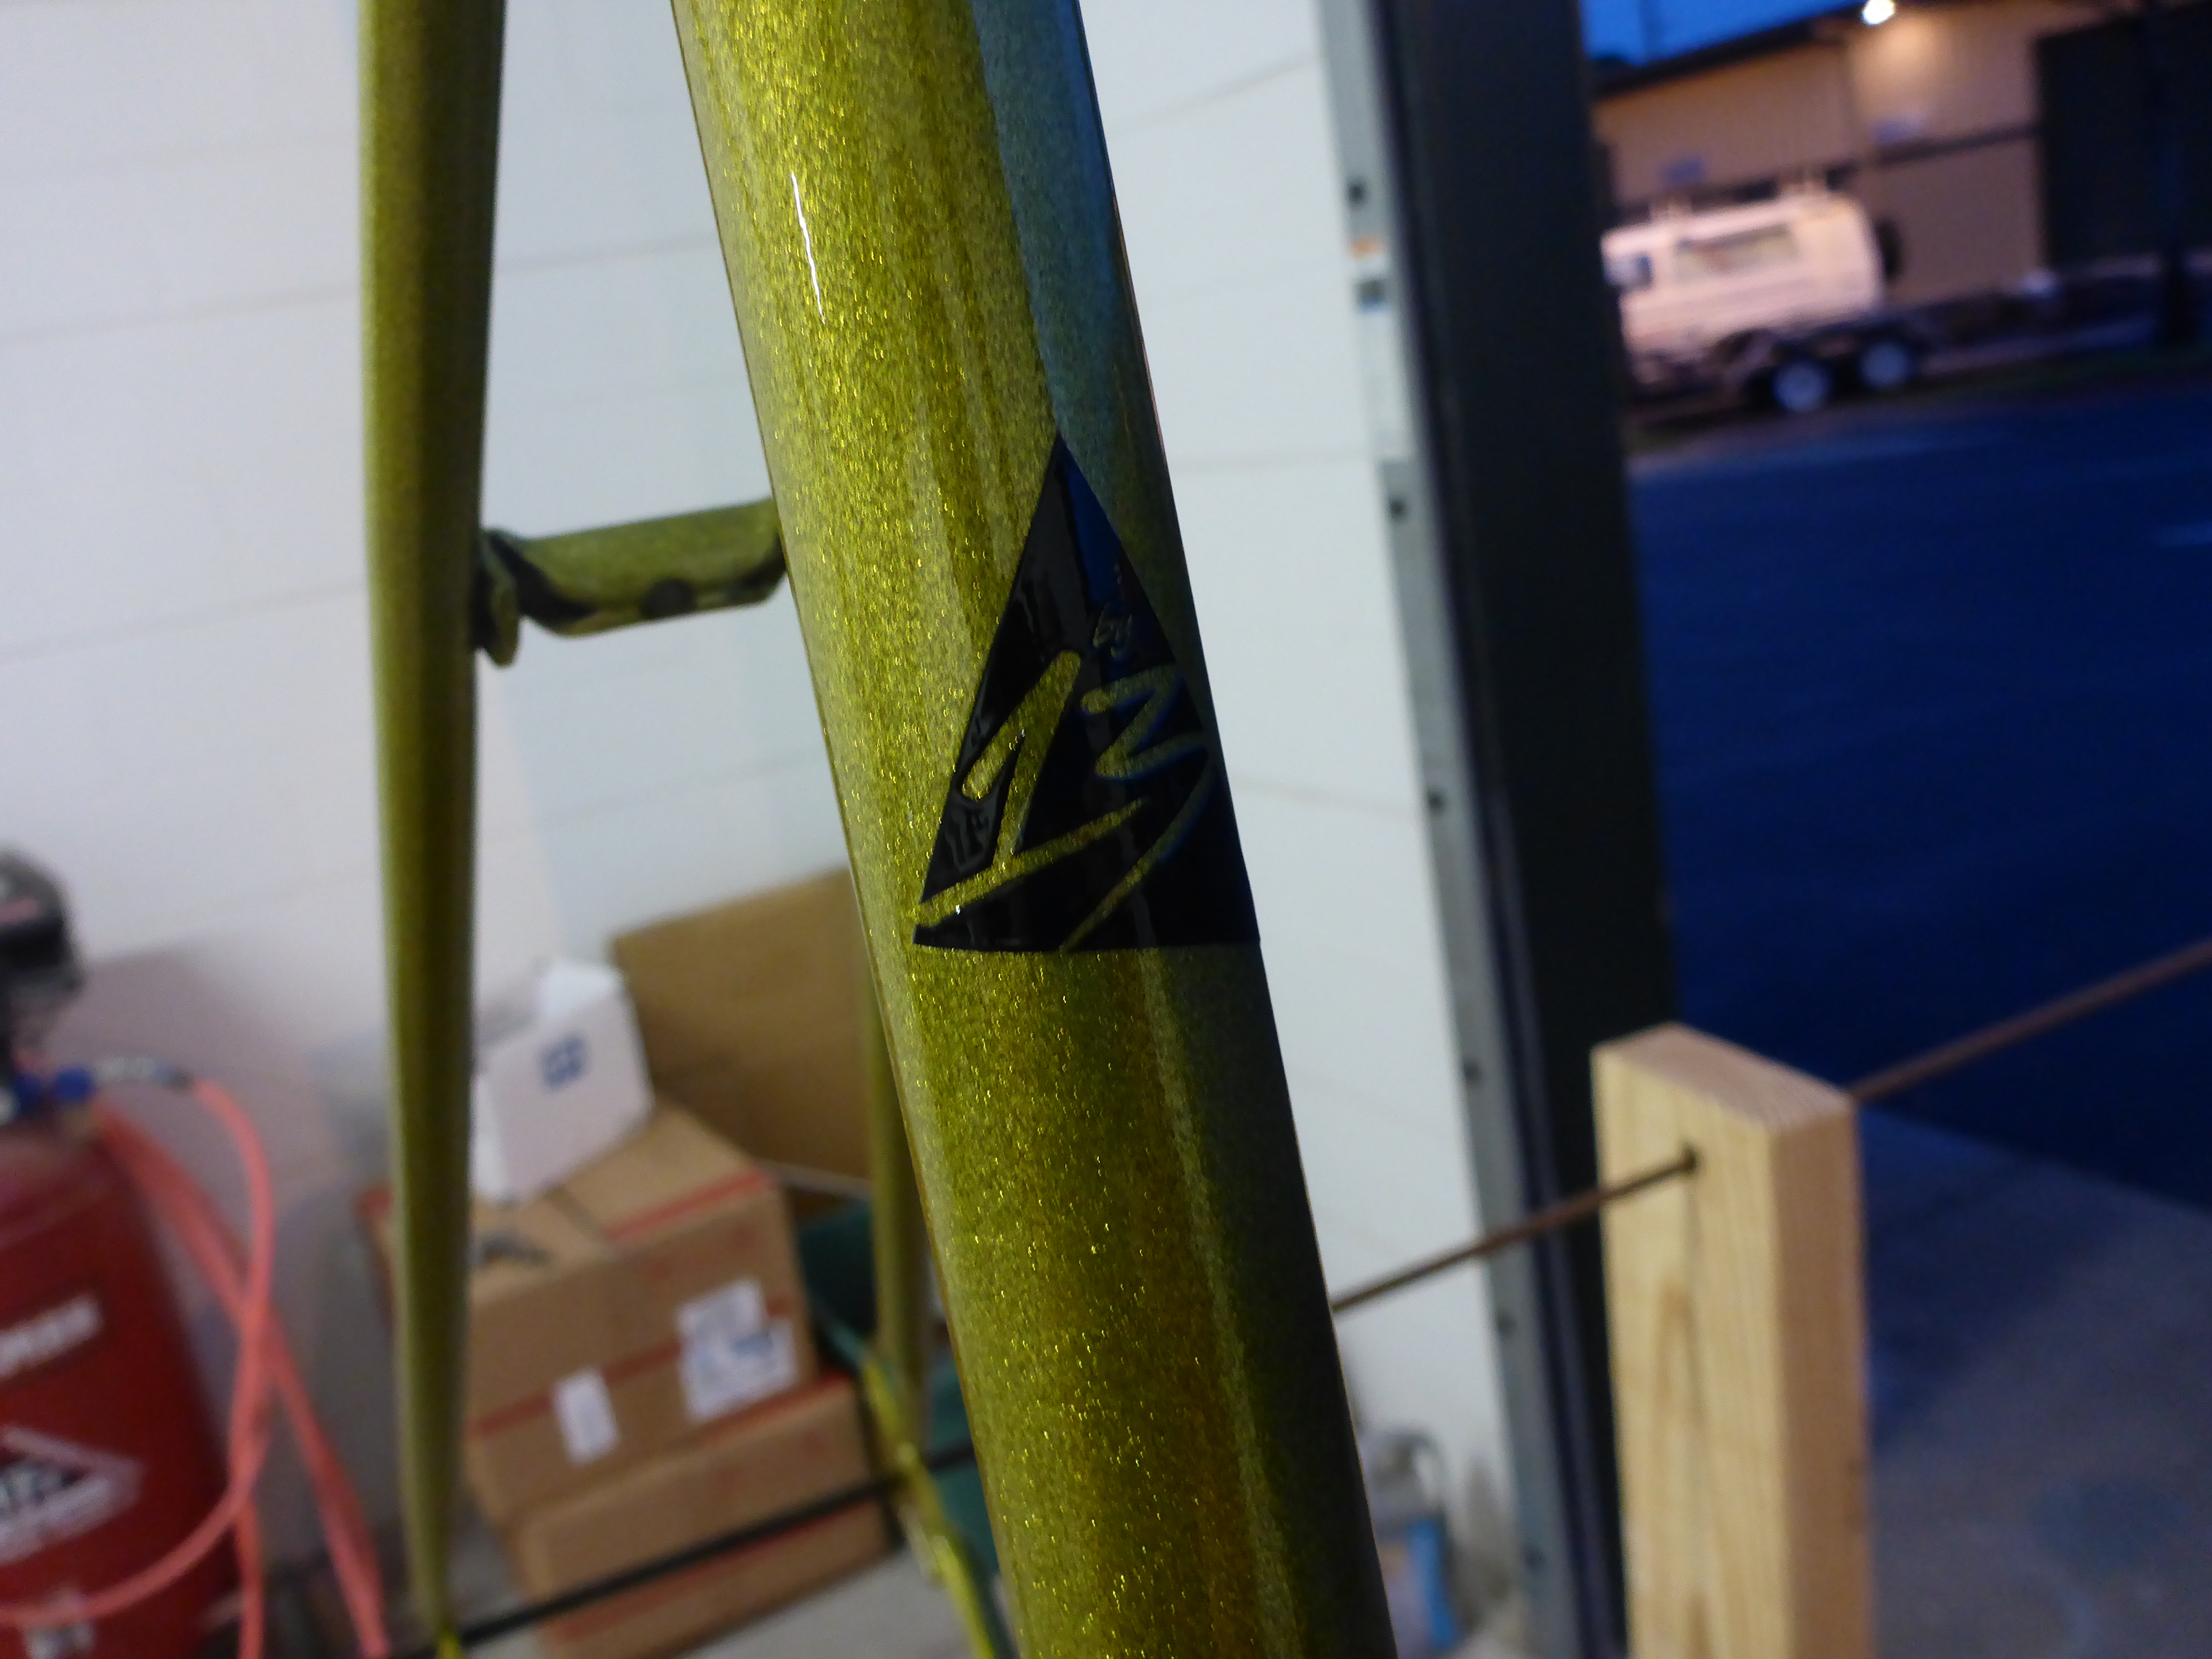
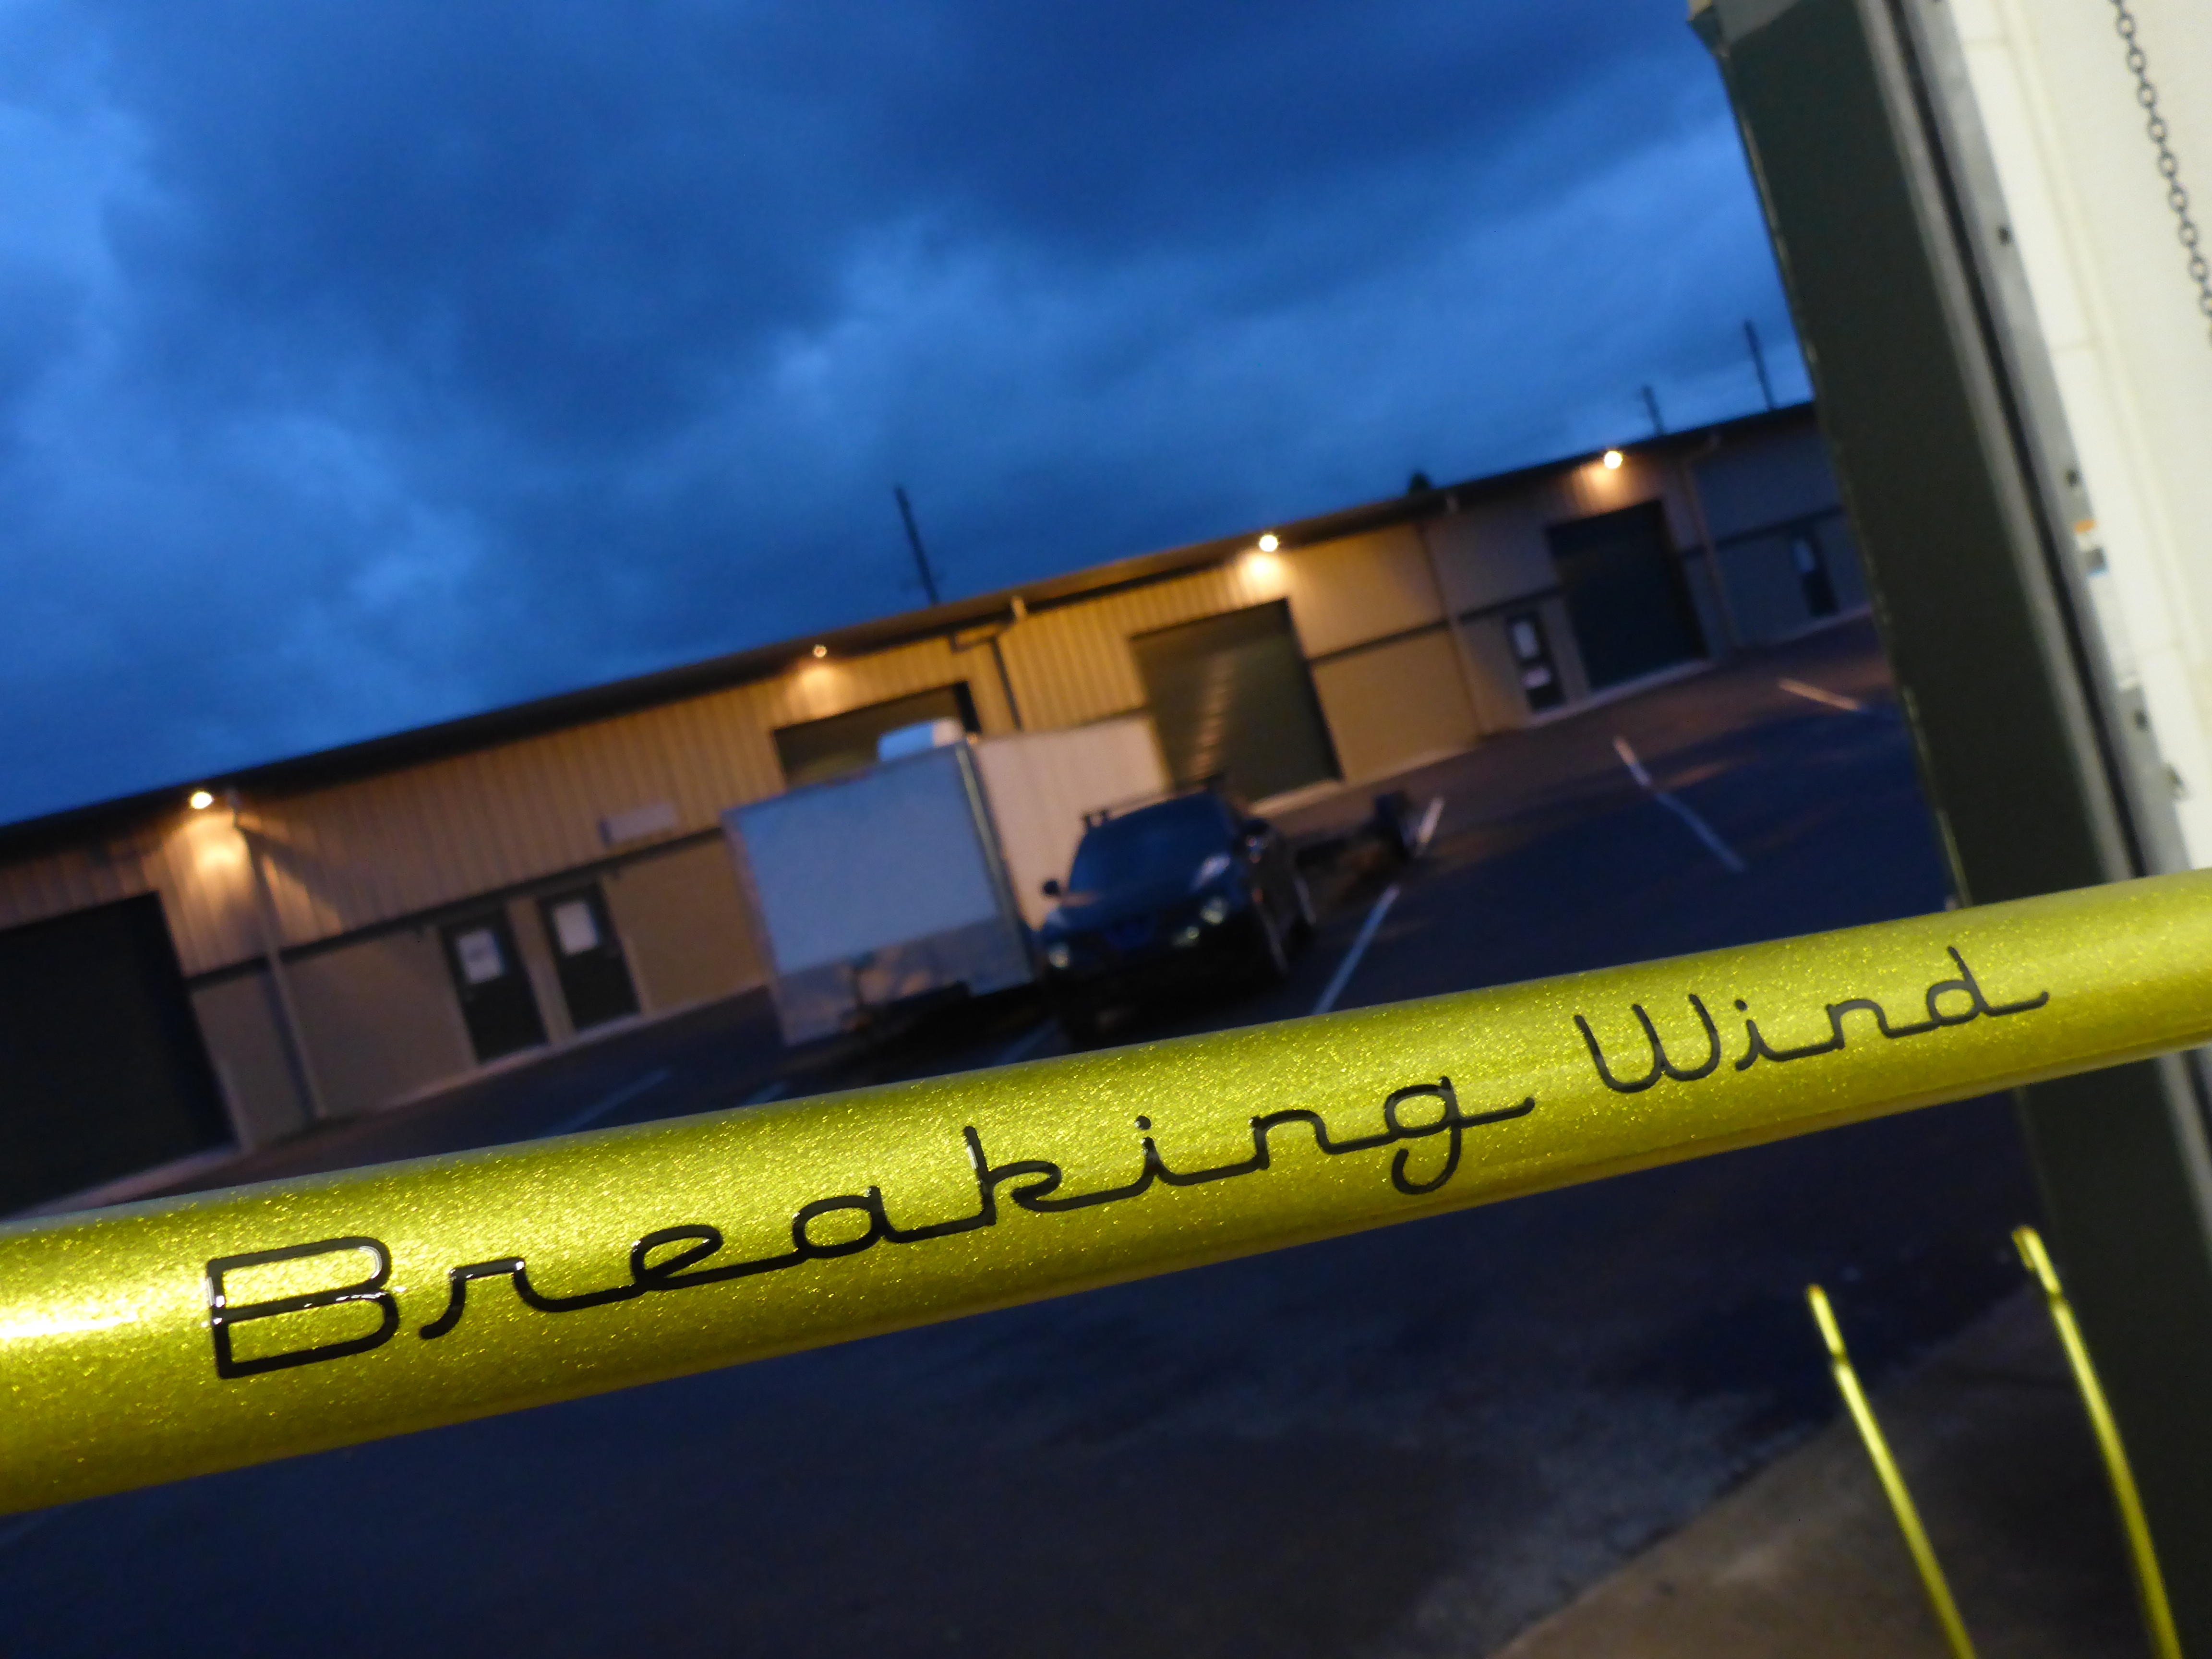
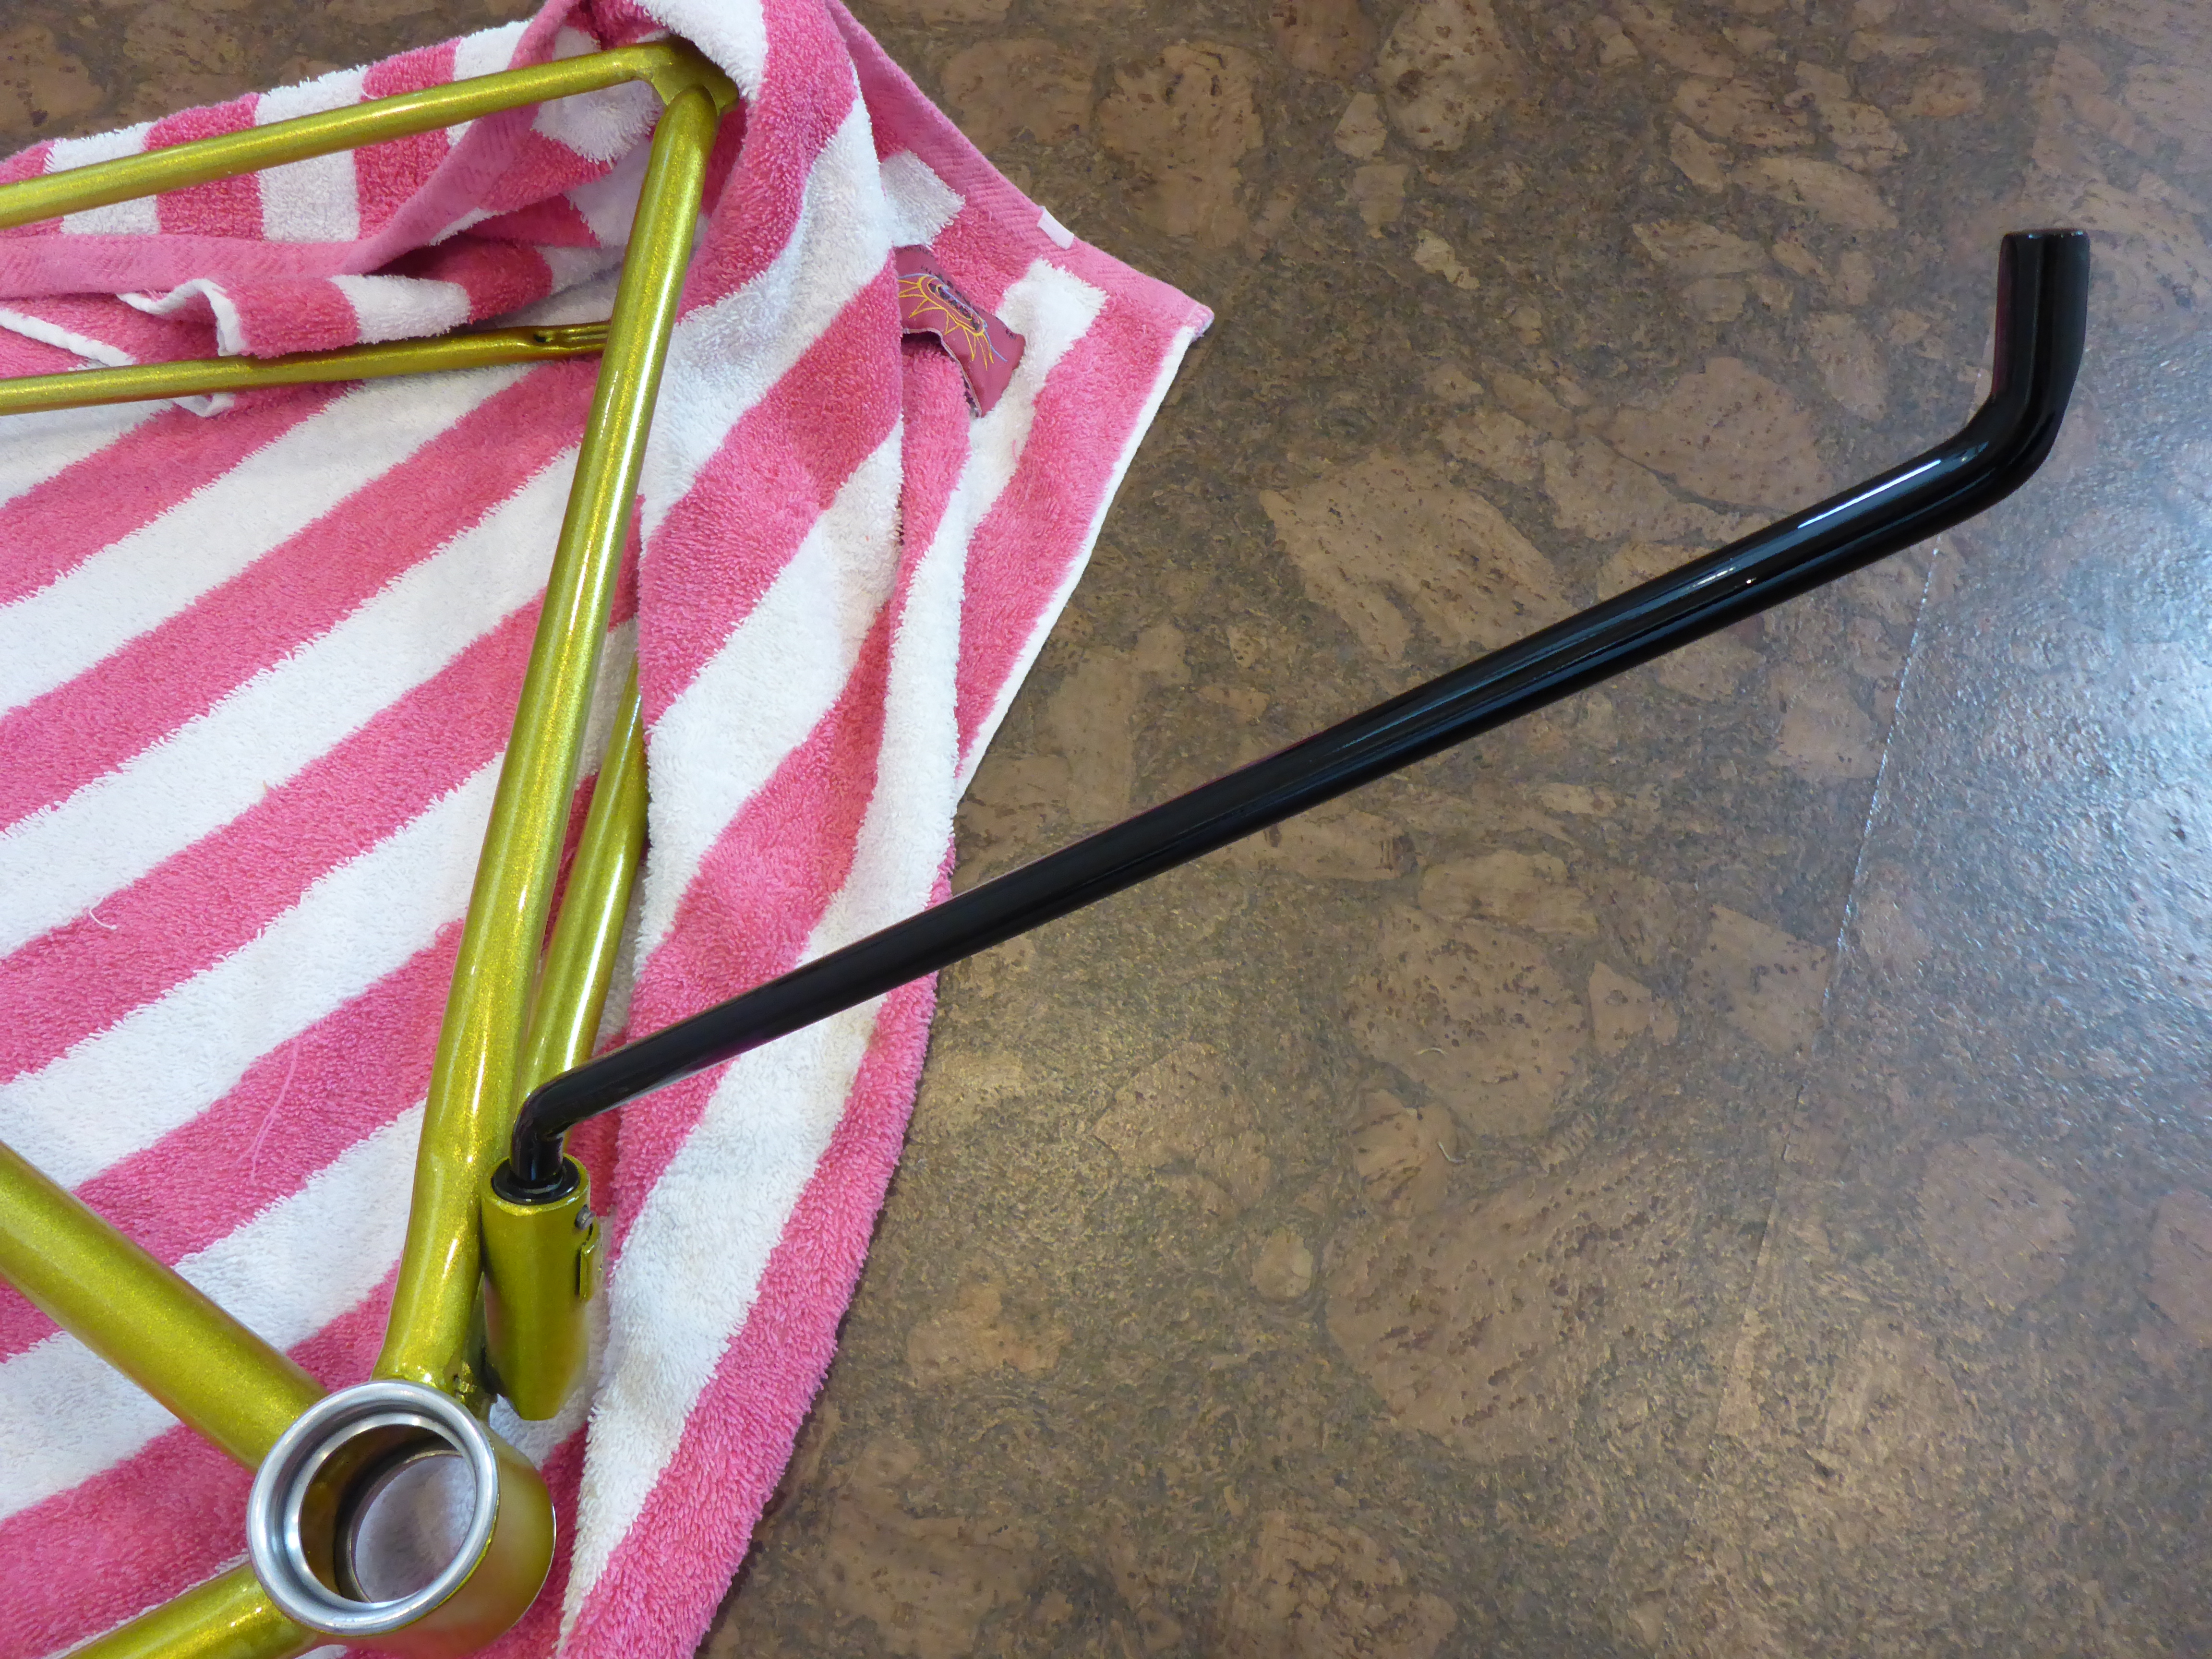
Let’s start with the frame. It’s the biggest piece that everything else pretty much sticks to so presumably the most important part and should get done first! One of the endearing qualities of the Schwinn Varsity model of the 1970s was that it had a smoothed weld joint up at the top front of the frame. I liked that transition; it flowed well. I wanted to replicate that smooth un-interrupted flow styling elsewhere on the bike and get rid of any visible weld seams.
Real simple delicate work: now ya see it, now ya don’t!
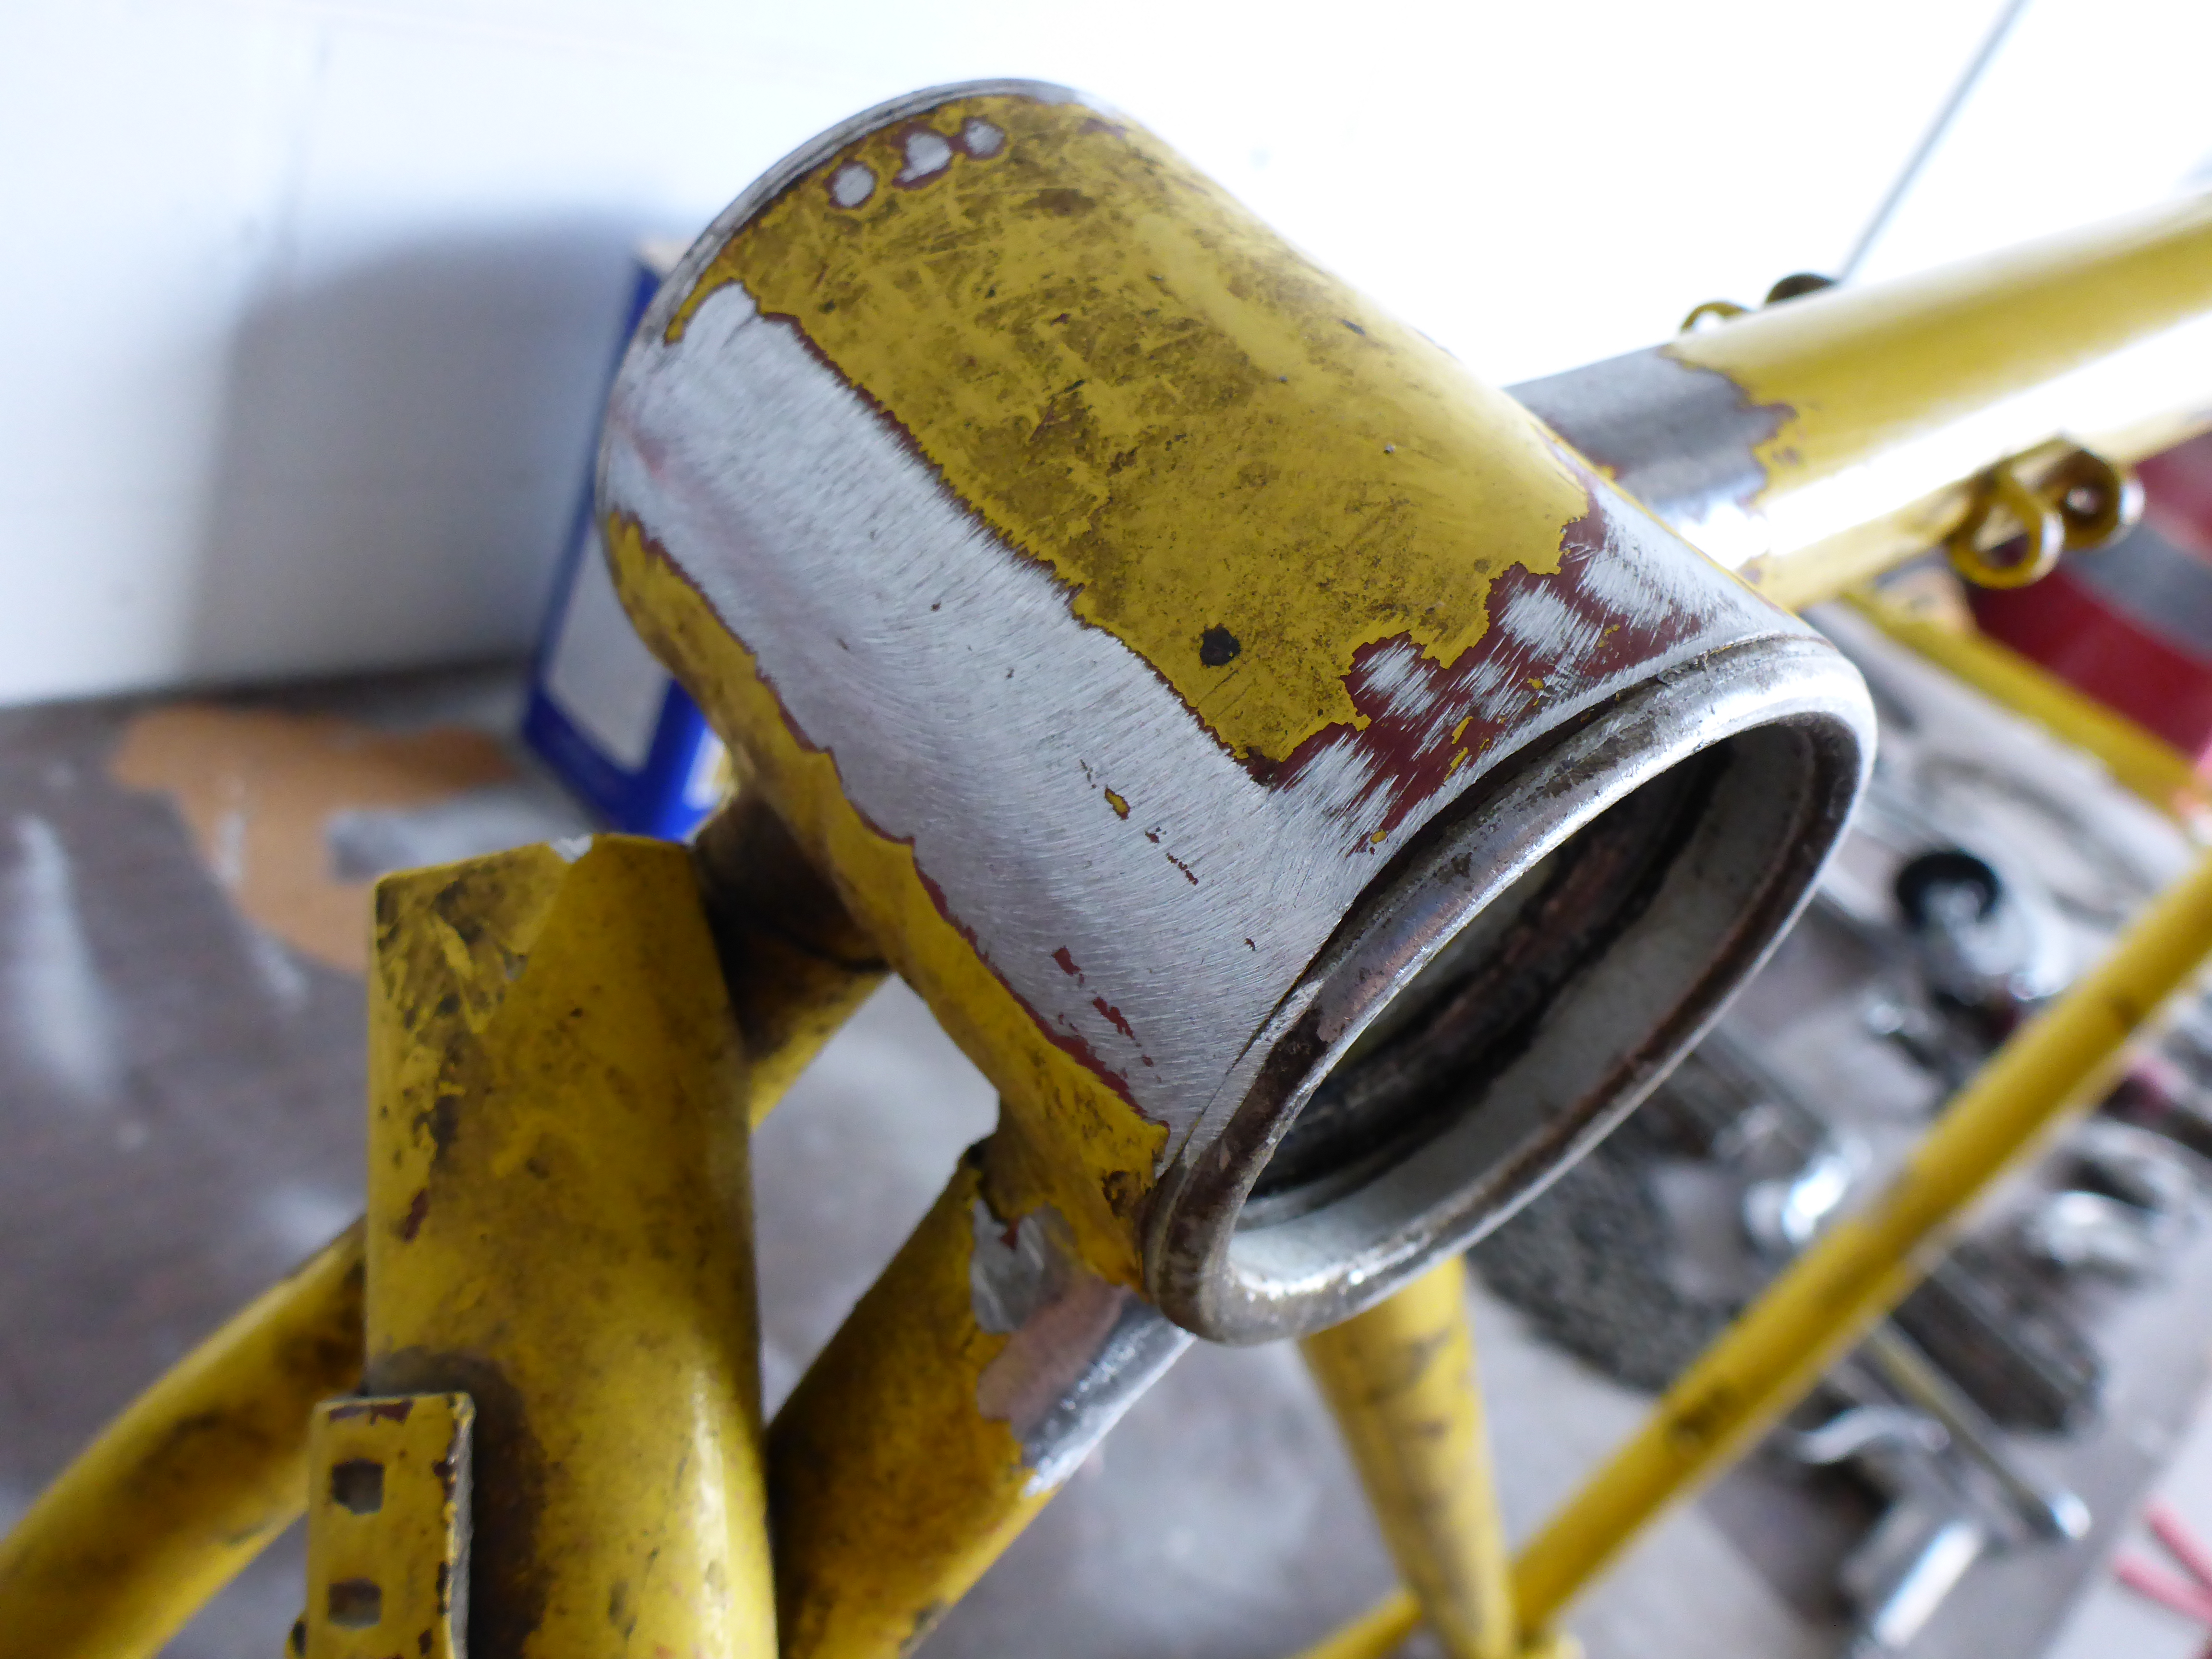
And in just a few other spots as well…

All righty! The frame is officially ready to be sent off for powder coating now. I didn’t know at the time that the bearing guides were simply pressed in and could be removed rather easily. Thankfully, my super amazing powdercoating team of Scott and Andrew over at Engine Armor Coatings had my back and removed them for me. Scott also happened to have a vintage bike laying around his shop for some time and, by doing this project for me, was inspired to complete his own restoration project. Thanks Uncle Pat for spreading the inspiration far and wide.

Once the frame was in the capable hands of Engine Armor, it was sandblasted to a smooth clean surface.
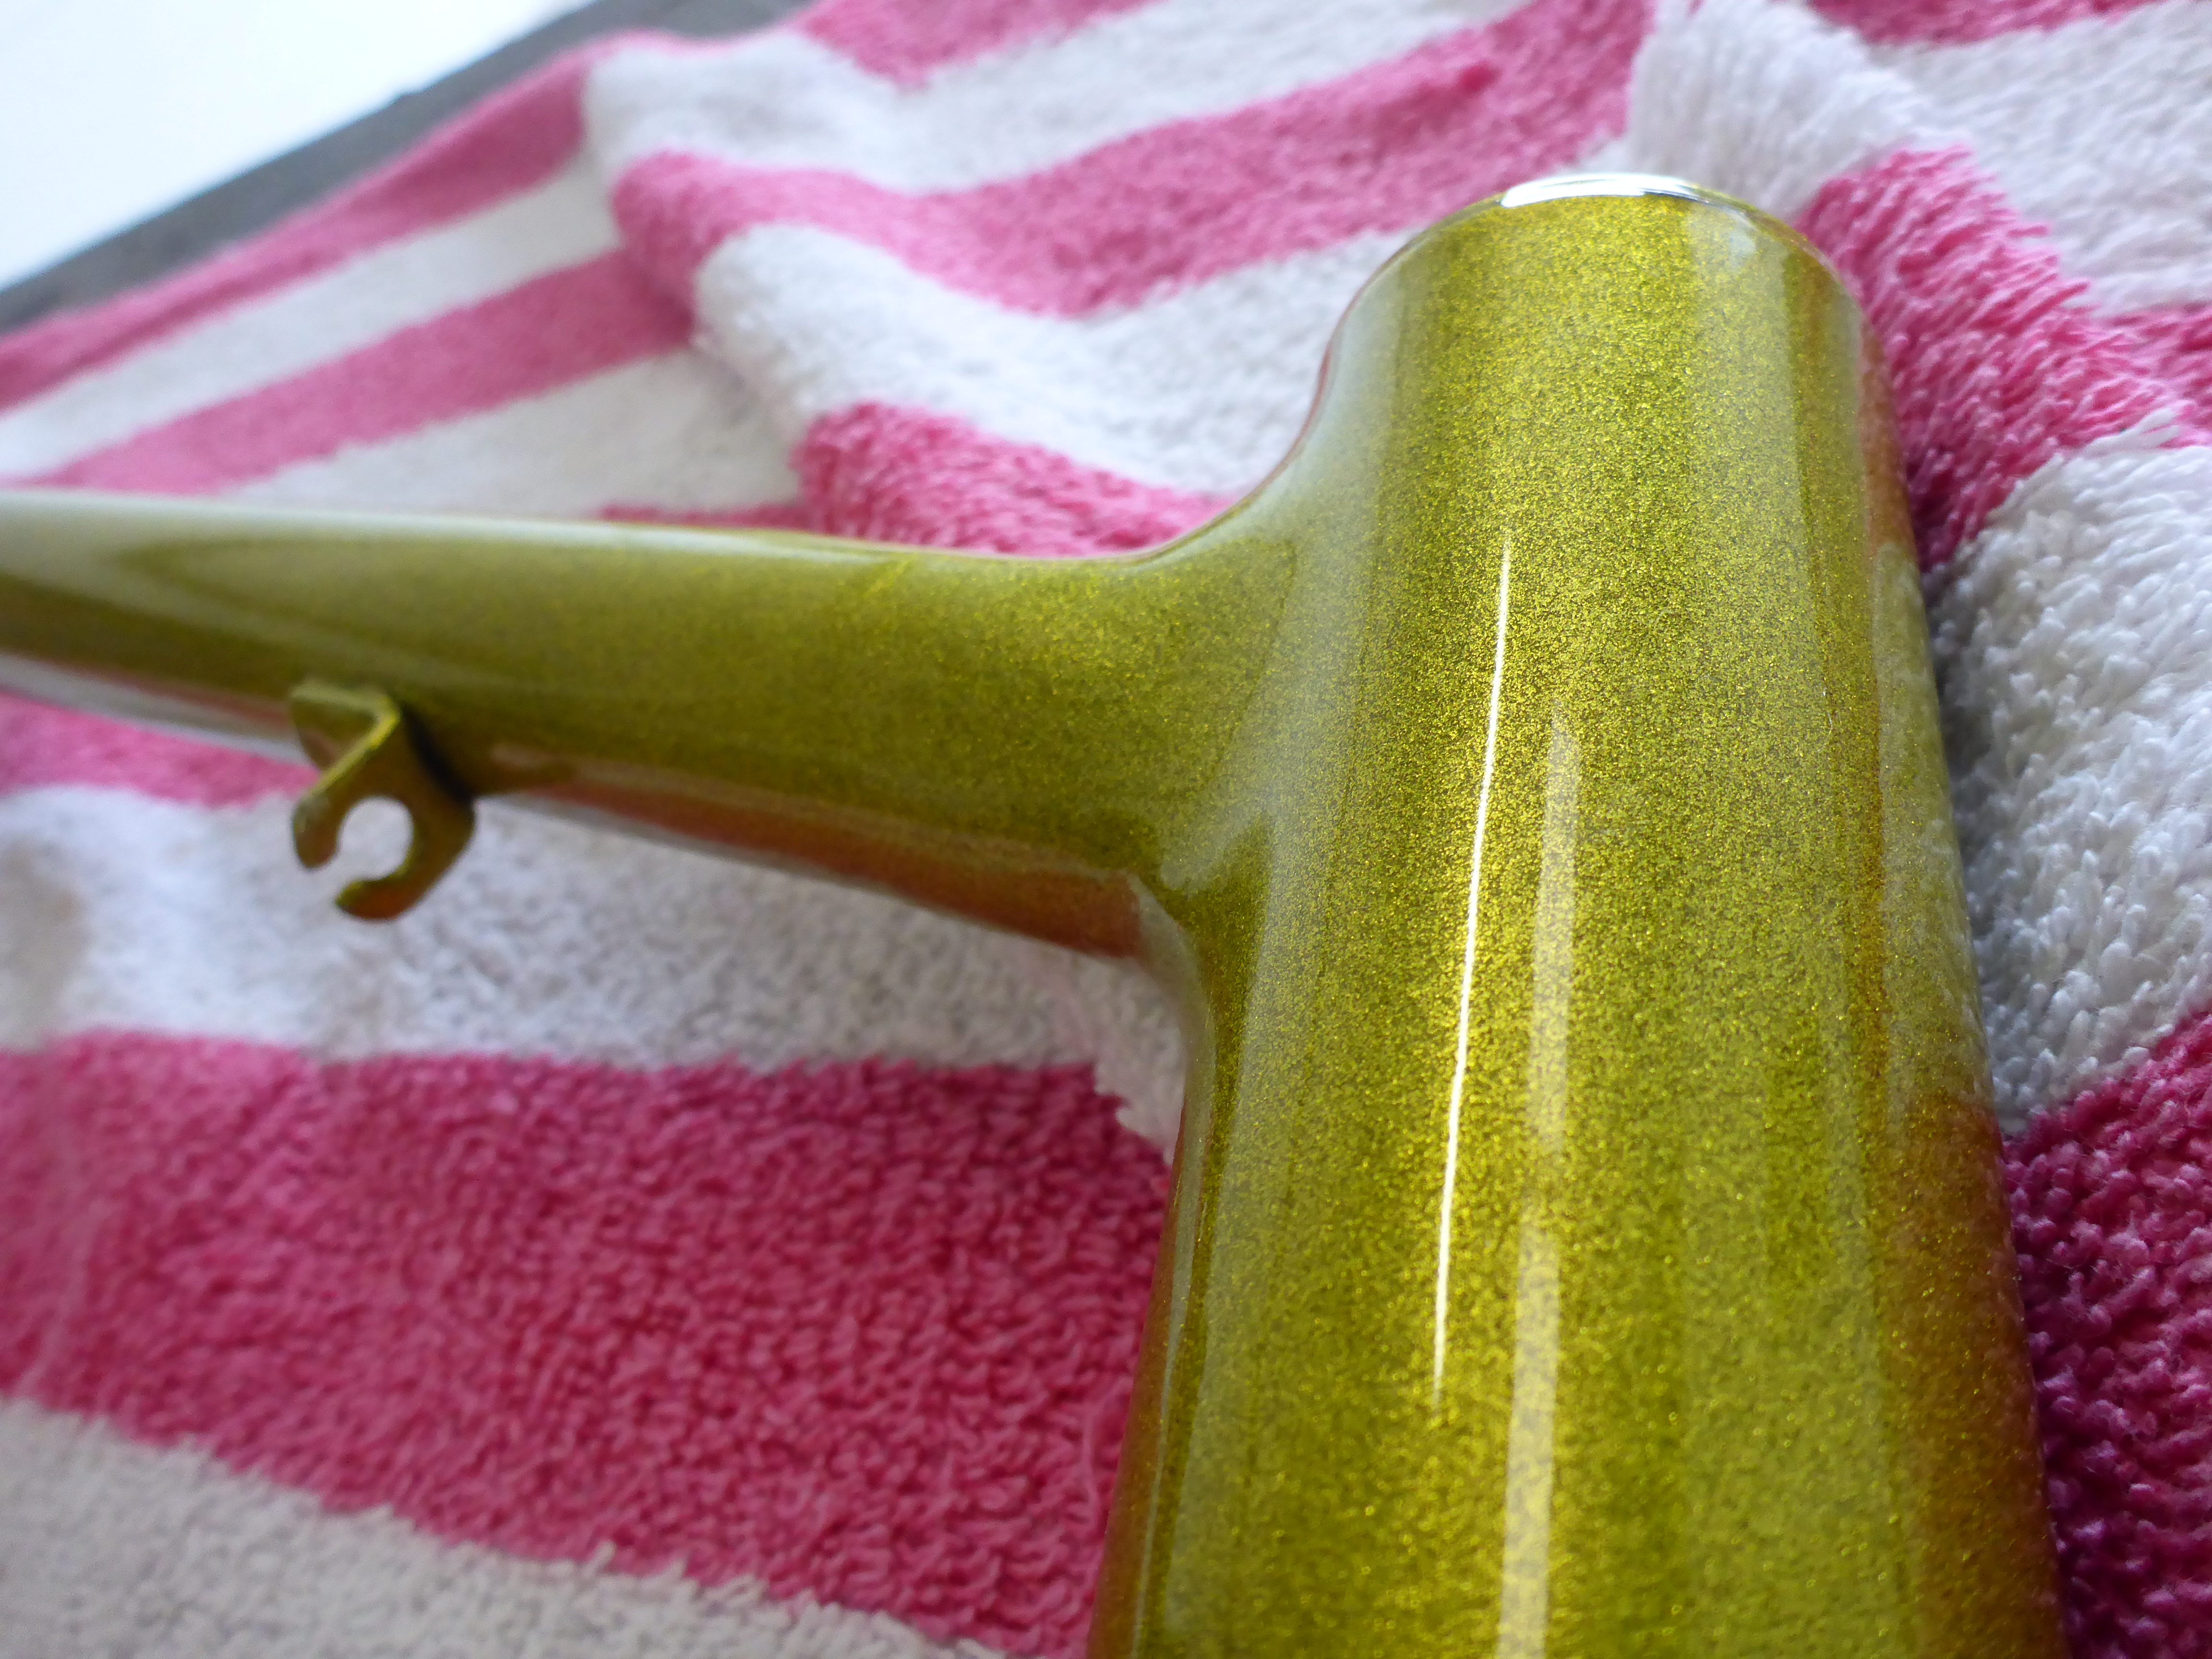
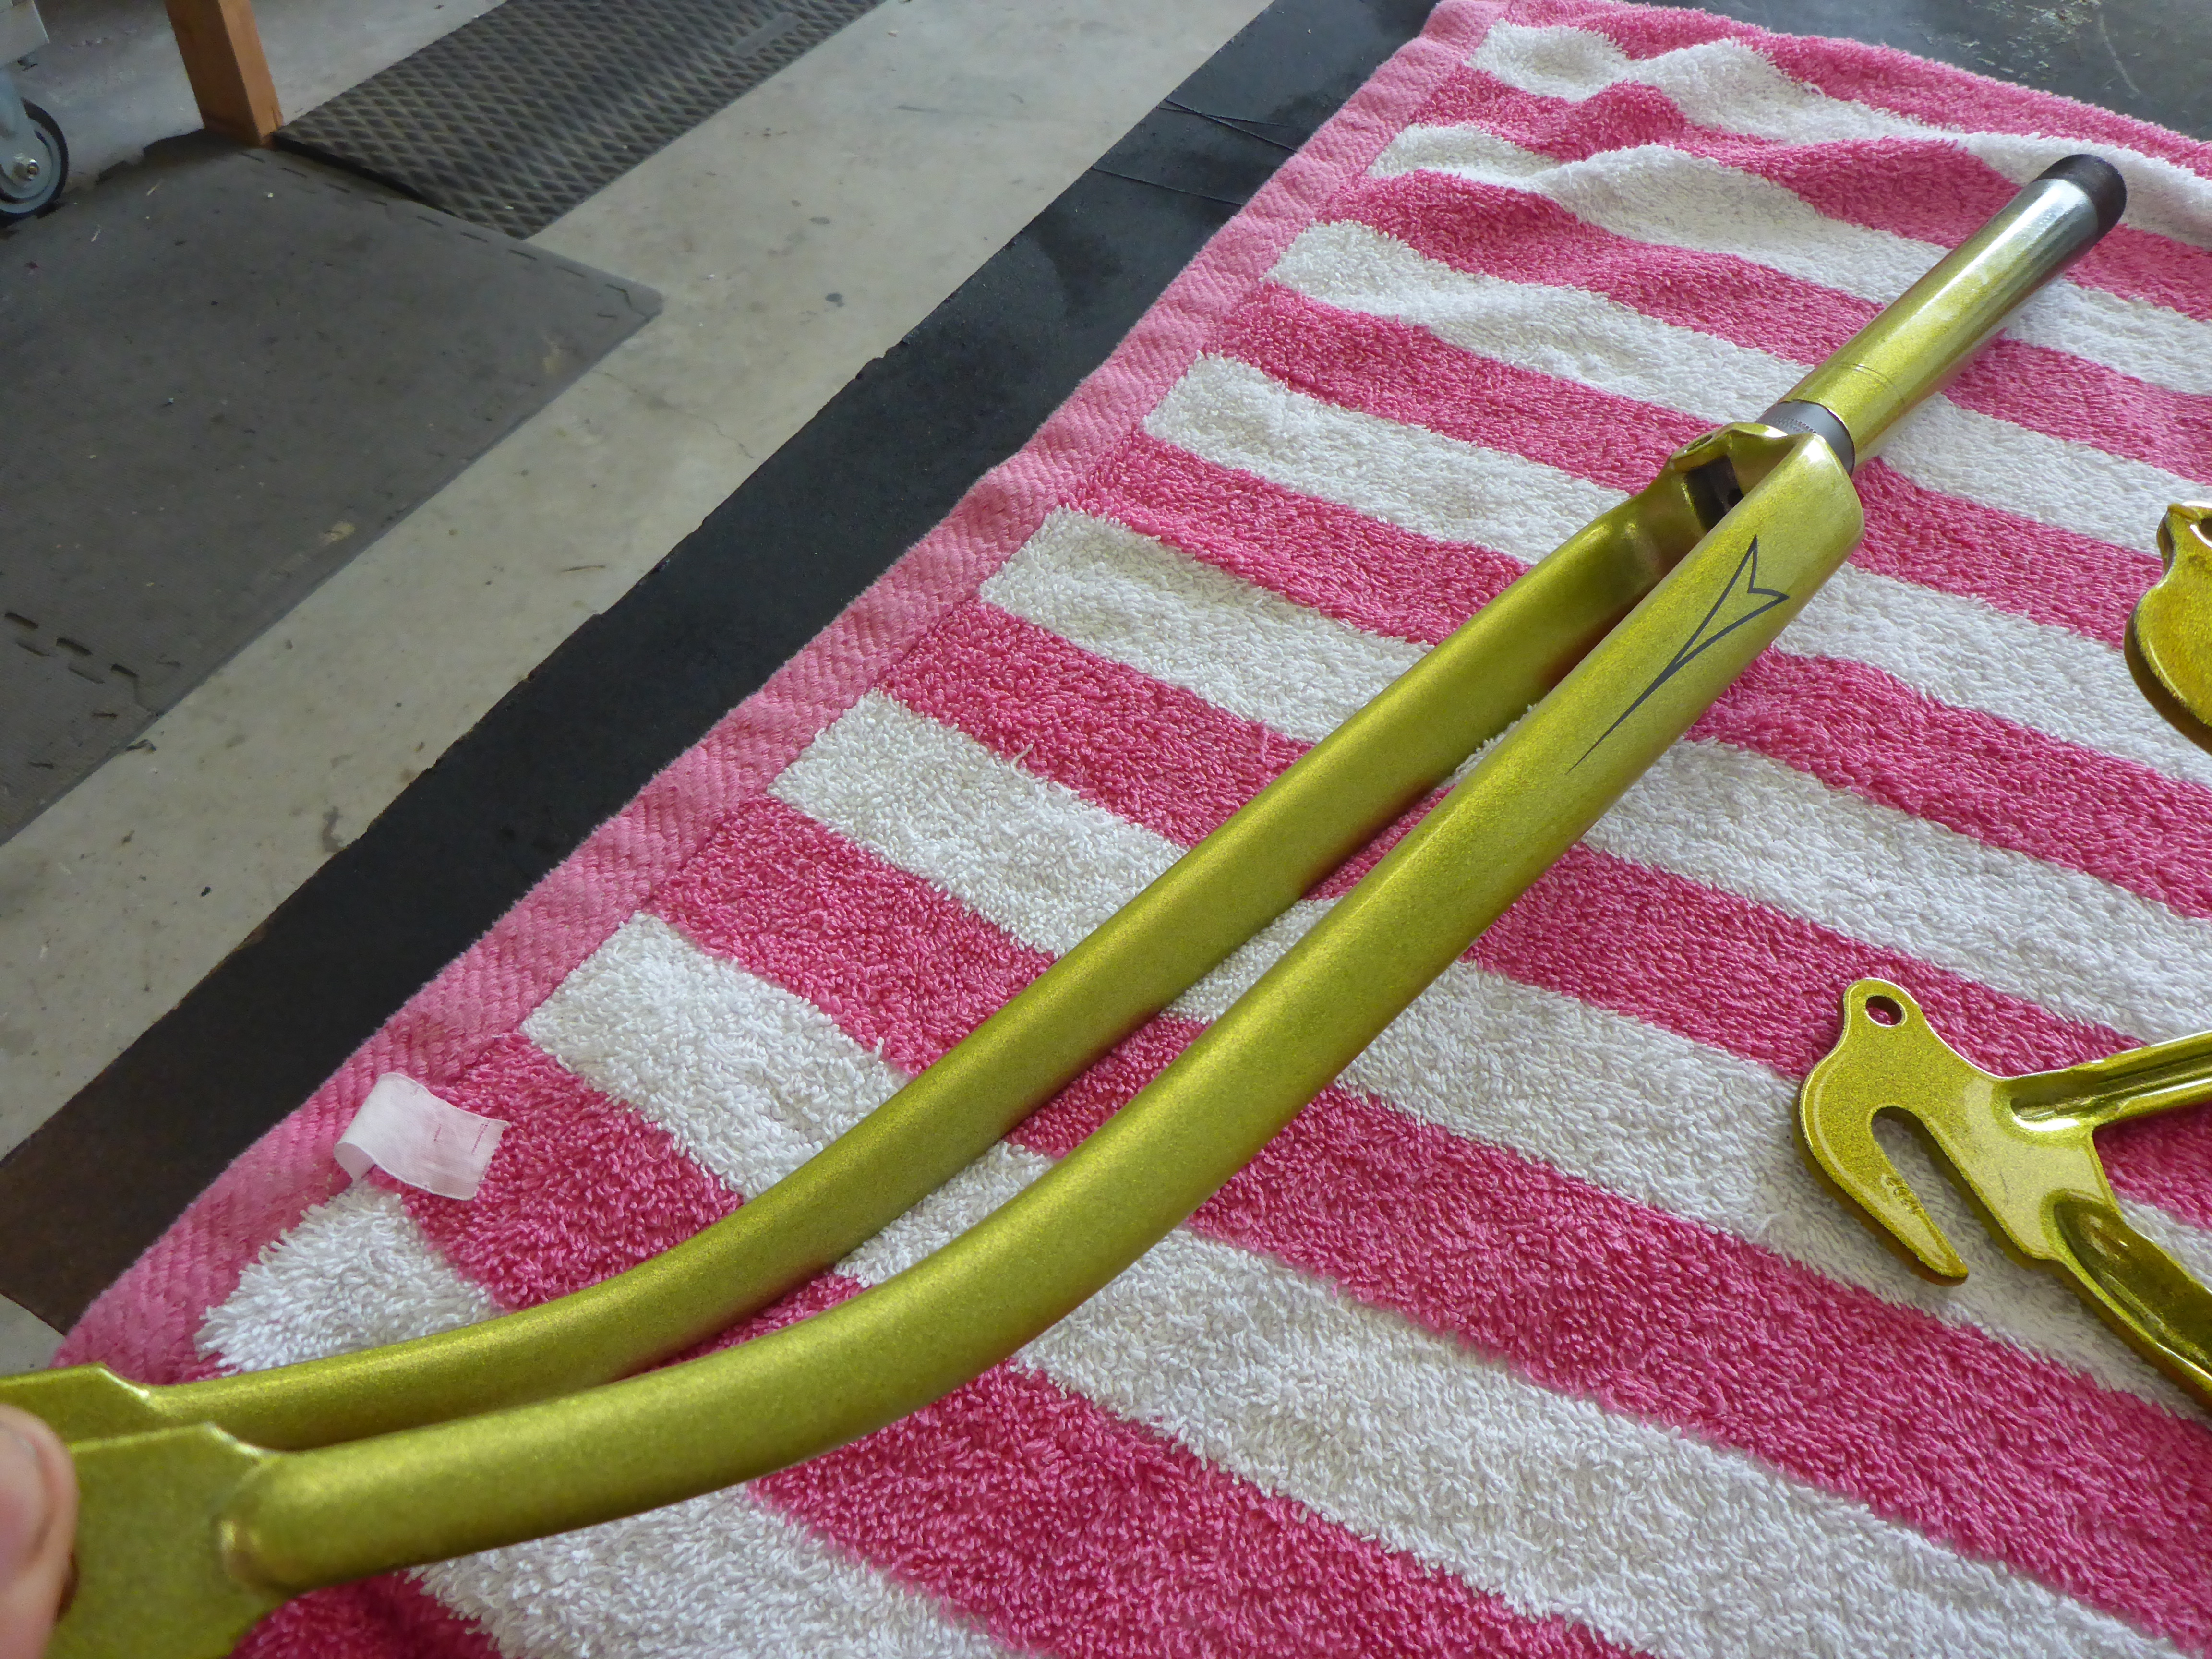
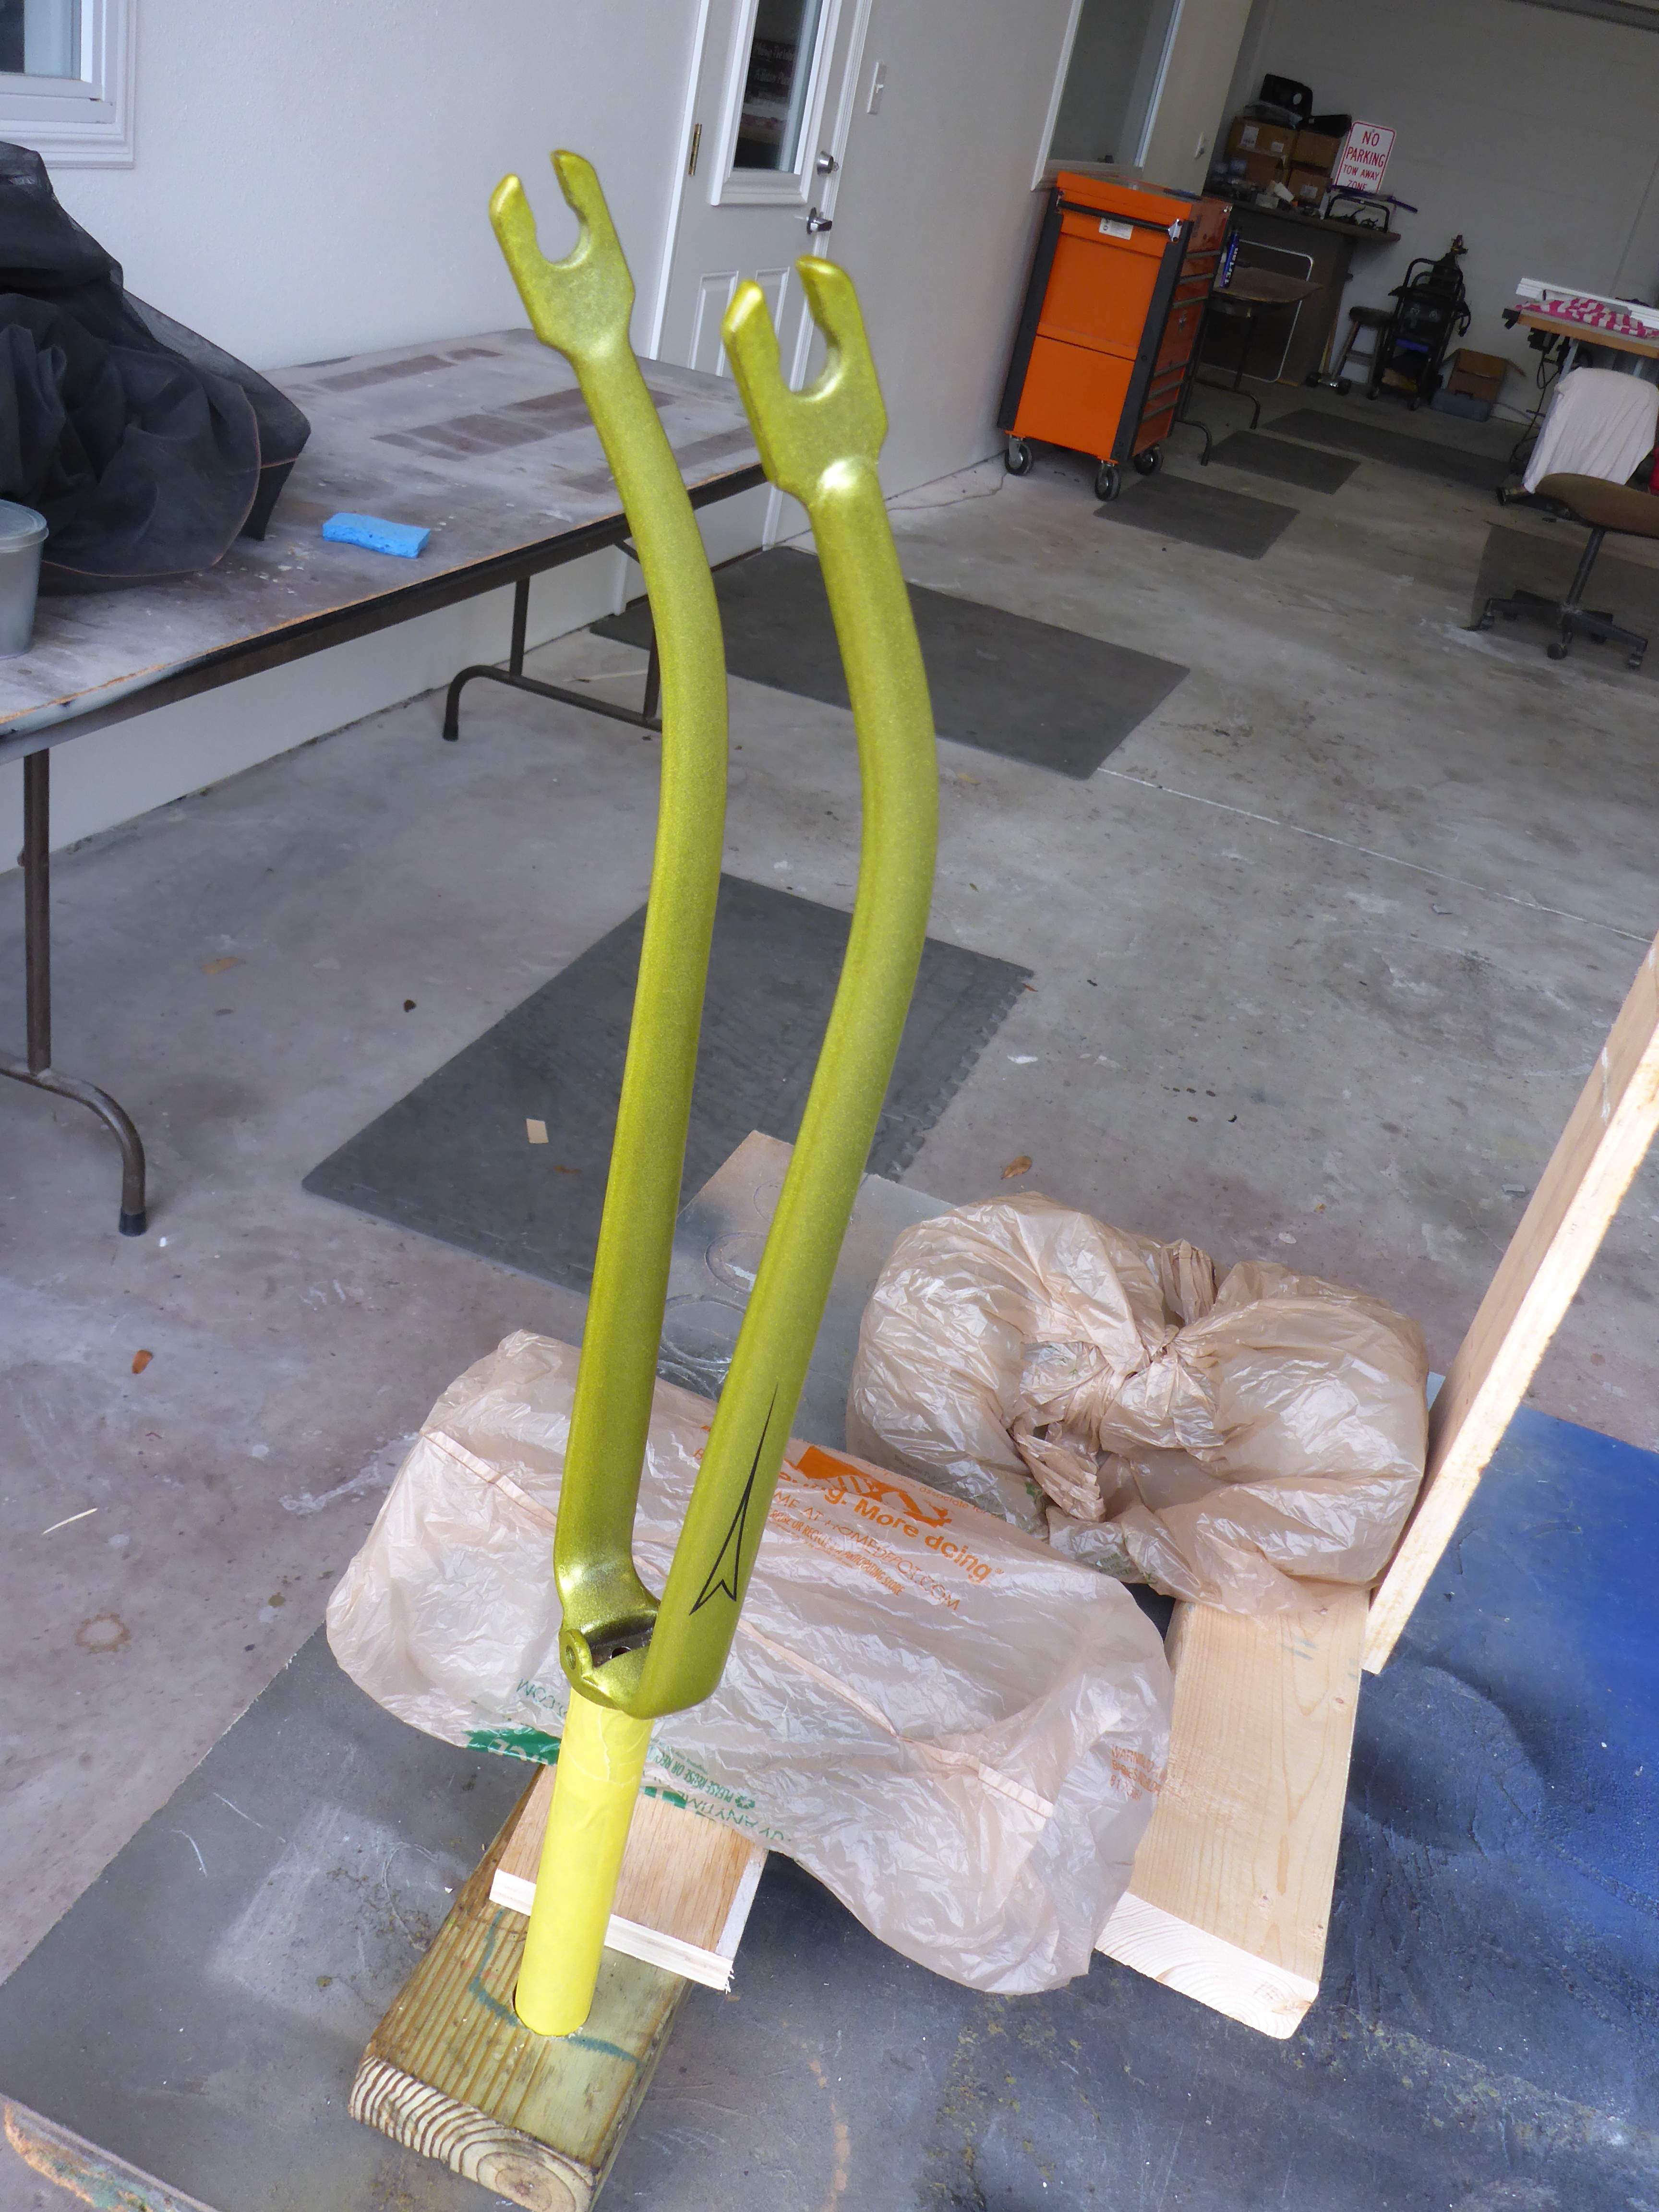
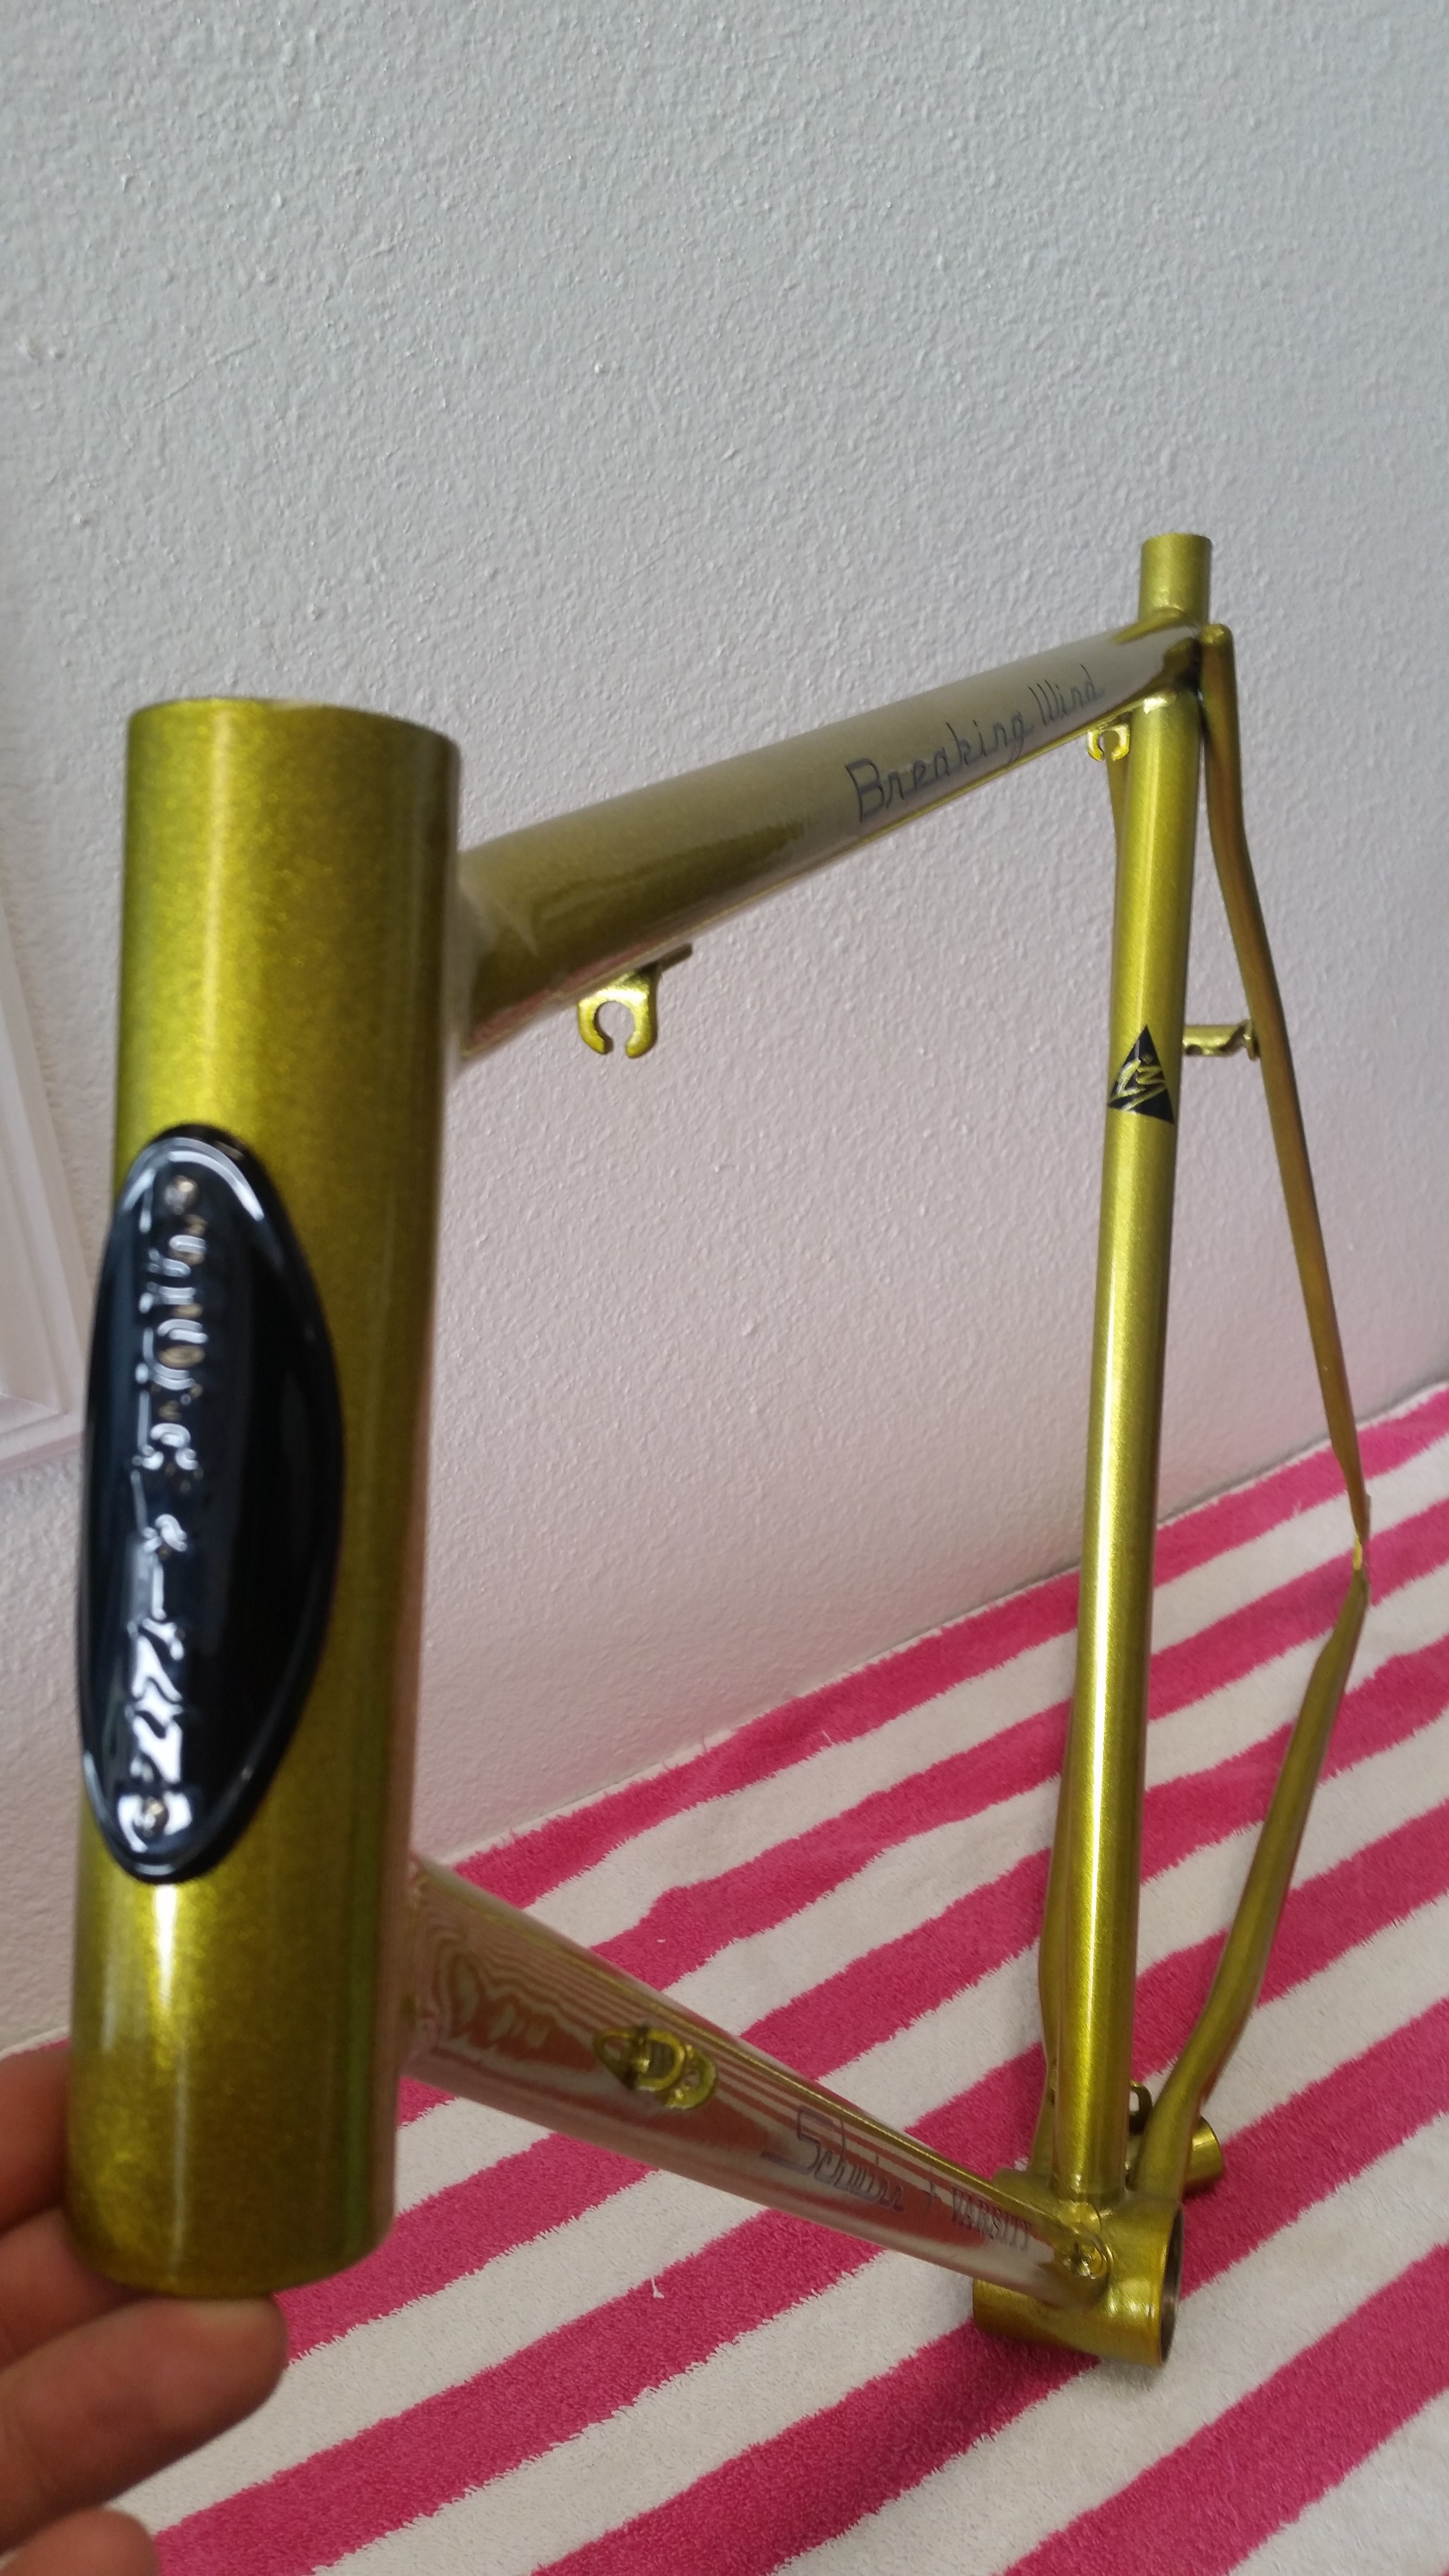
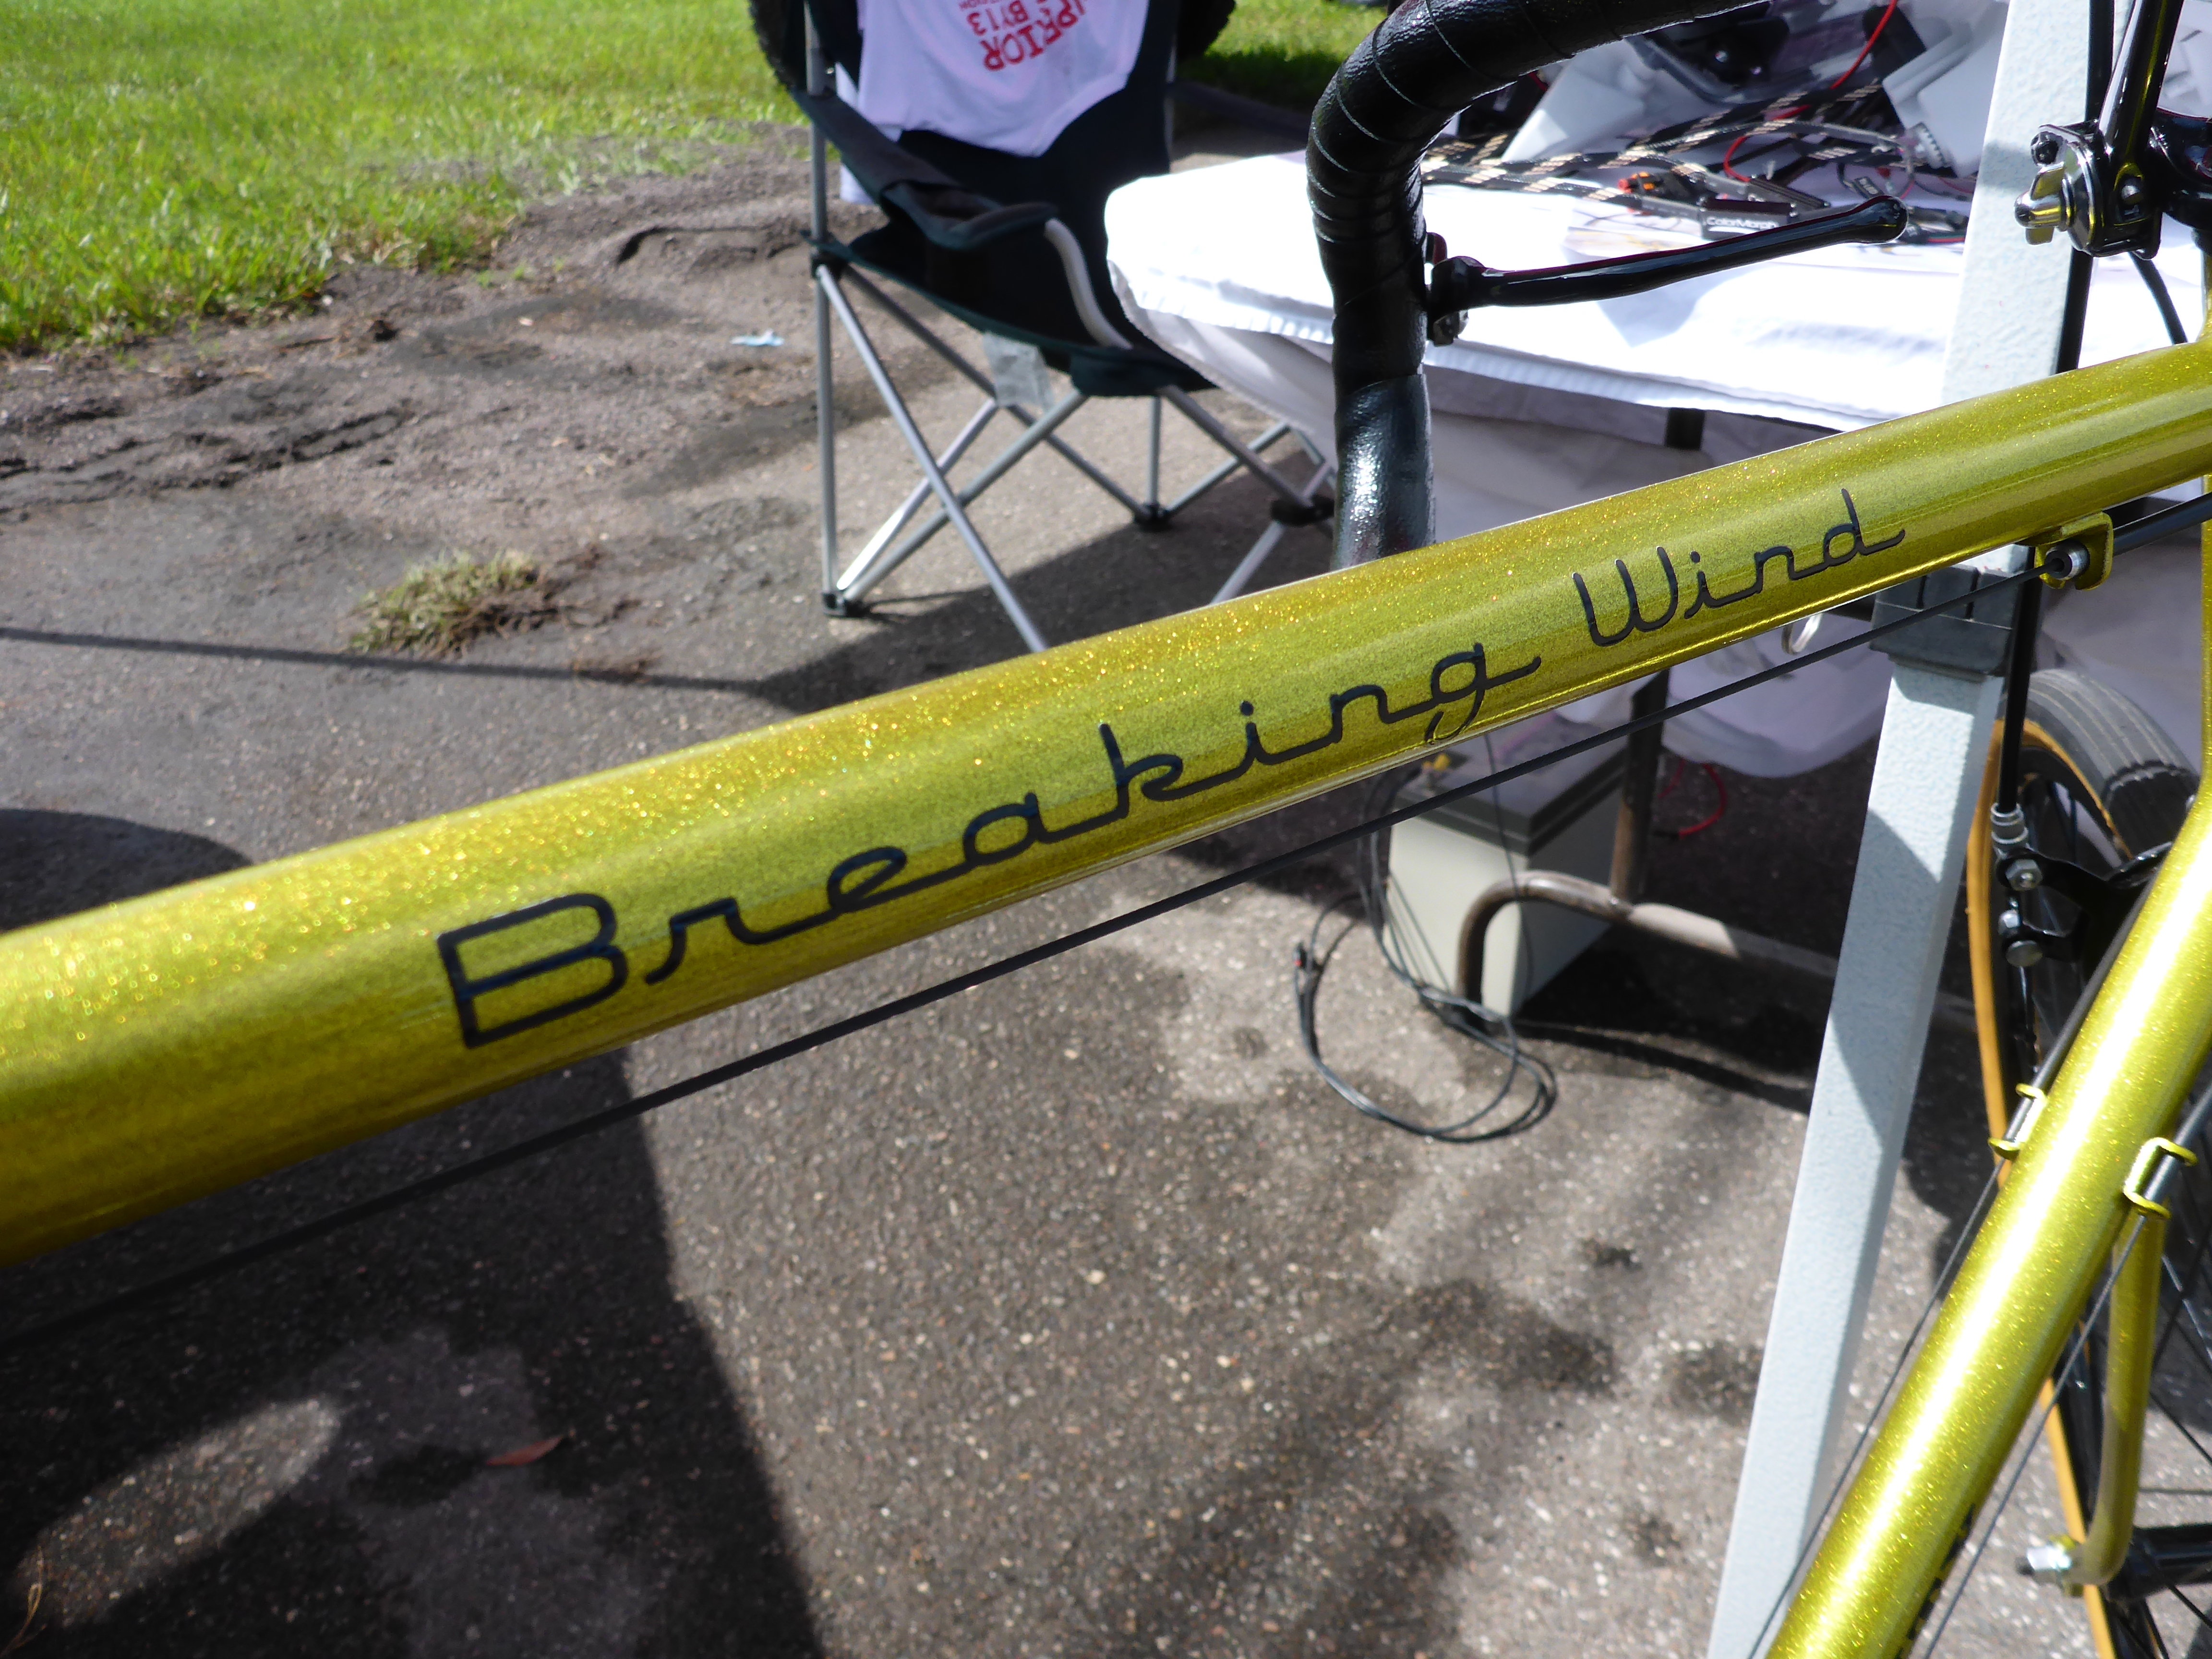
Time to talk about color selection! Selecting the final finish for this restoration was a several-week-long process complete with multiple samples and lengthy option discussions. I knew I wanted to stay yellow. Partially because the whole ‘staying true to the original’ concept. But also partially because “black stripe, yellow paint, them niggas scared of it, but them hoes ain’t” …. Wiz Khalifa terrible rap song reference, maybe you get it? Black and yellow, black and yellow was the official color scheme (and melodic chant) of this build. I knew I wanted to do a sparkly metallic finish: something that would catch eyes and warrant careful attention. Turns out that a yellow metal flake finish in powder is something of a unicorn. There were few options available and absolutely none of them were acceptable. One was too gold and the other reminded me of a fluorescent yellow highlighter. So Andrew proposed a fantastic brilliant solution: a silver base coat with a silver flake top coat with a yellow-tinted clear over all of that. Remember, all of this was done with powder, not paint! Powder coating electrically charges the pieces so that the finish is evenly smooth and utilizes a heat curing process so that the final product has a baked-on durable finish. The result was stunning and precisely what I wanted.
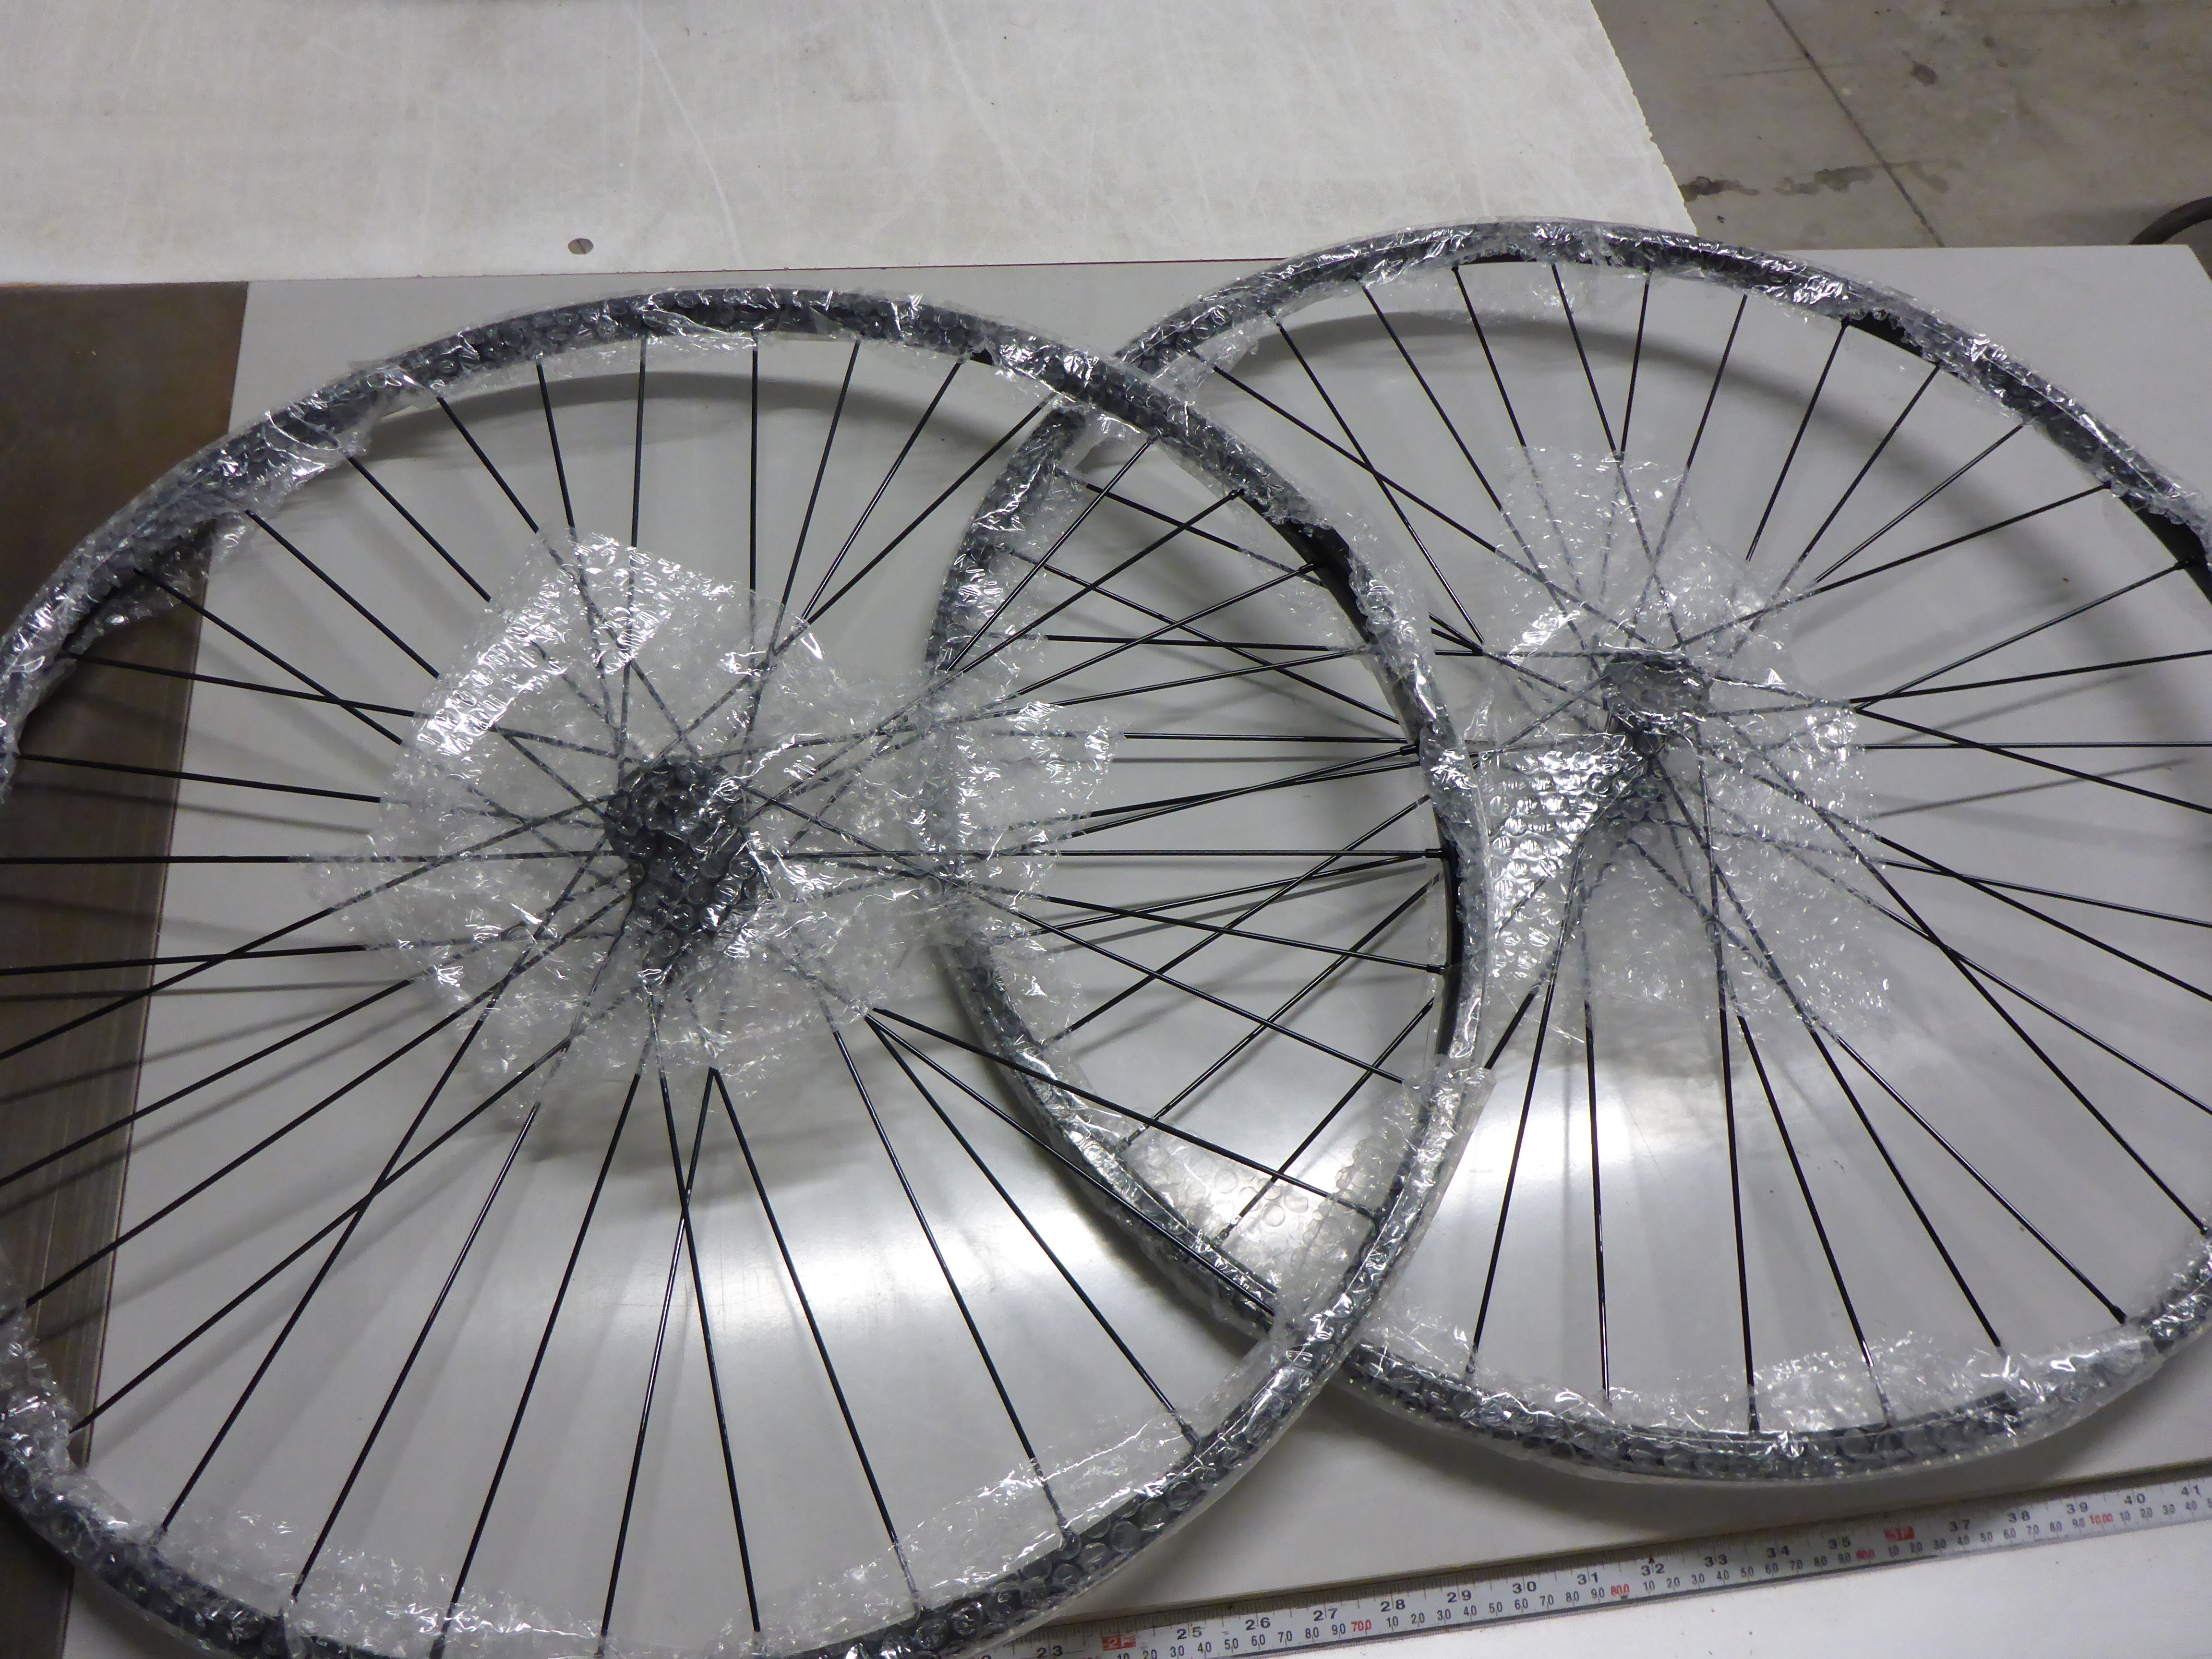
Bringing home a beautiful bubble wrapped surprise:
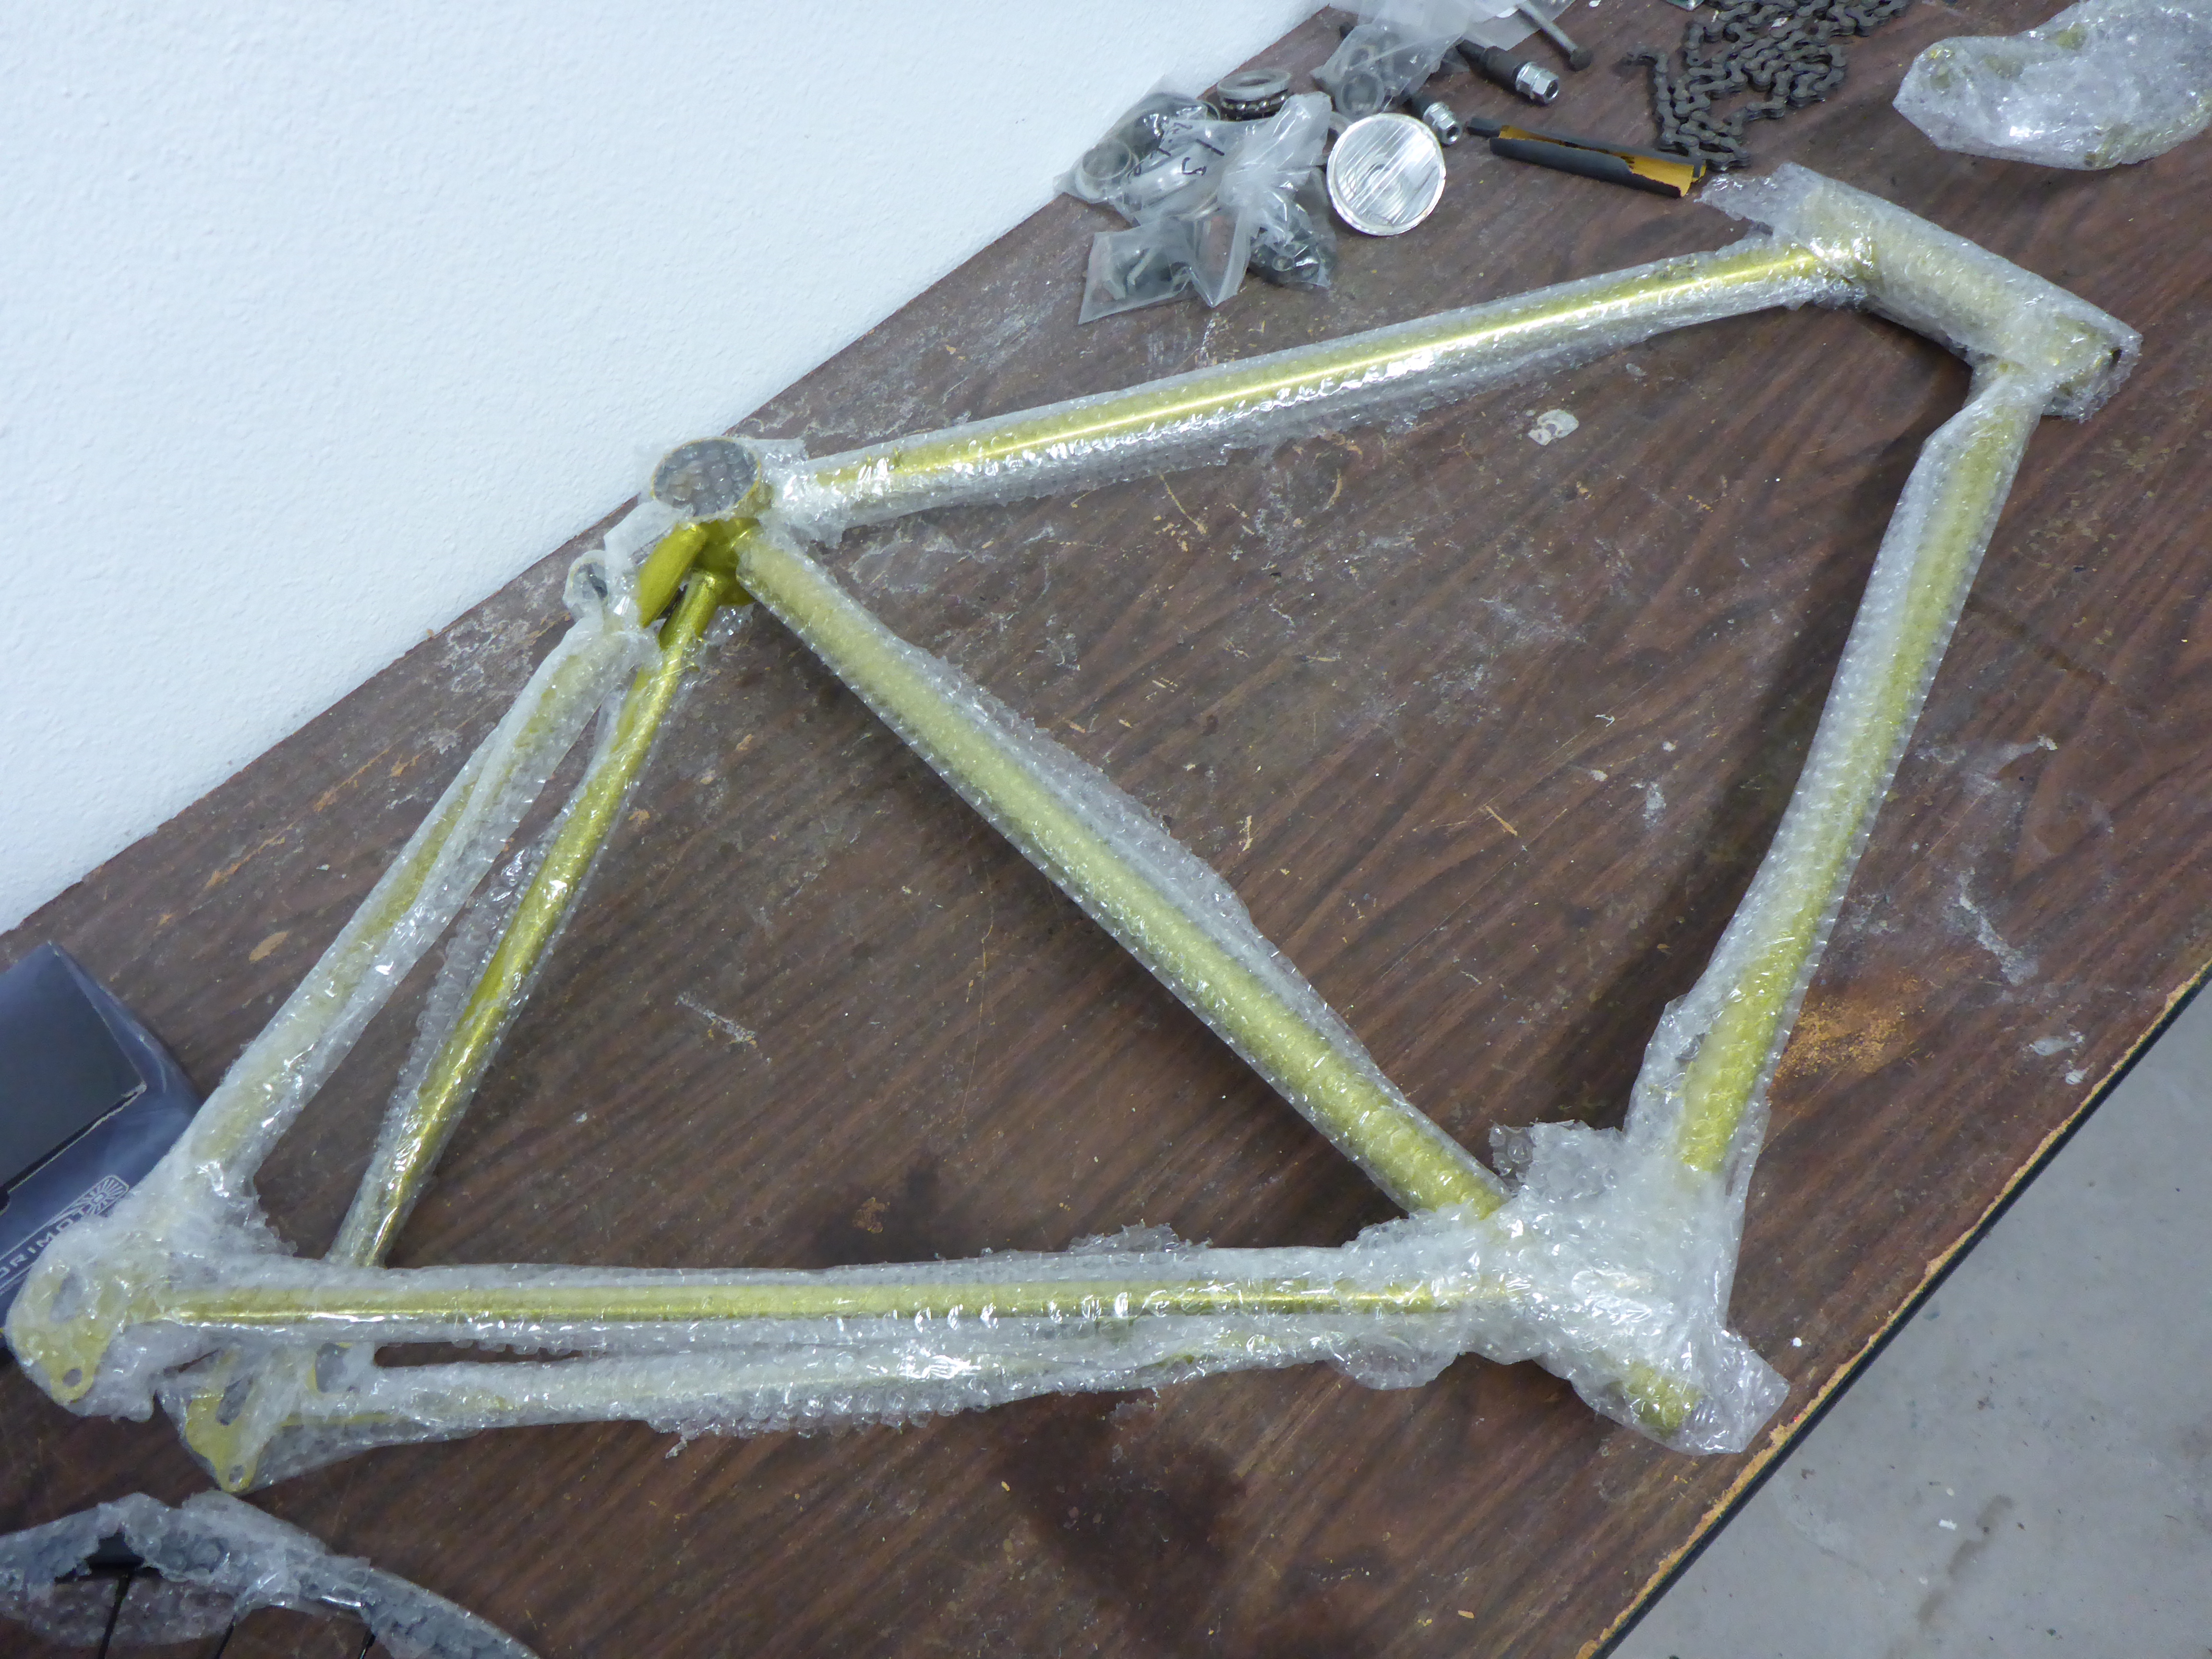
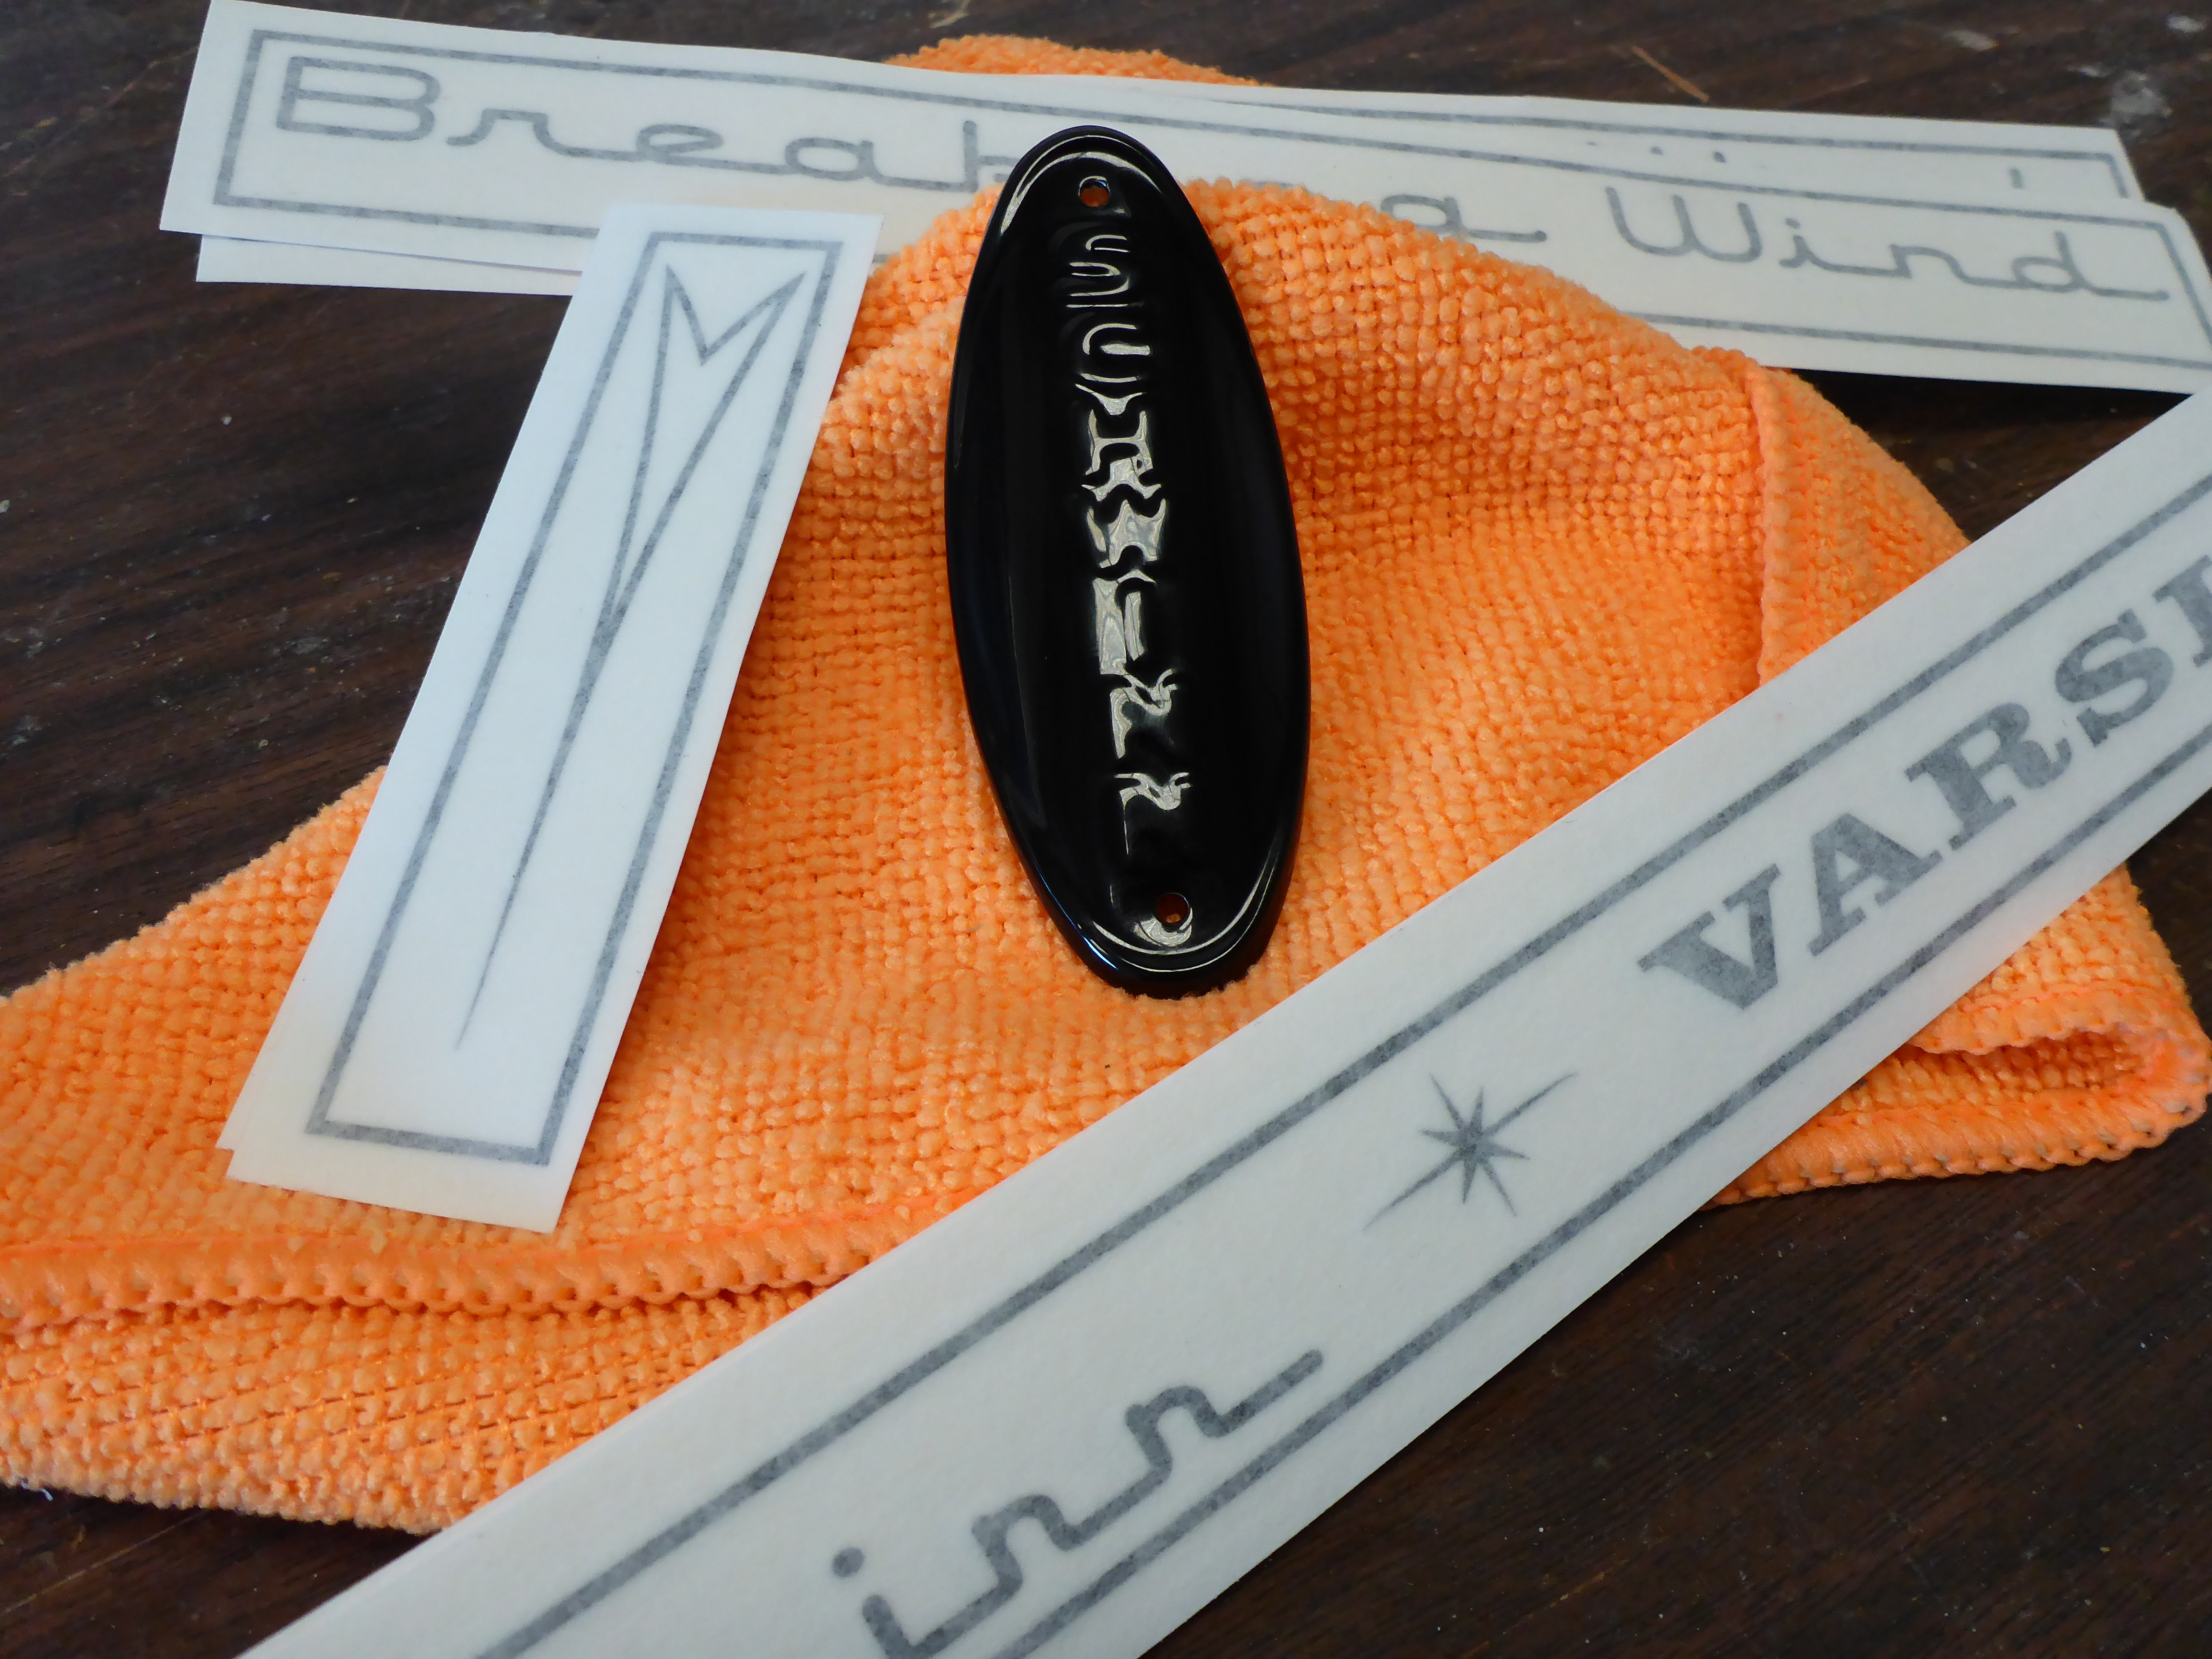
Now to scuff up this flawless surface and apply some vinyl cut decals that I designed on the computer.
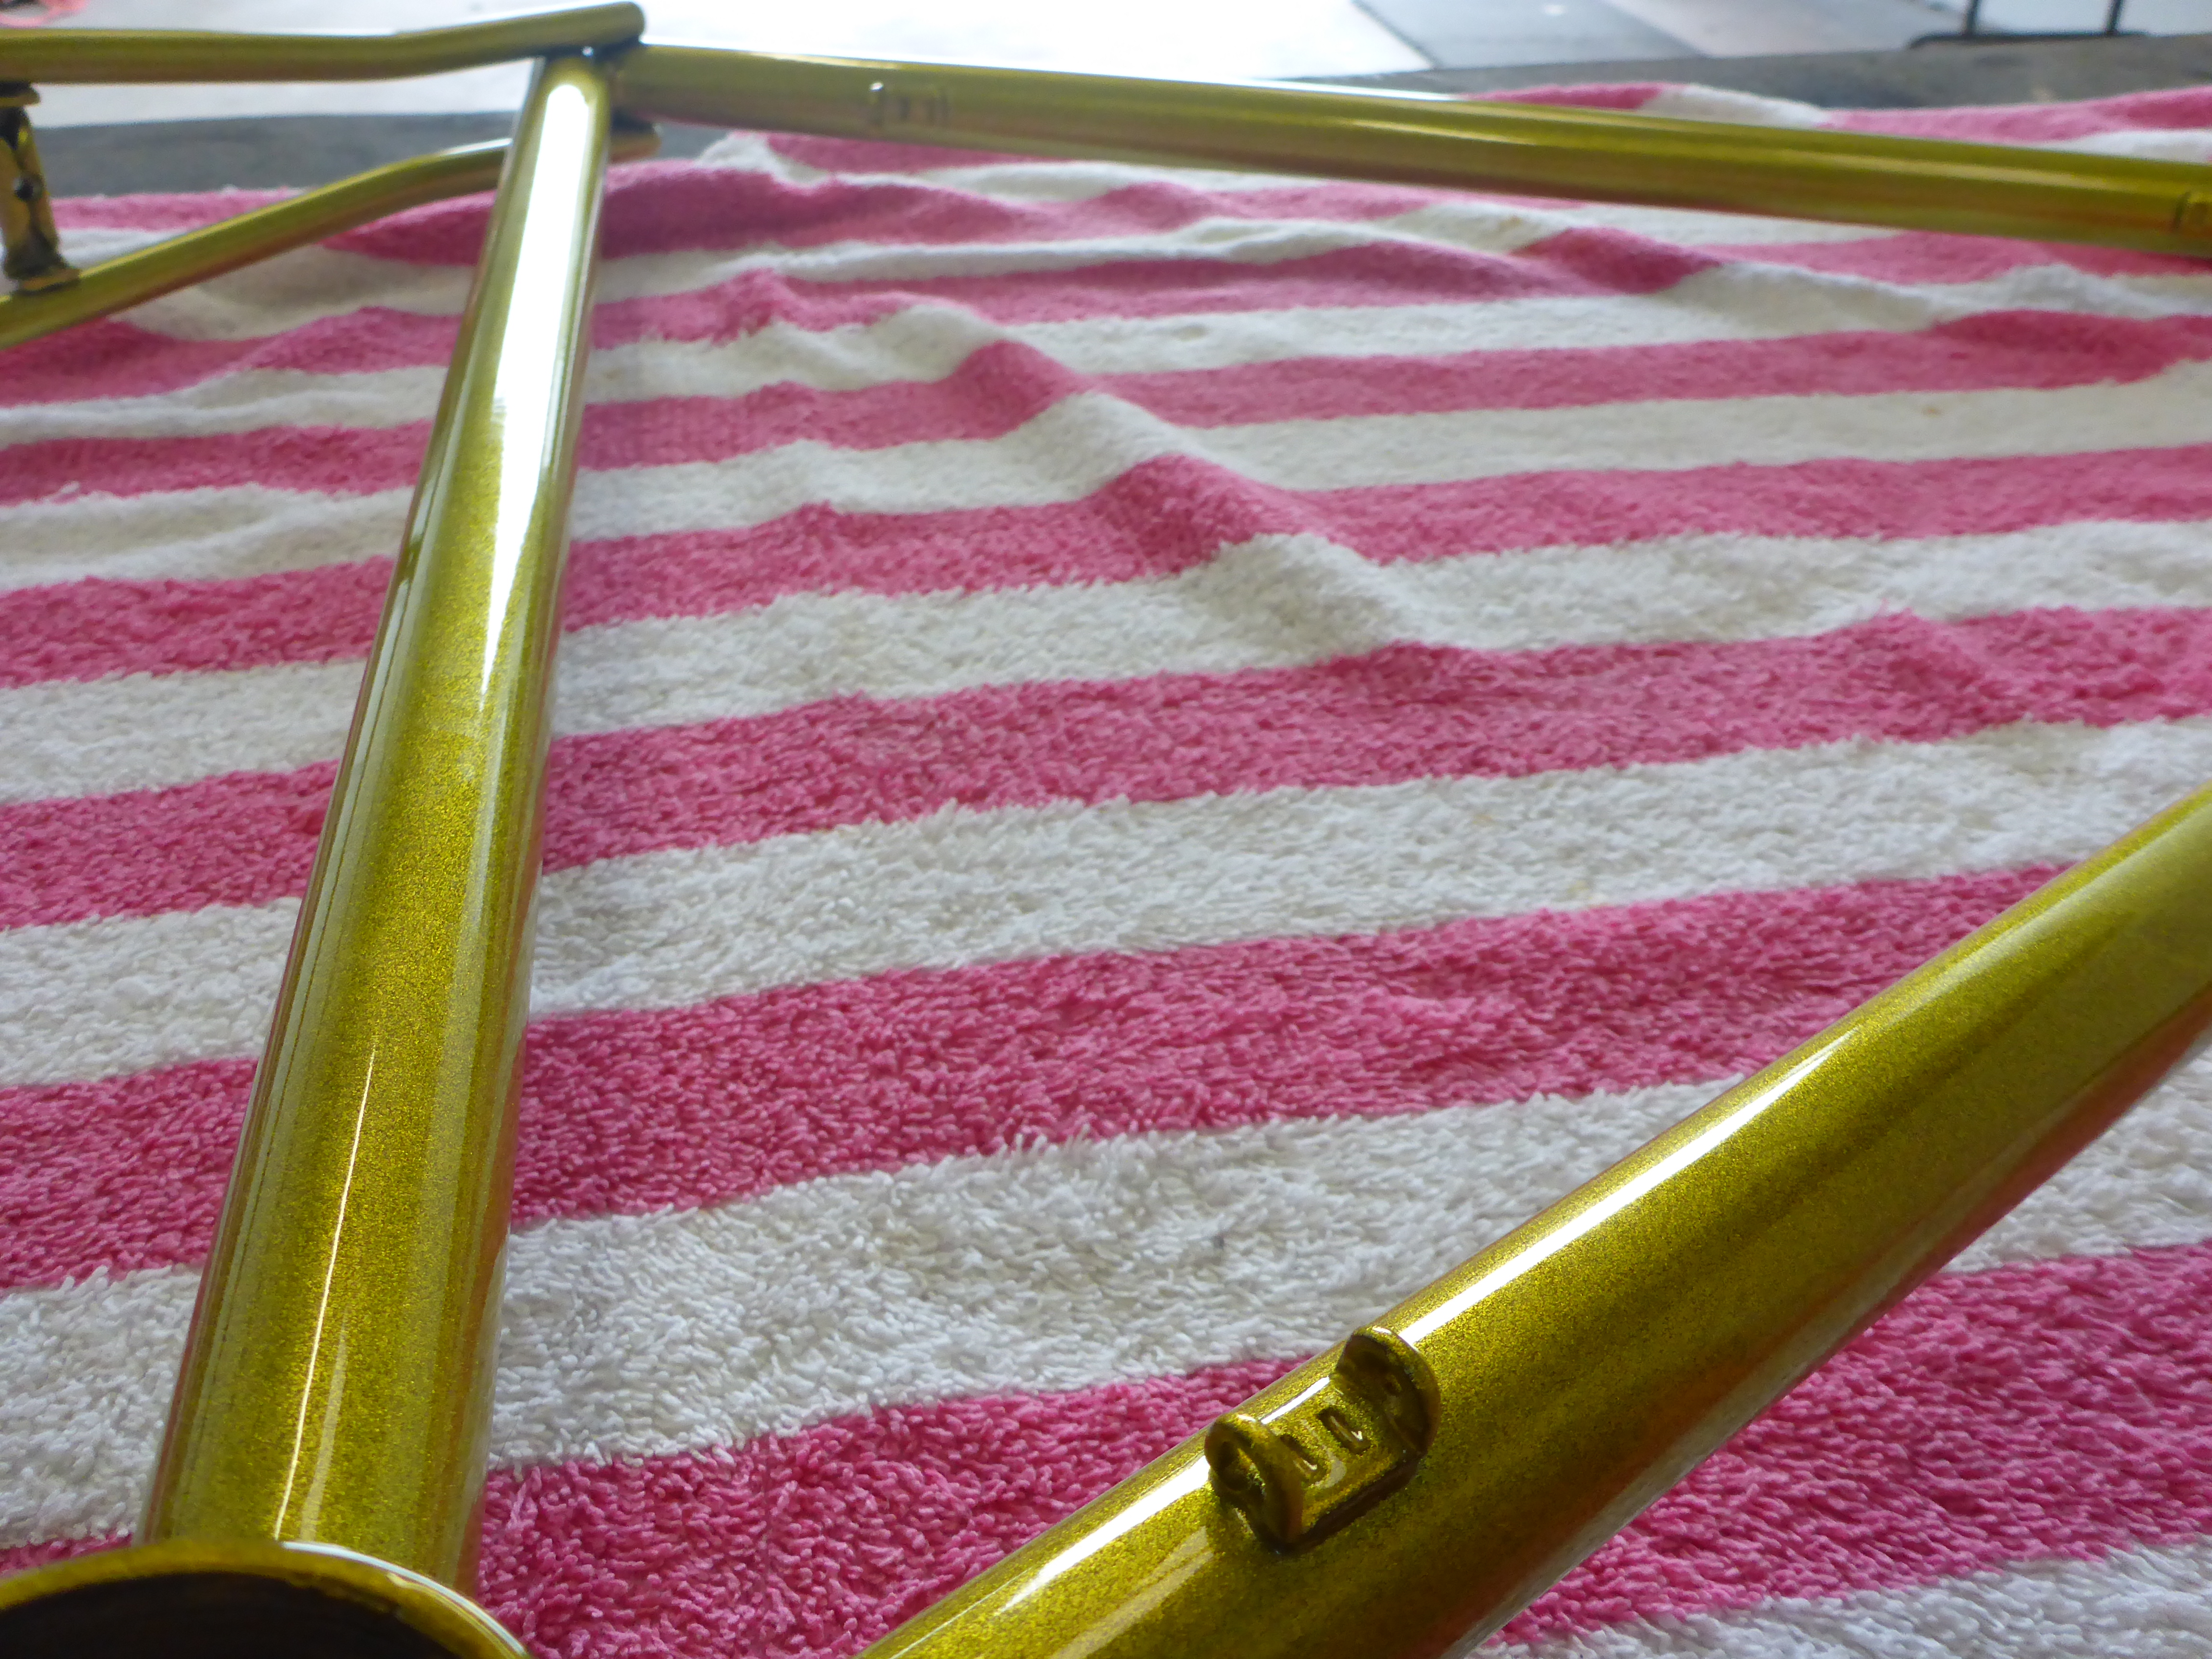
A jig was made to apply automotive grade clear coat. This added layer provides additional depth to the sparkle in the finish, adds a repairable buffer zone against chips/nicks, and, most importantly, seals the pin striping to the frame.
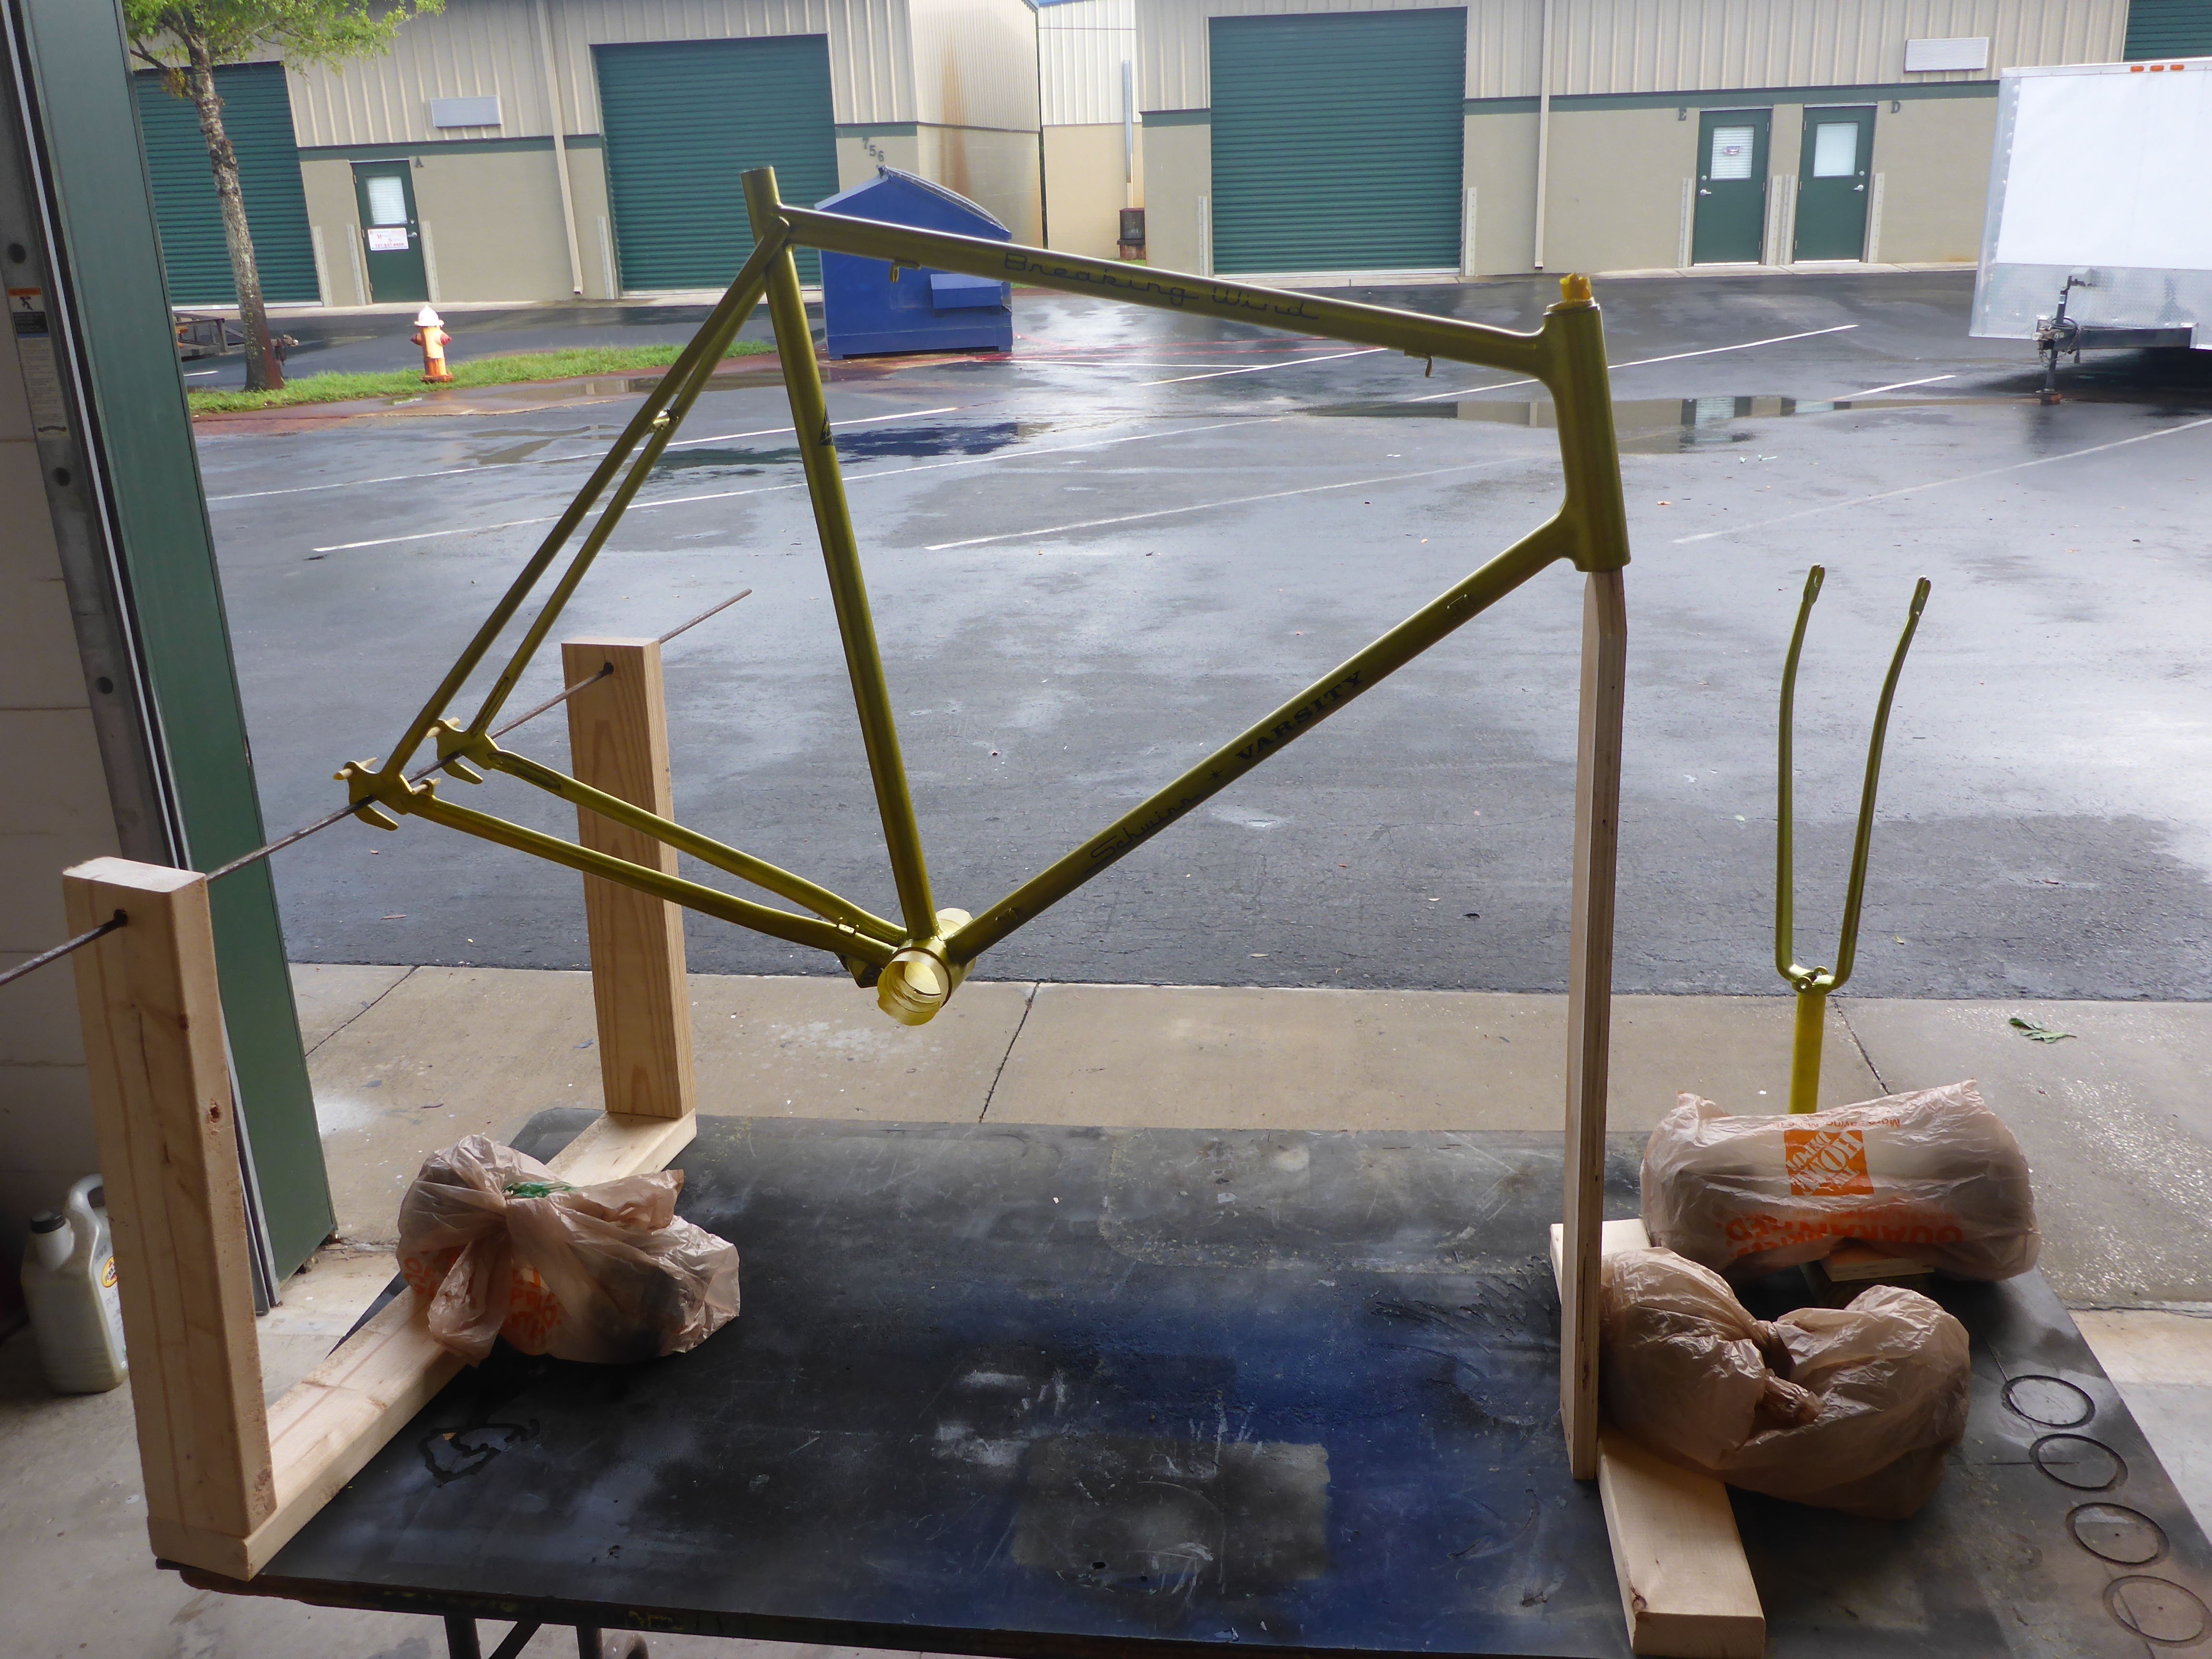
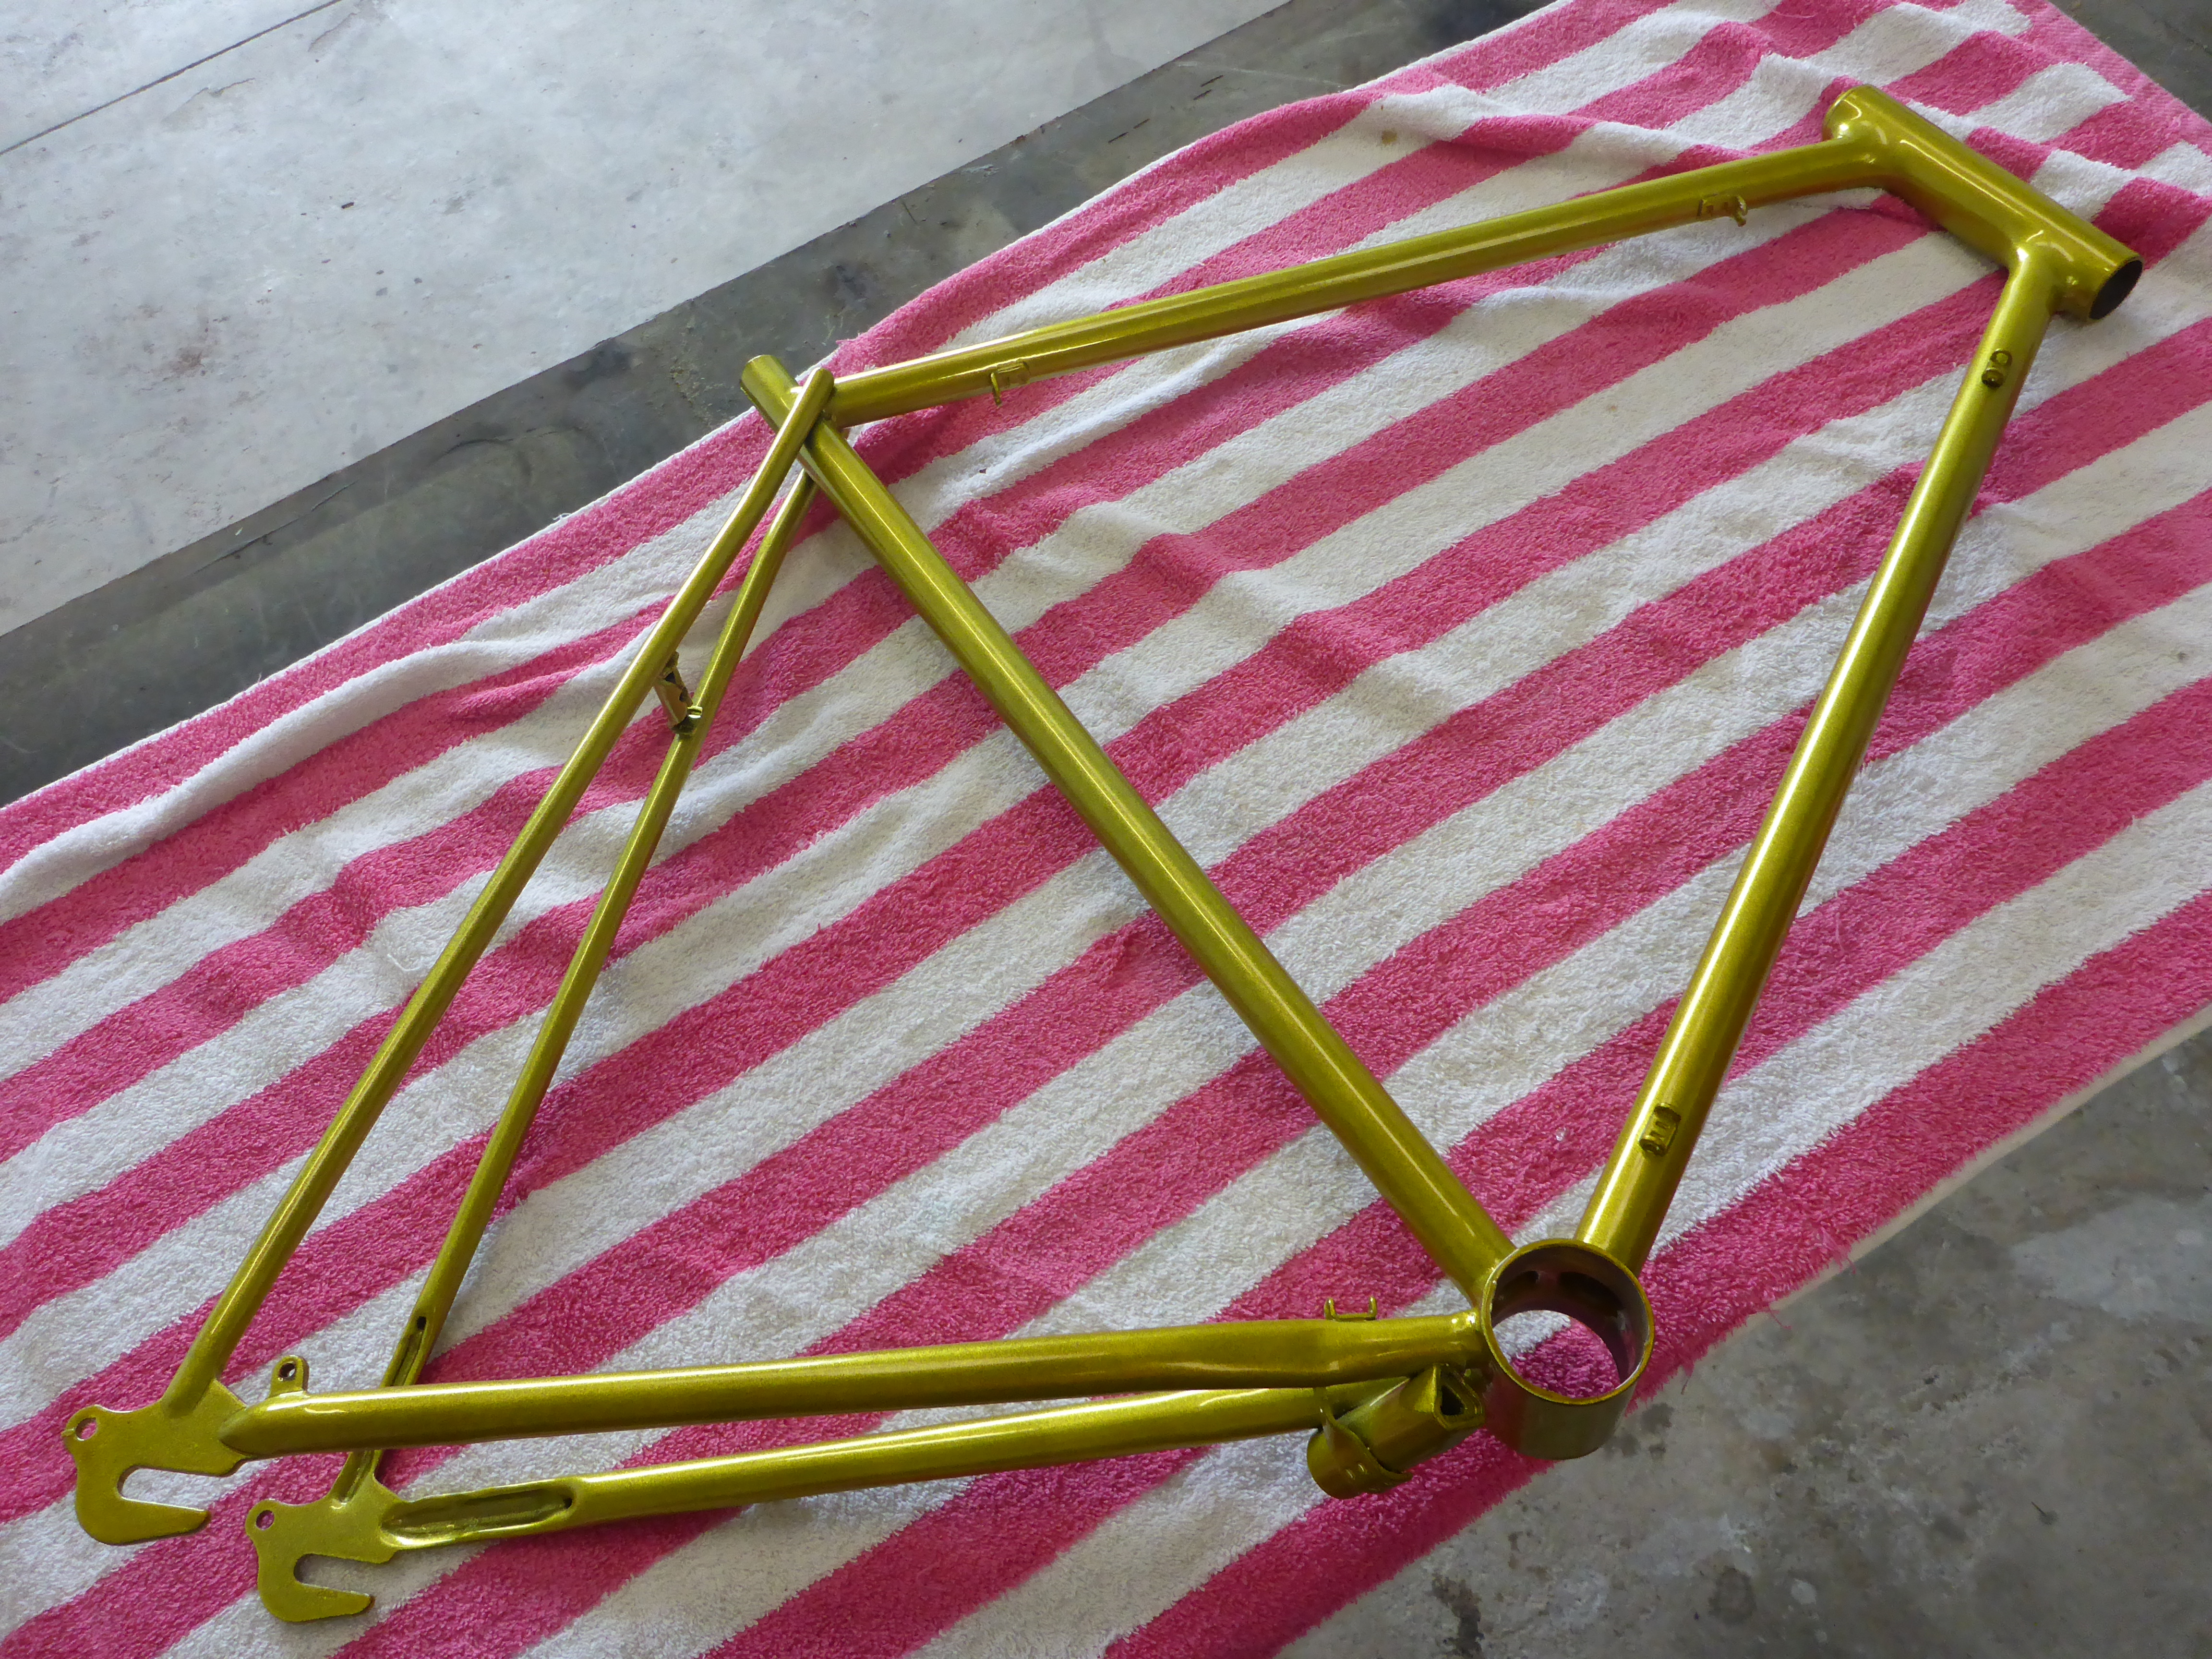
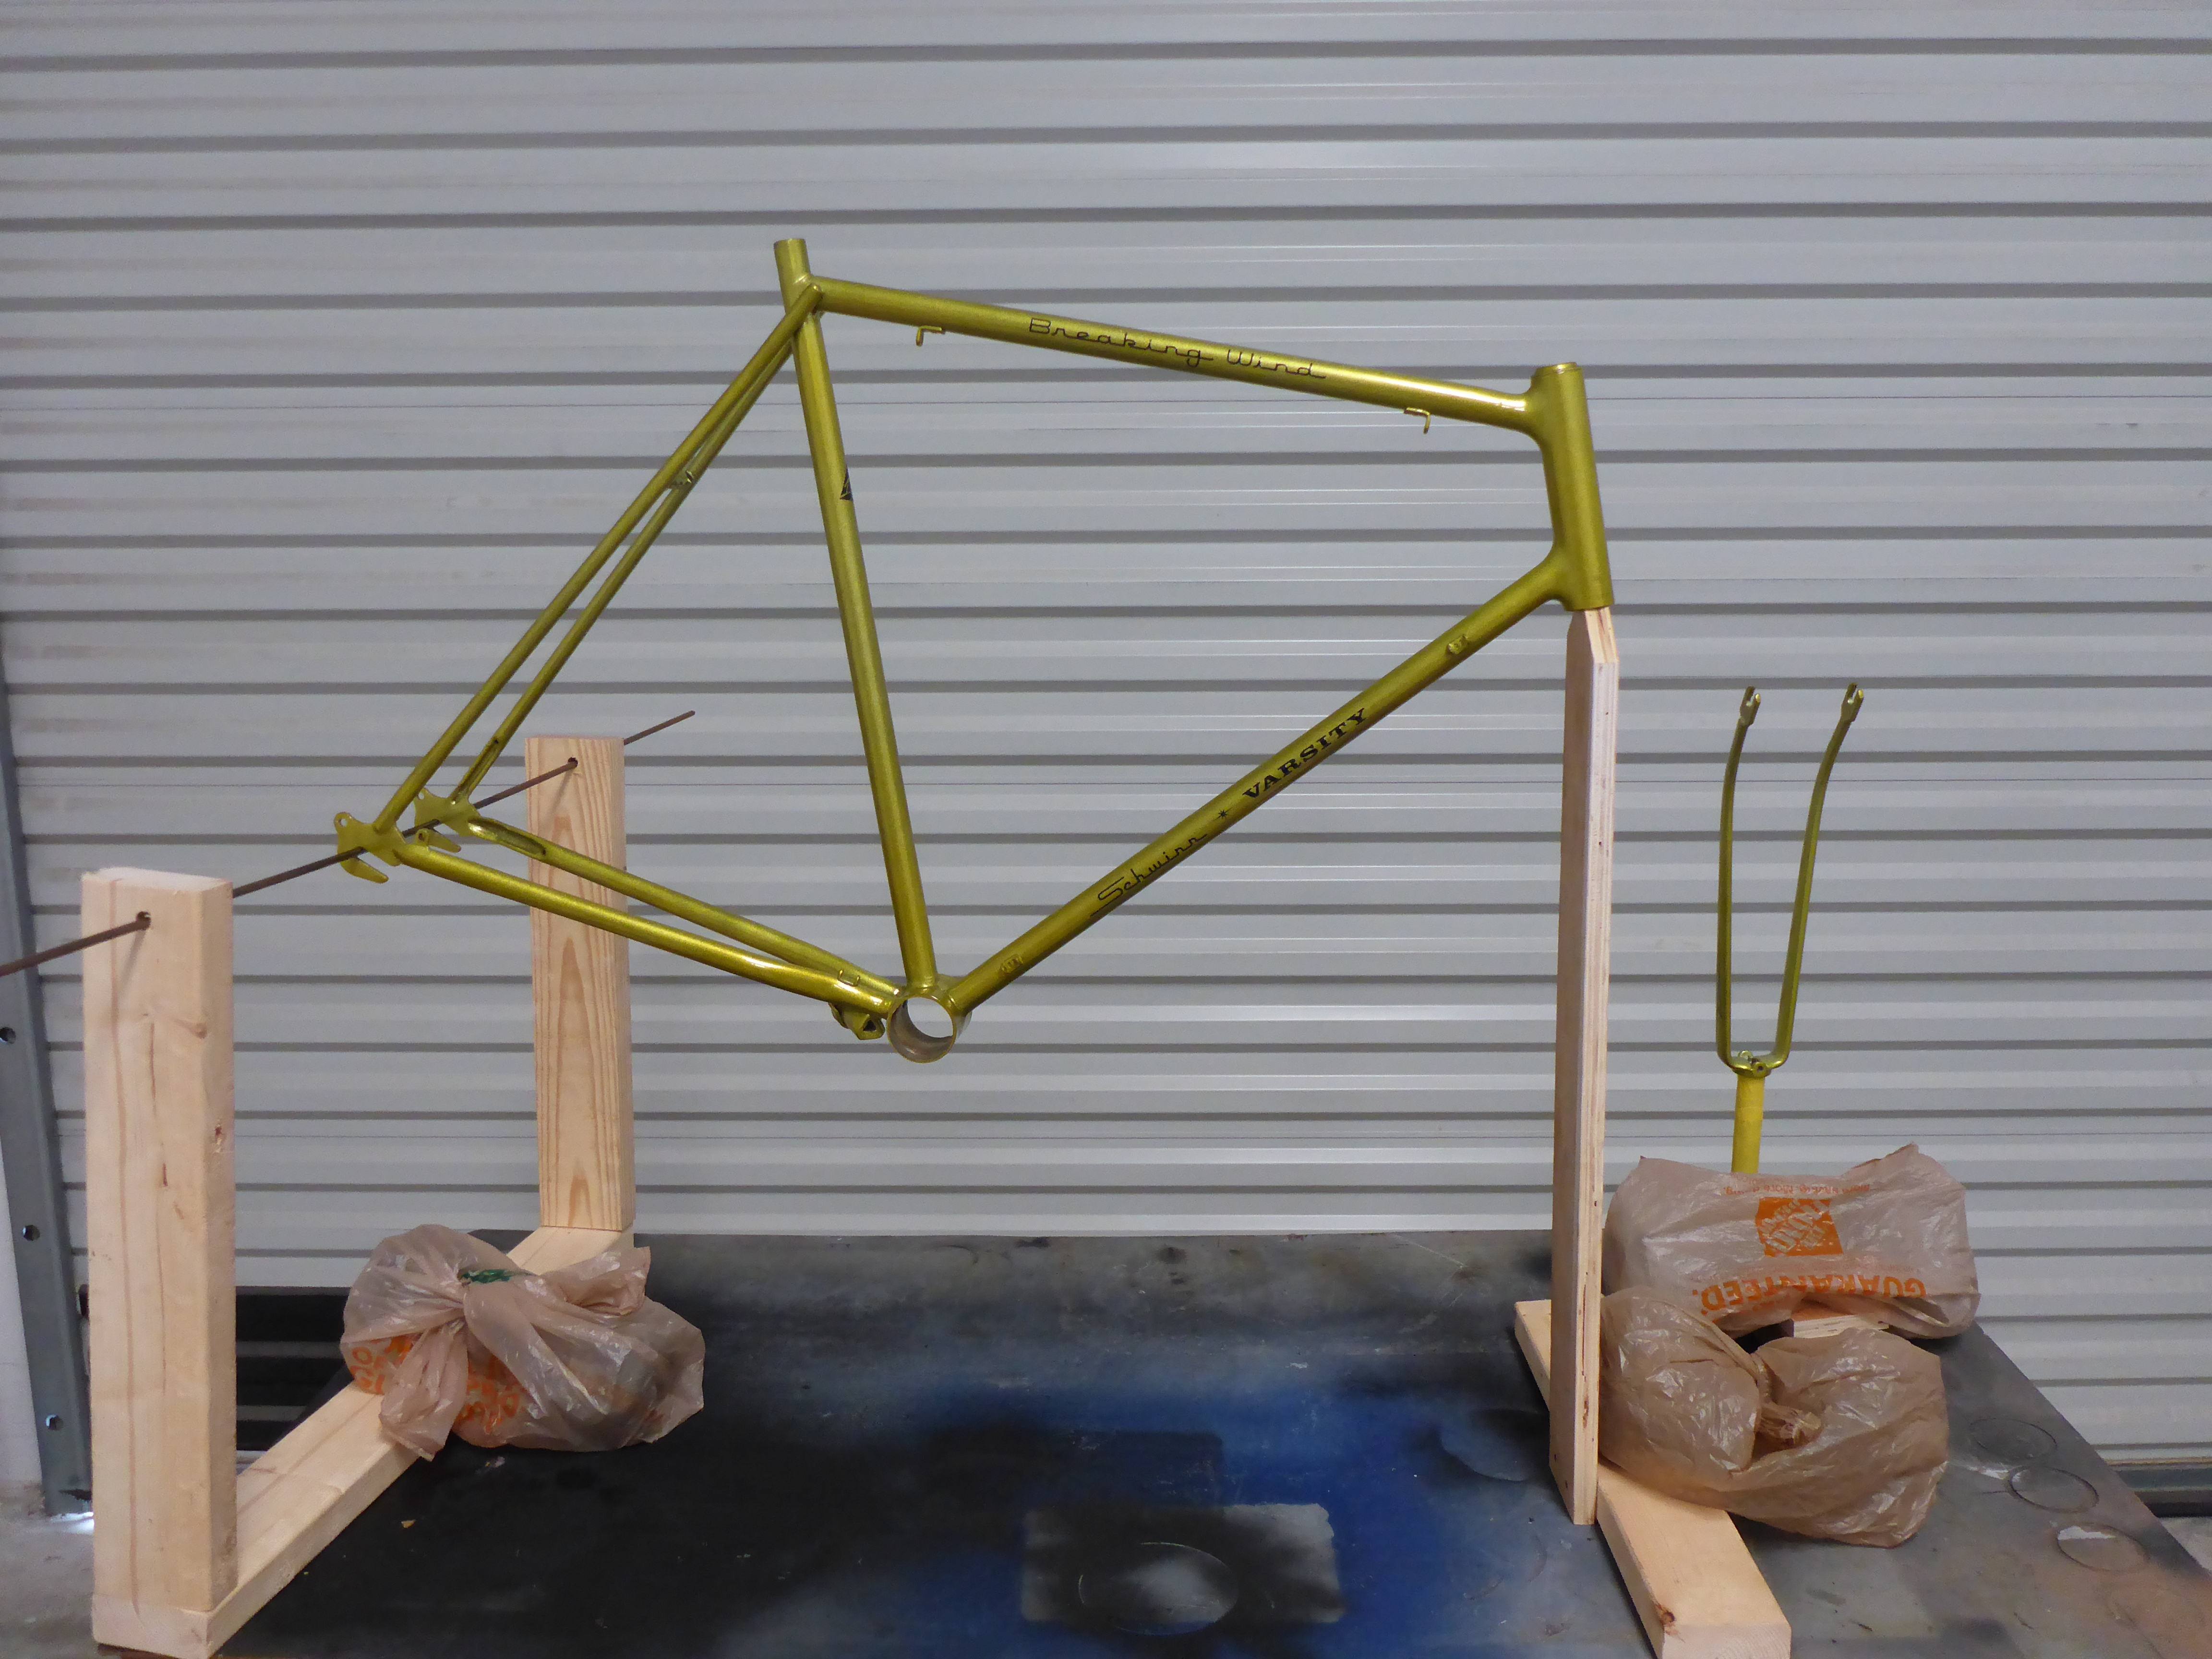
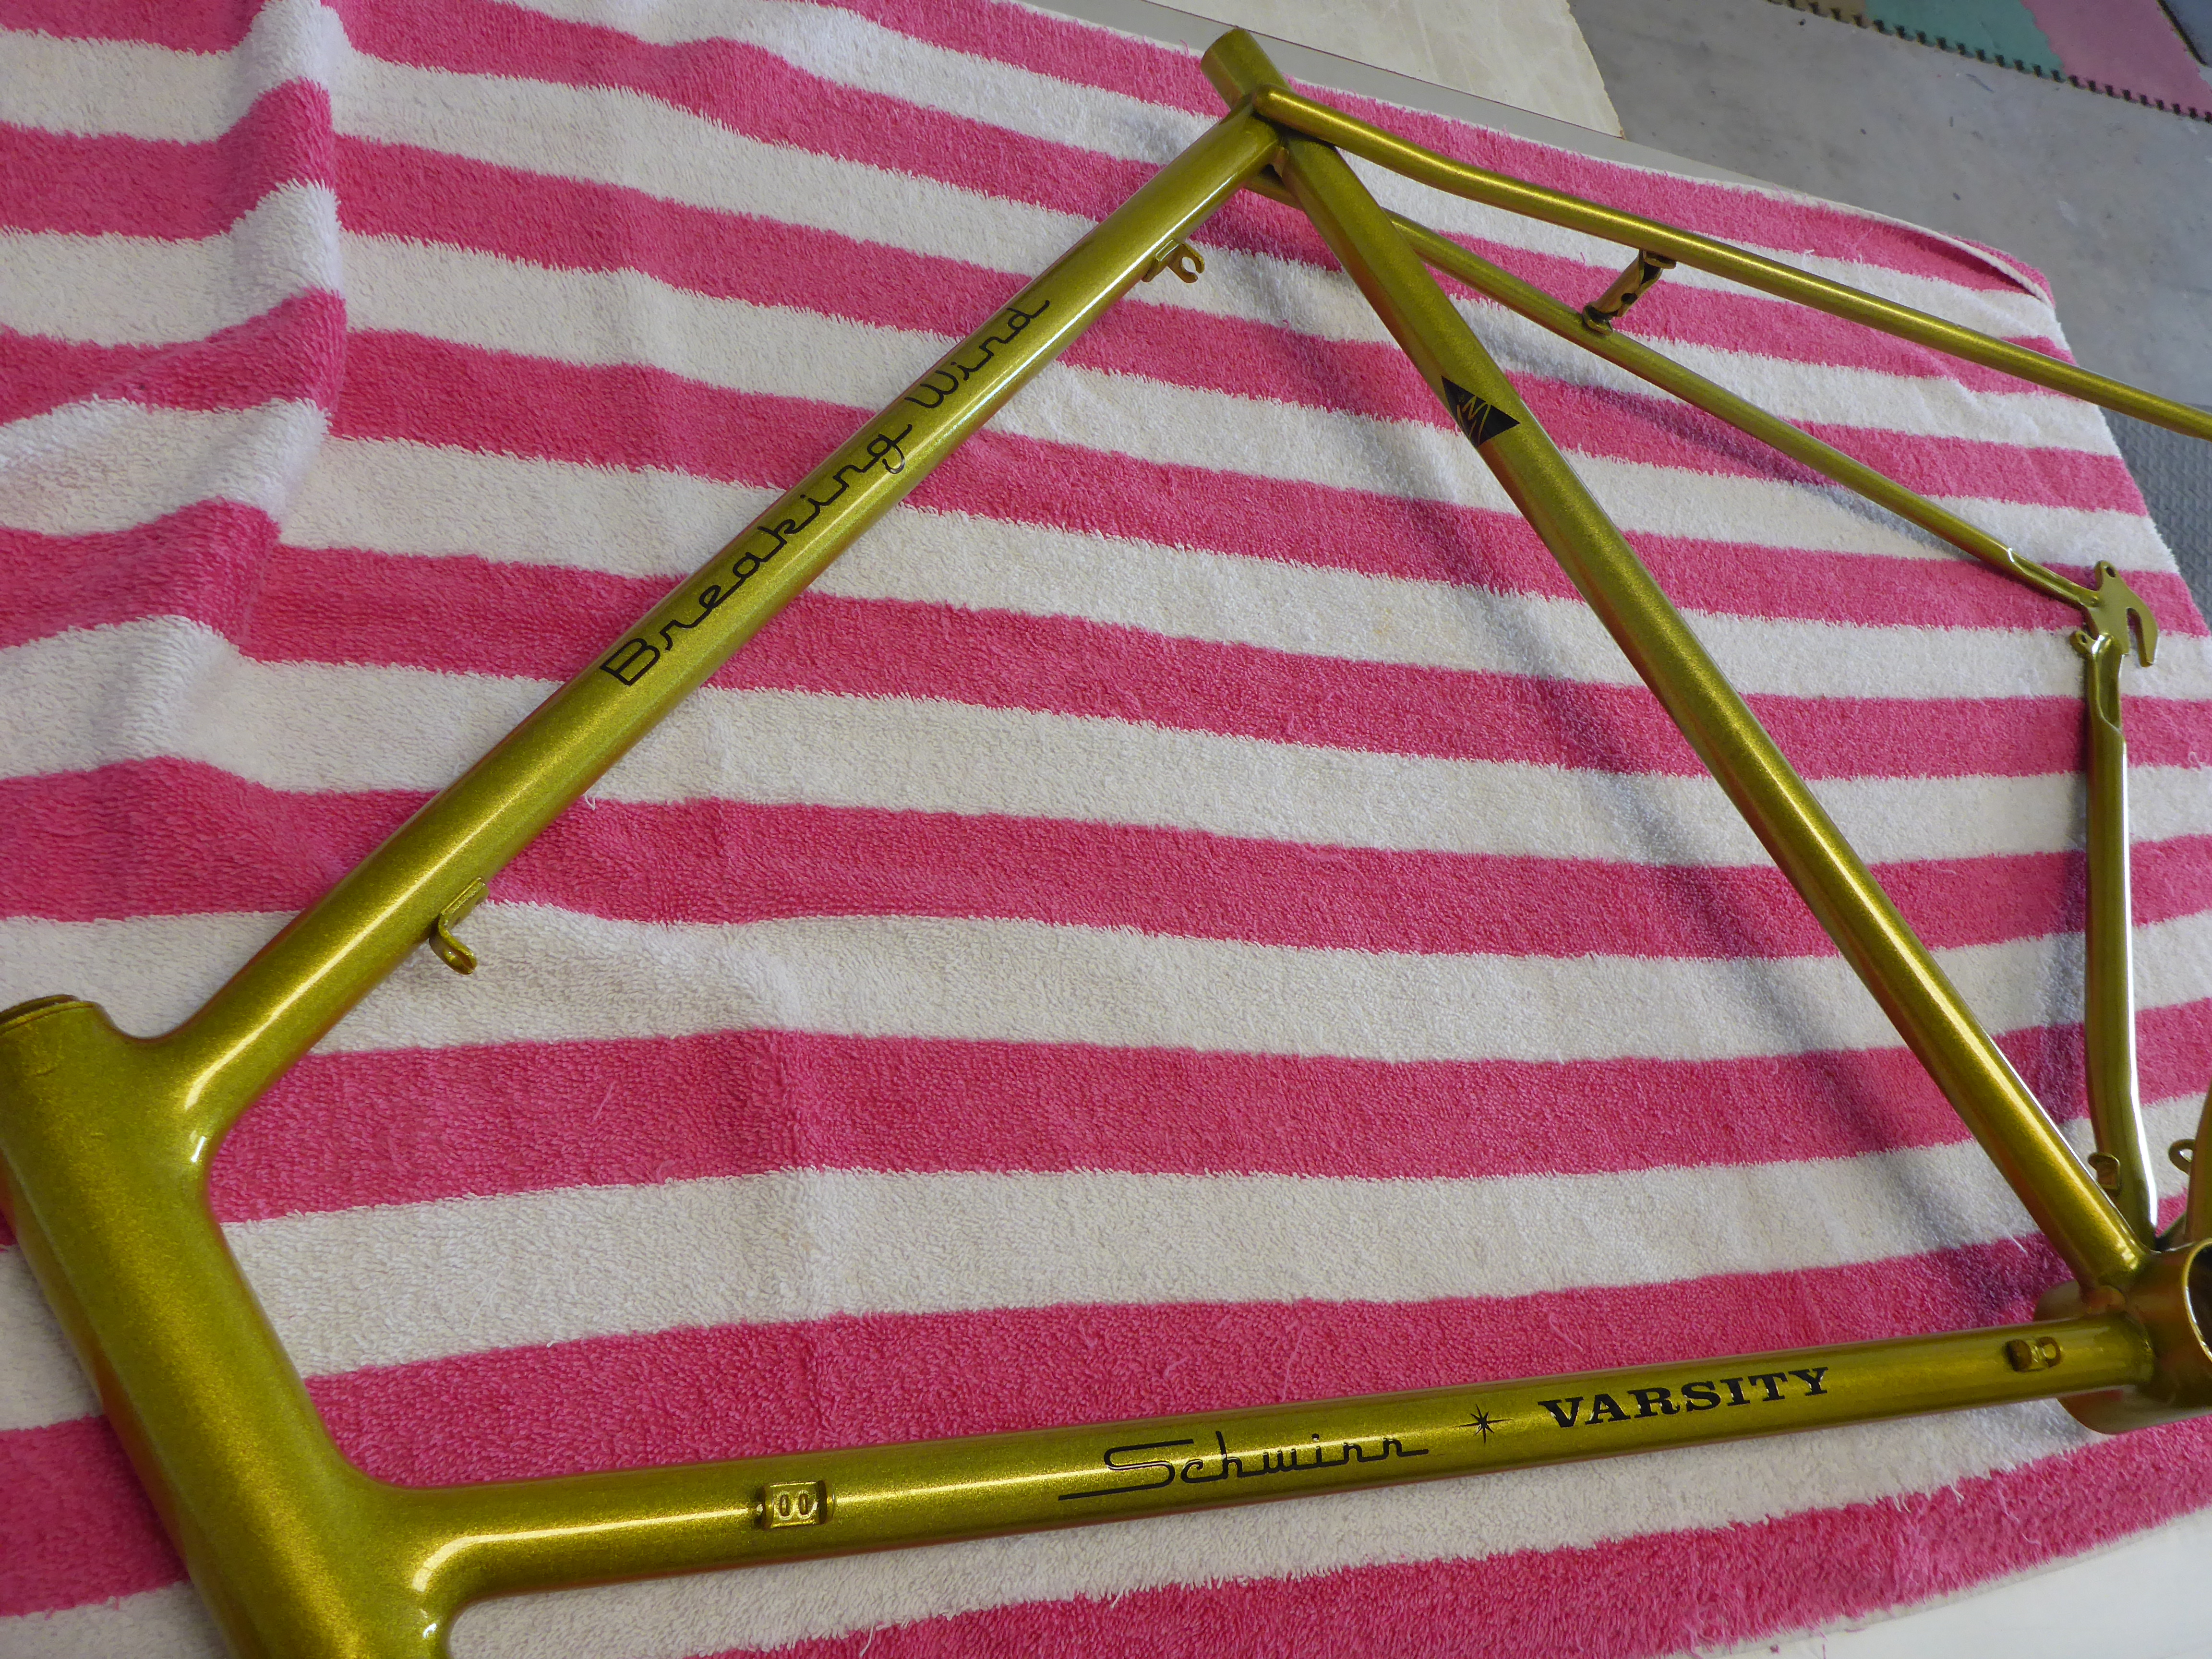
Clear coat down! Frame is done!

Did some buff & polish and here’s our super sexy completed frame photo shoot:


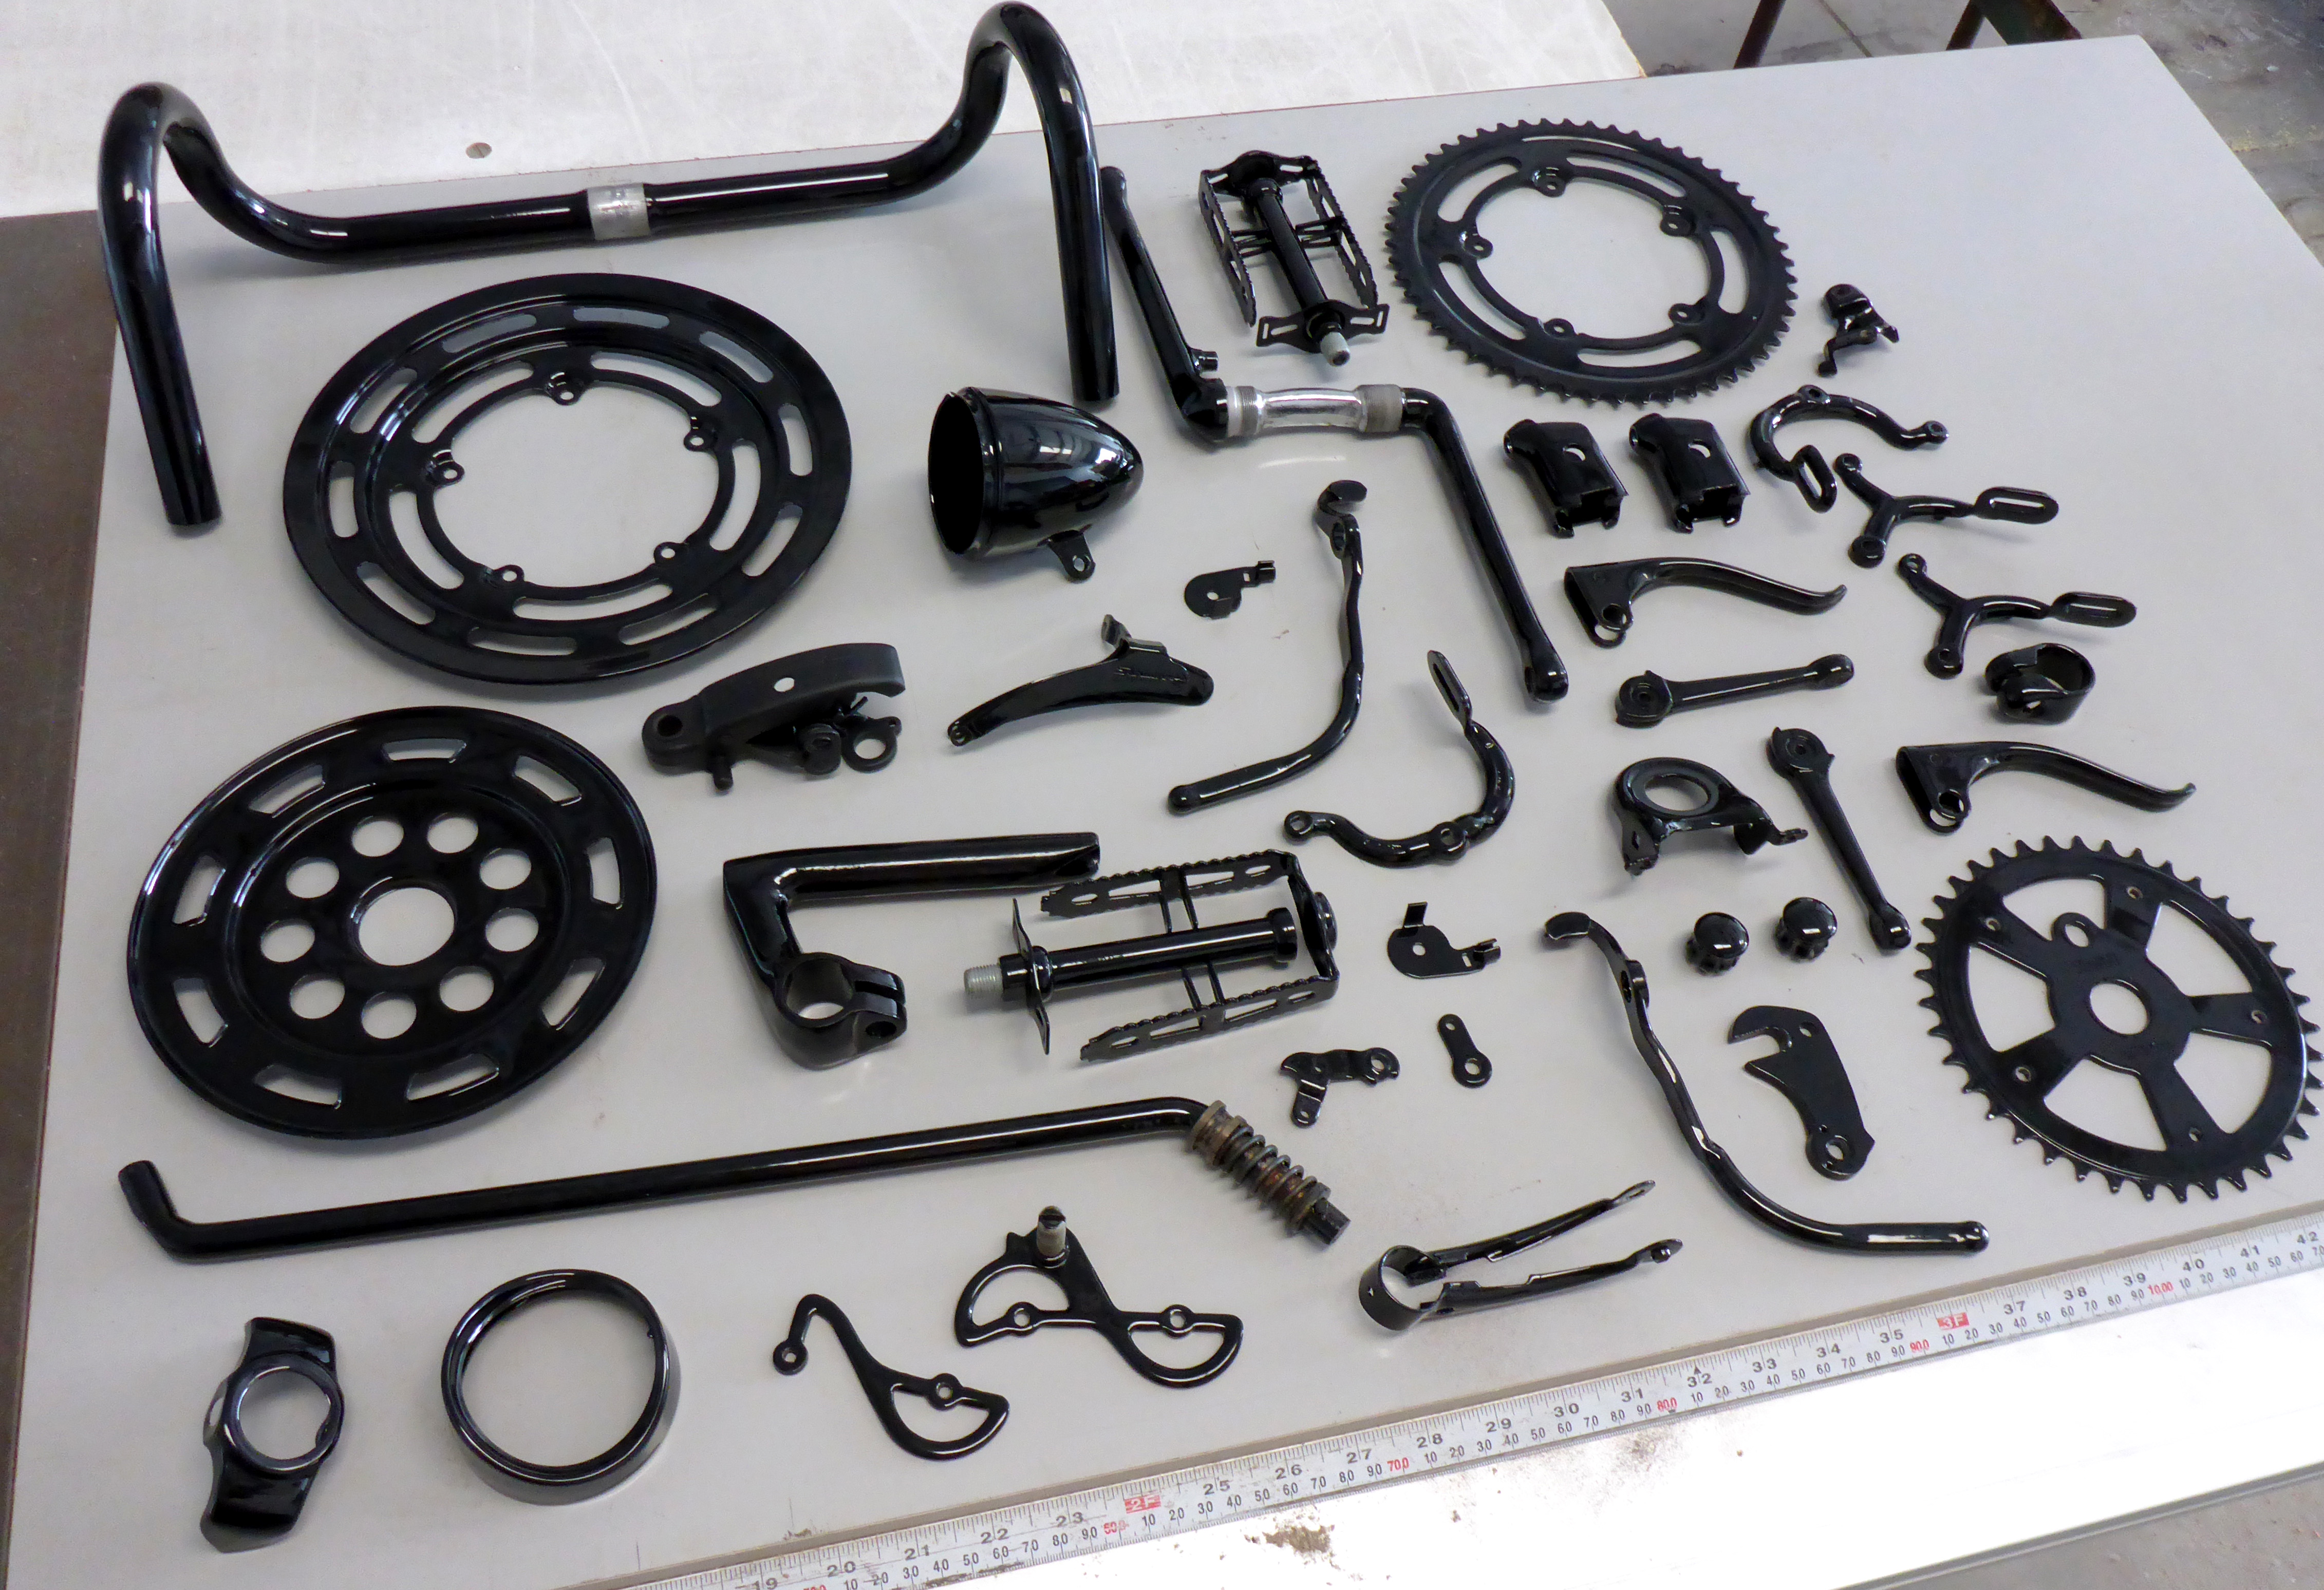
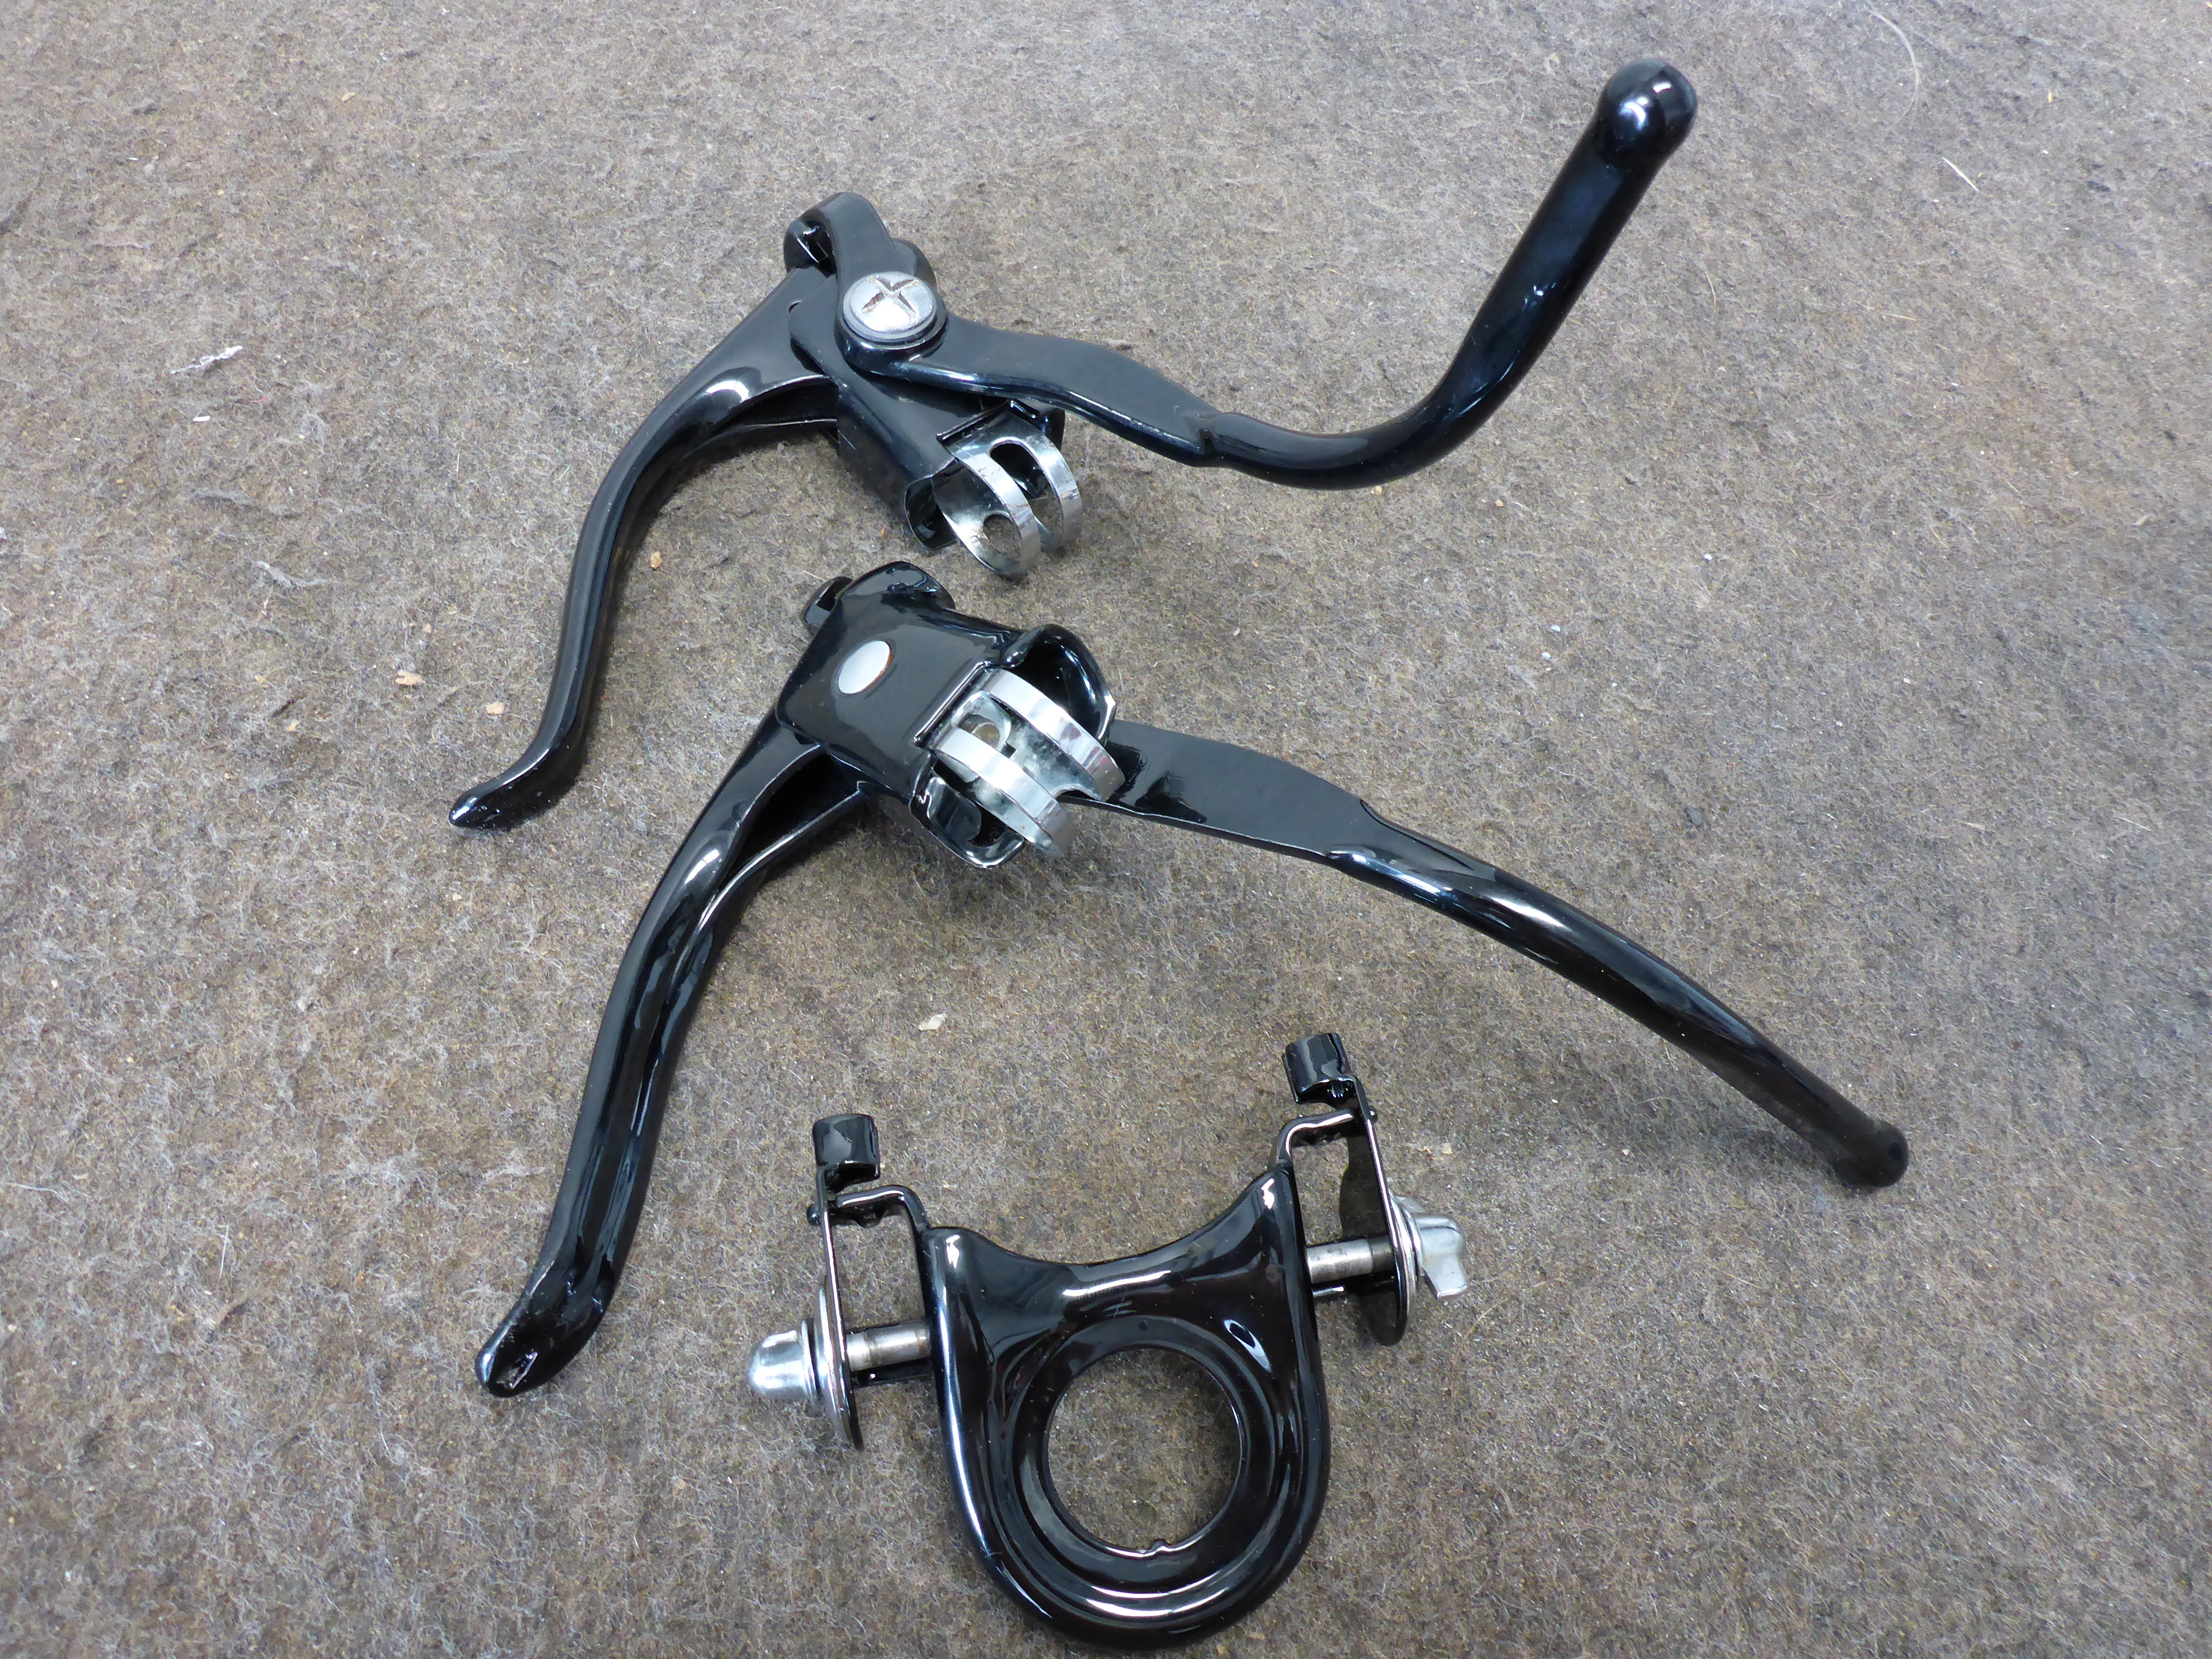
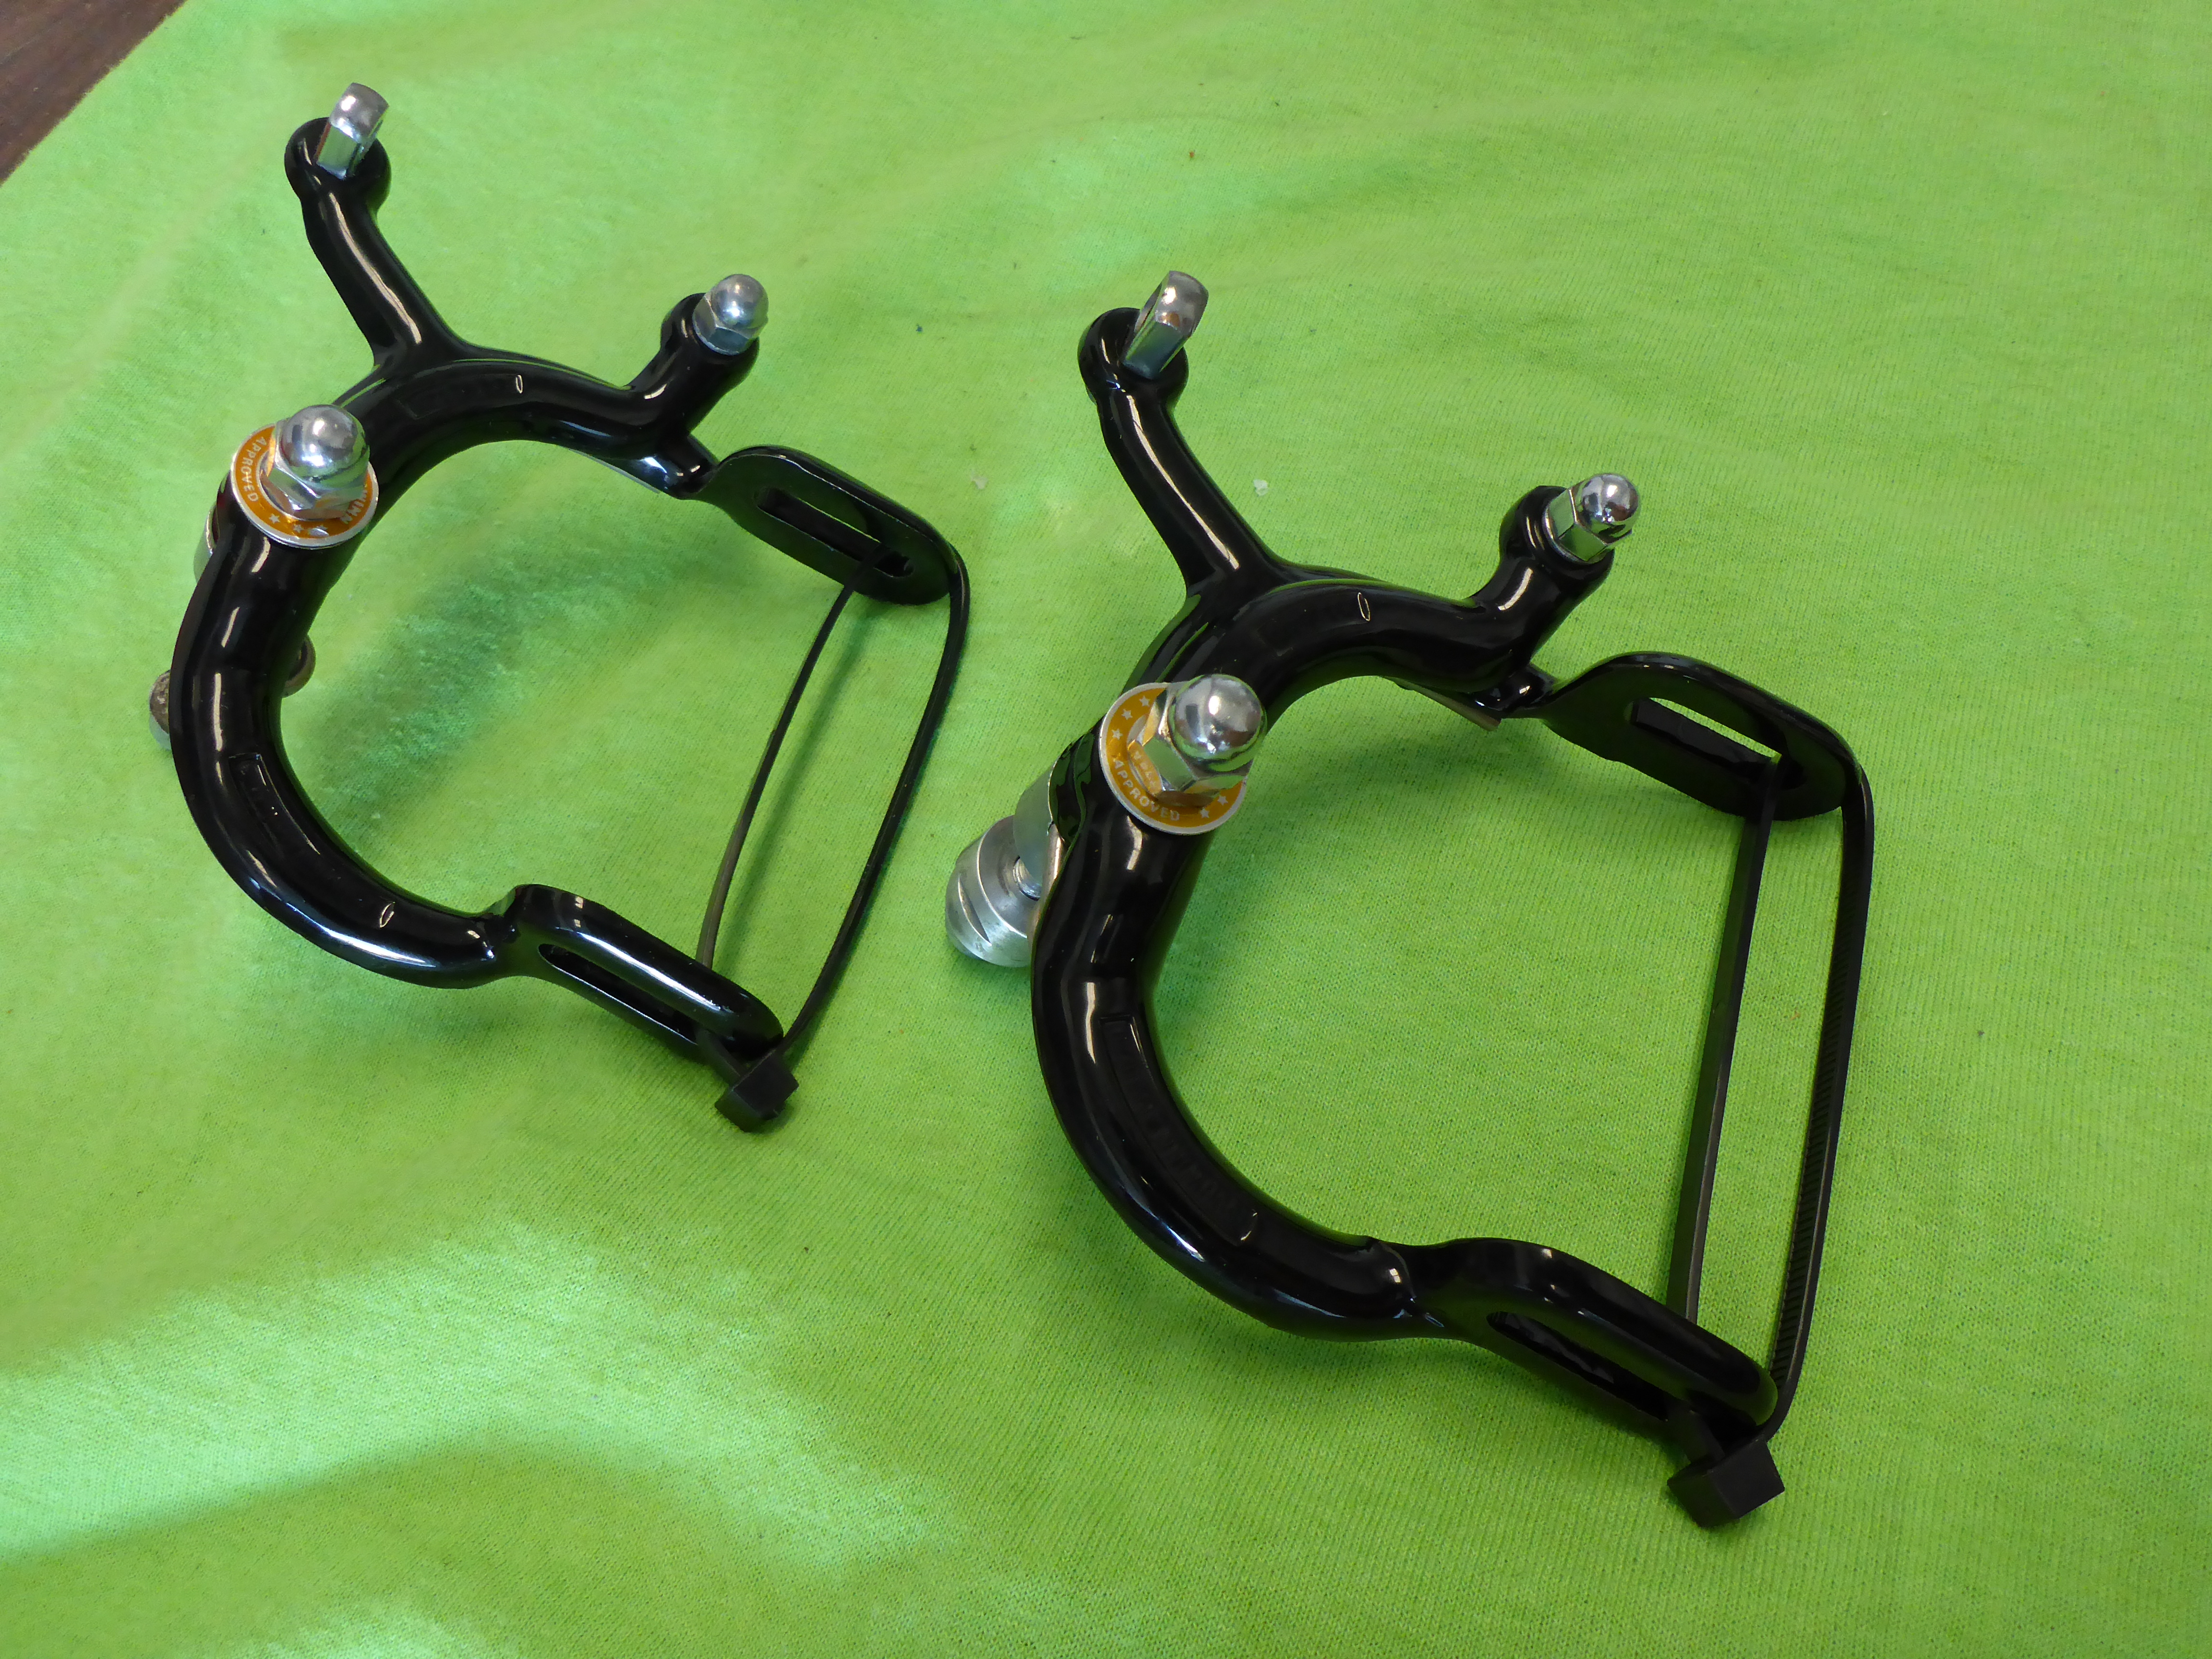
Everything else would be coated with a gloss black powdercoat. The only exception would be hardware: that would be polished and restored to its original luster.
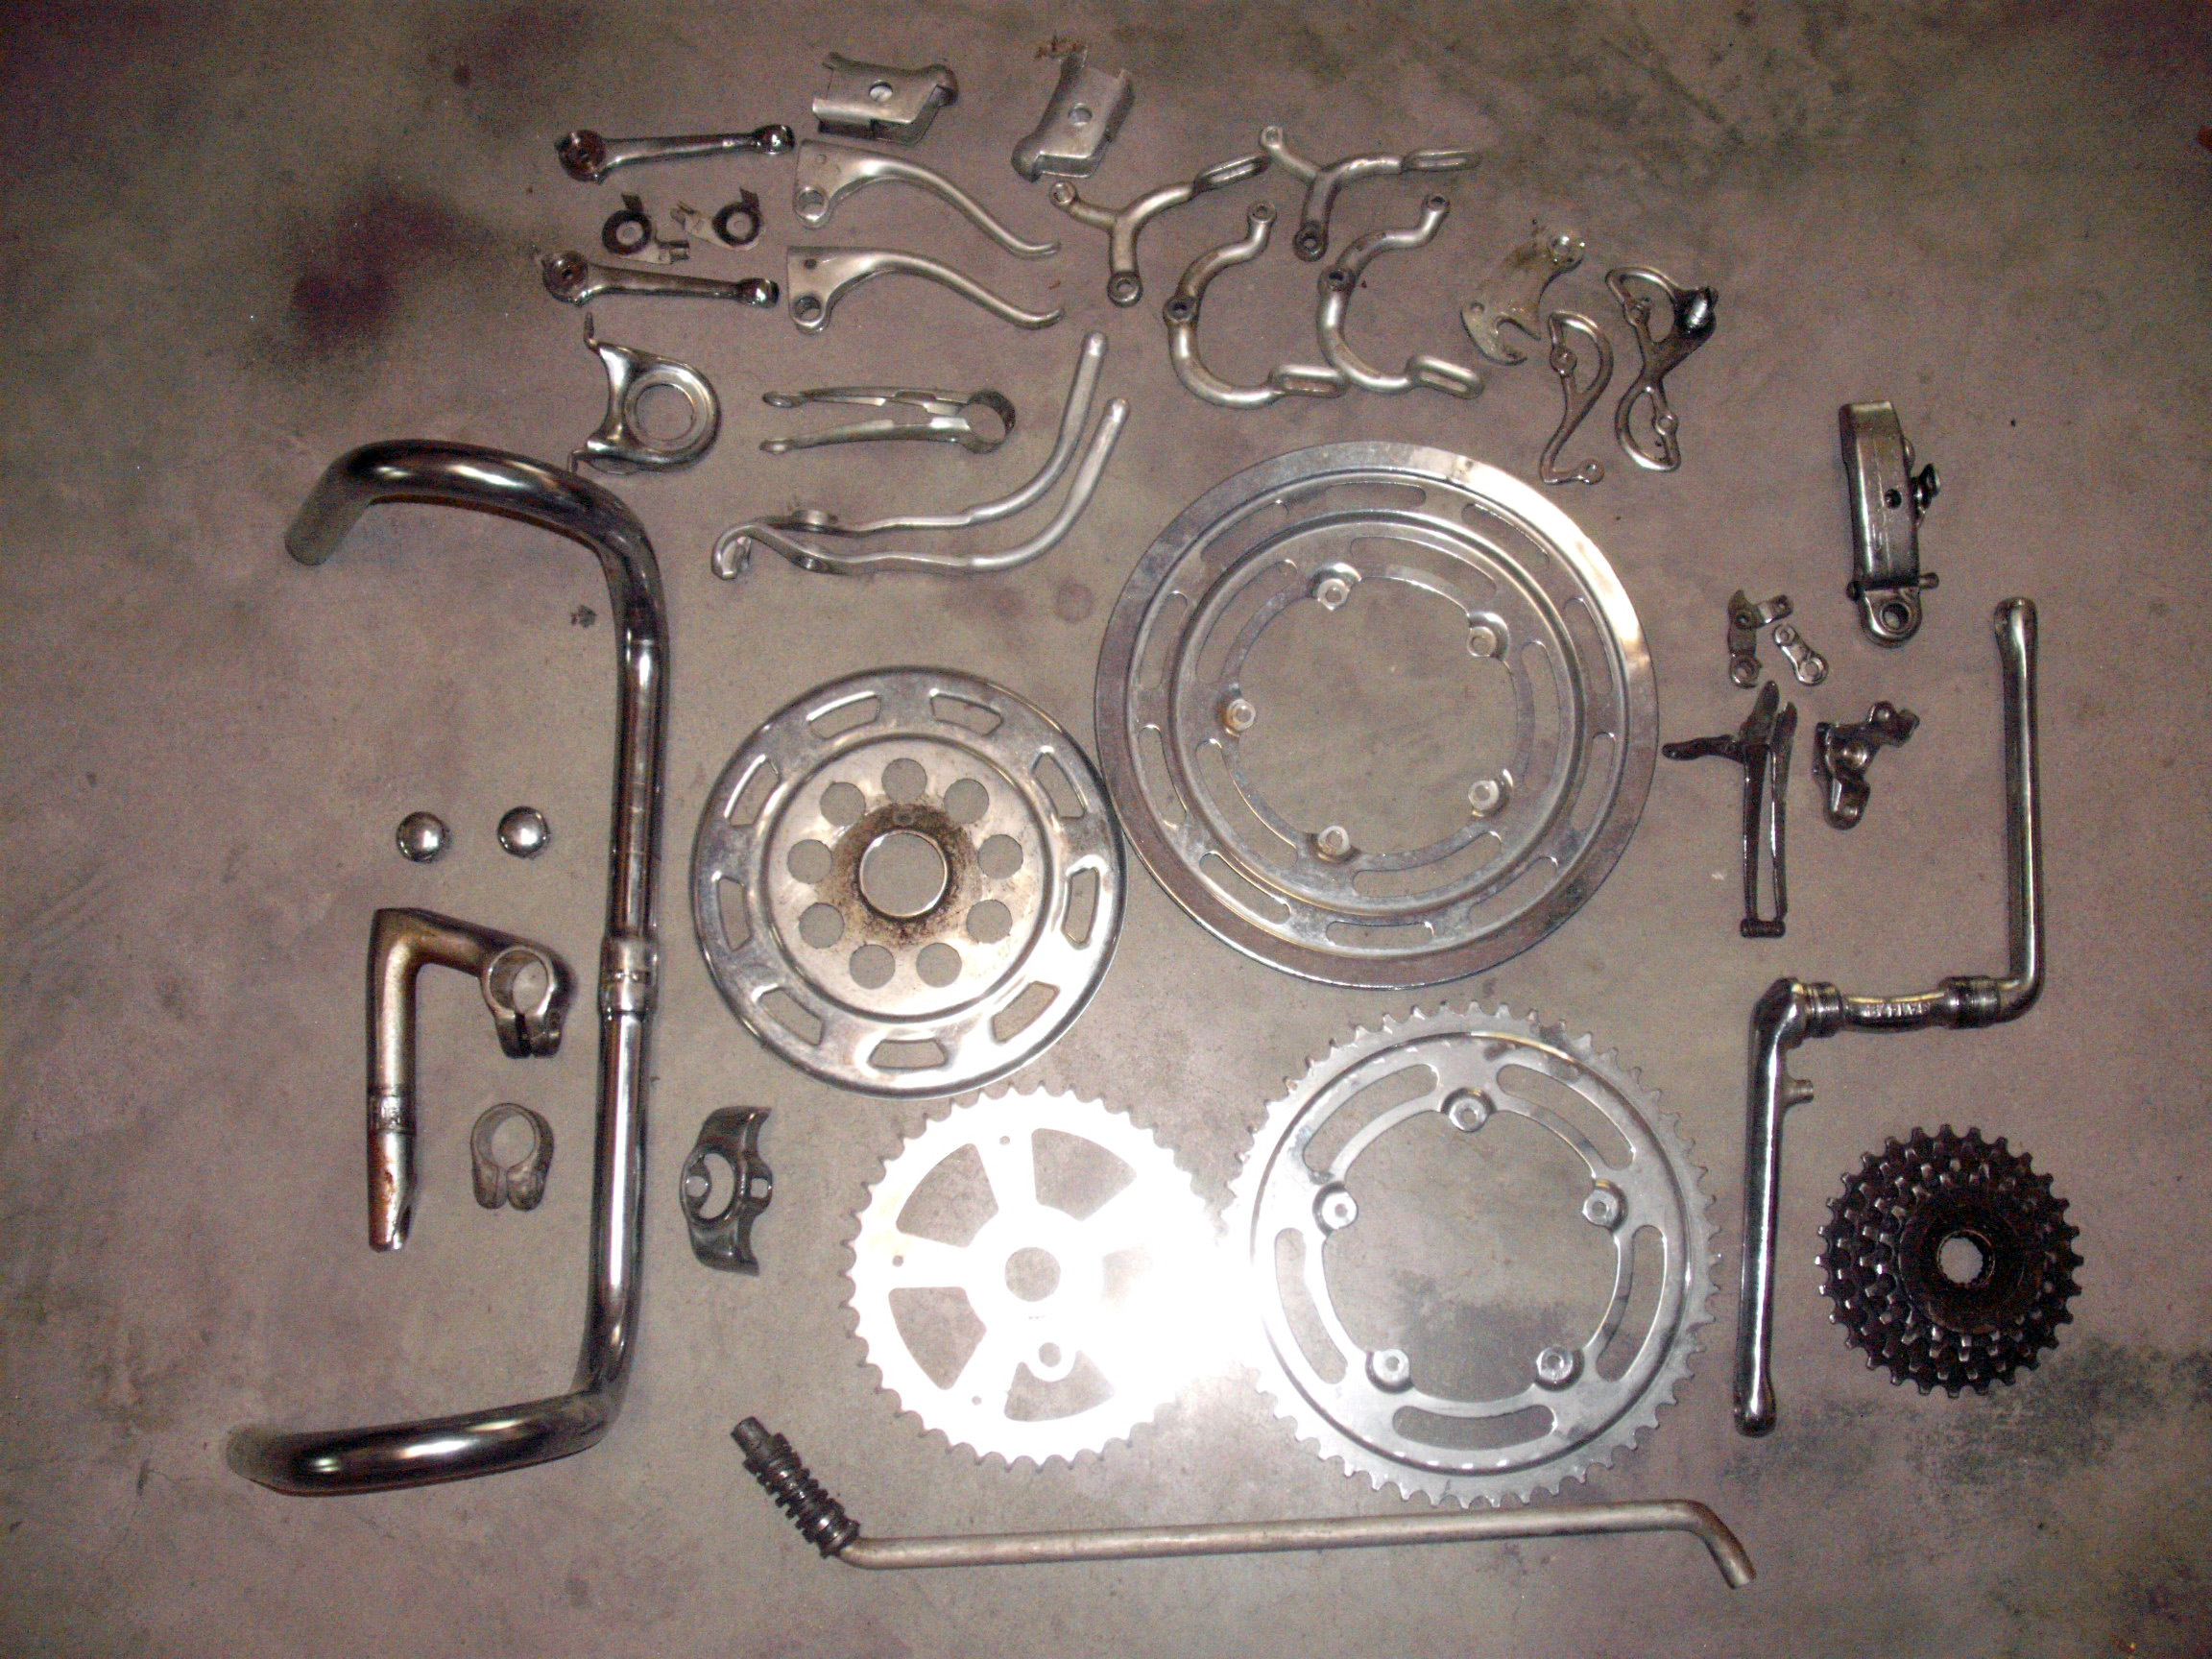
I disassembled everything as far as I could and sent a huge batch of parts off for transformation:
Viola! Gloss black powdercoat!
The pedals were a treat. They had to be taken apart, cleaned, powdered, lubed, and reassembled. Like brand new yet way sexier.


Even though the rims were already black, they also got the gloss black powdercoat treatment to match. The original tires were still in great condition so they were cleaned and restored to remain in use. This brought me a lot of joy. The yellow sidewalls really set off the wheels.

Let’s talk about that pesky kickstand for a minute. Of course, that got powdercoated as well. But when it was installed, a 1/2″ long section of nasty original unfinished steel was exposed. Unacceptable! I masked off the entire bike, scuffed up the section, and layed down a nice gorgeous black paint job with clear coat. Top secret fact: the kickstand is the only black painted part on the bike… but you’d never notice!

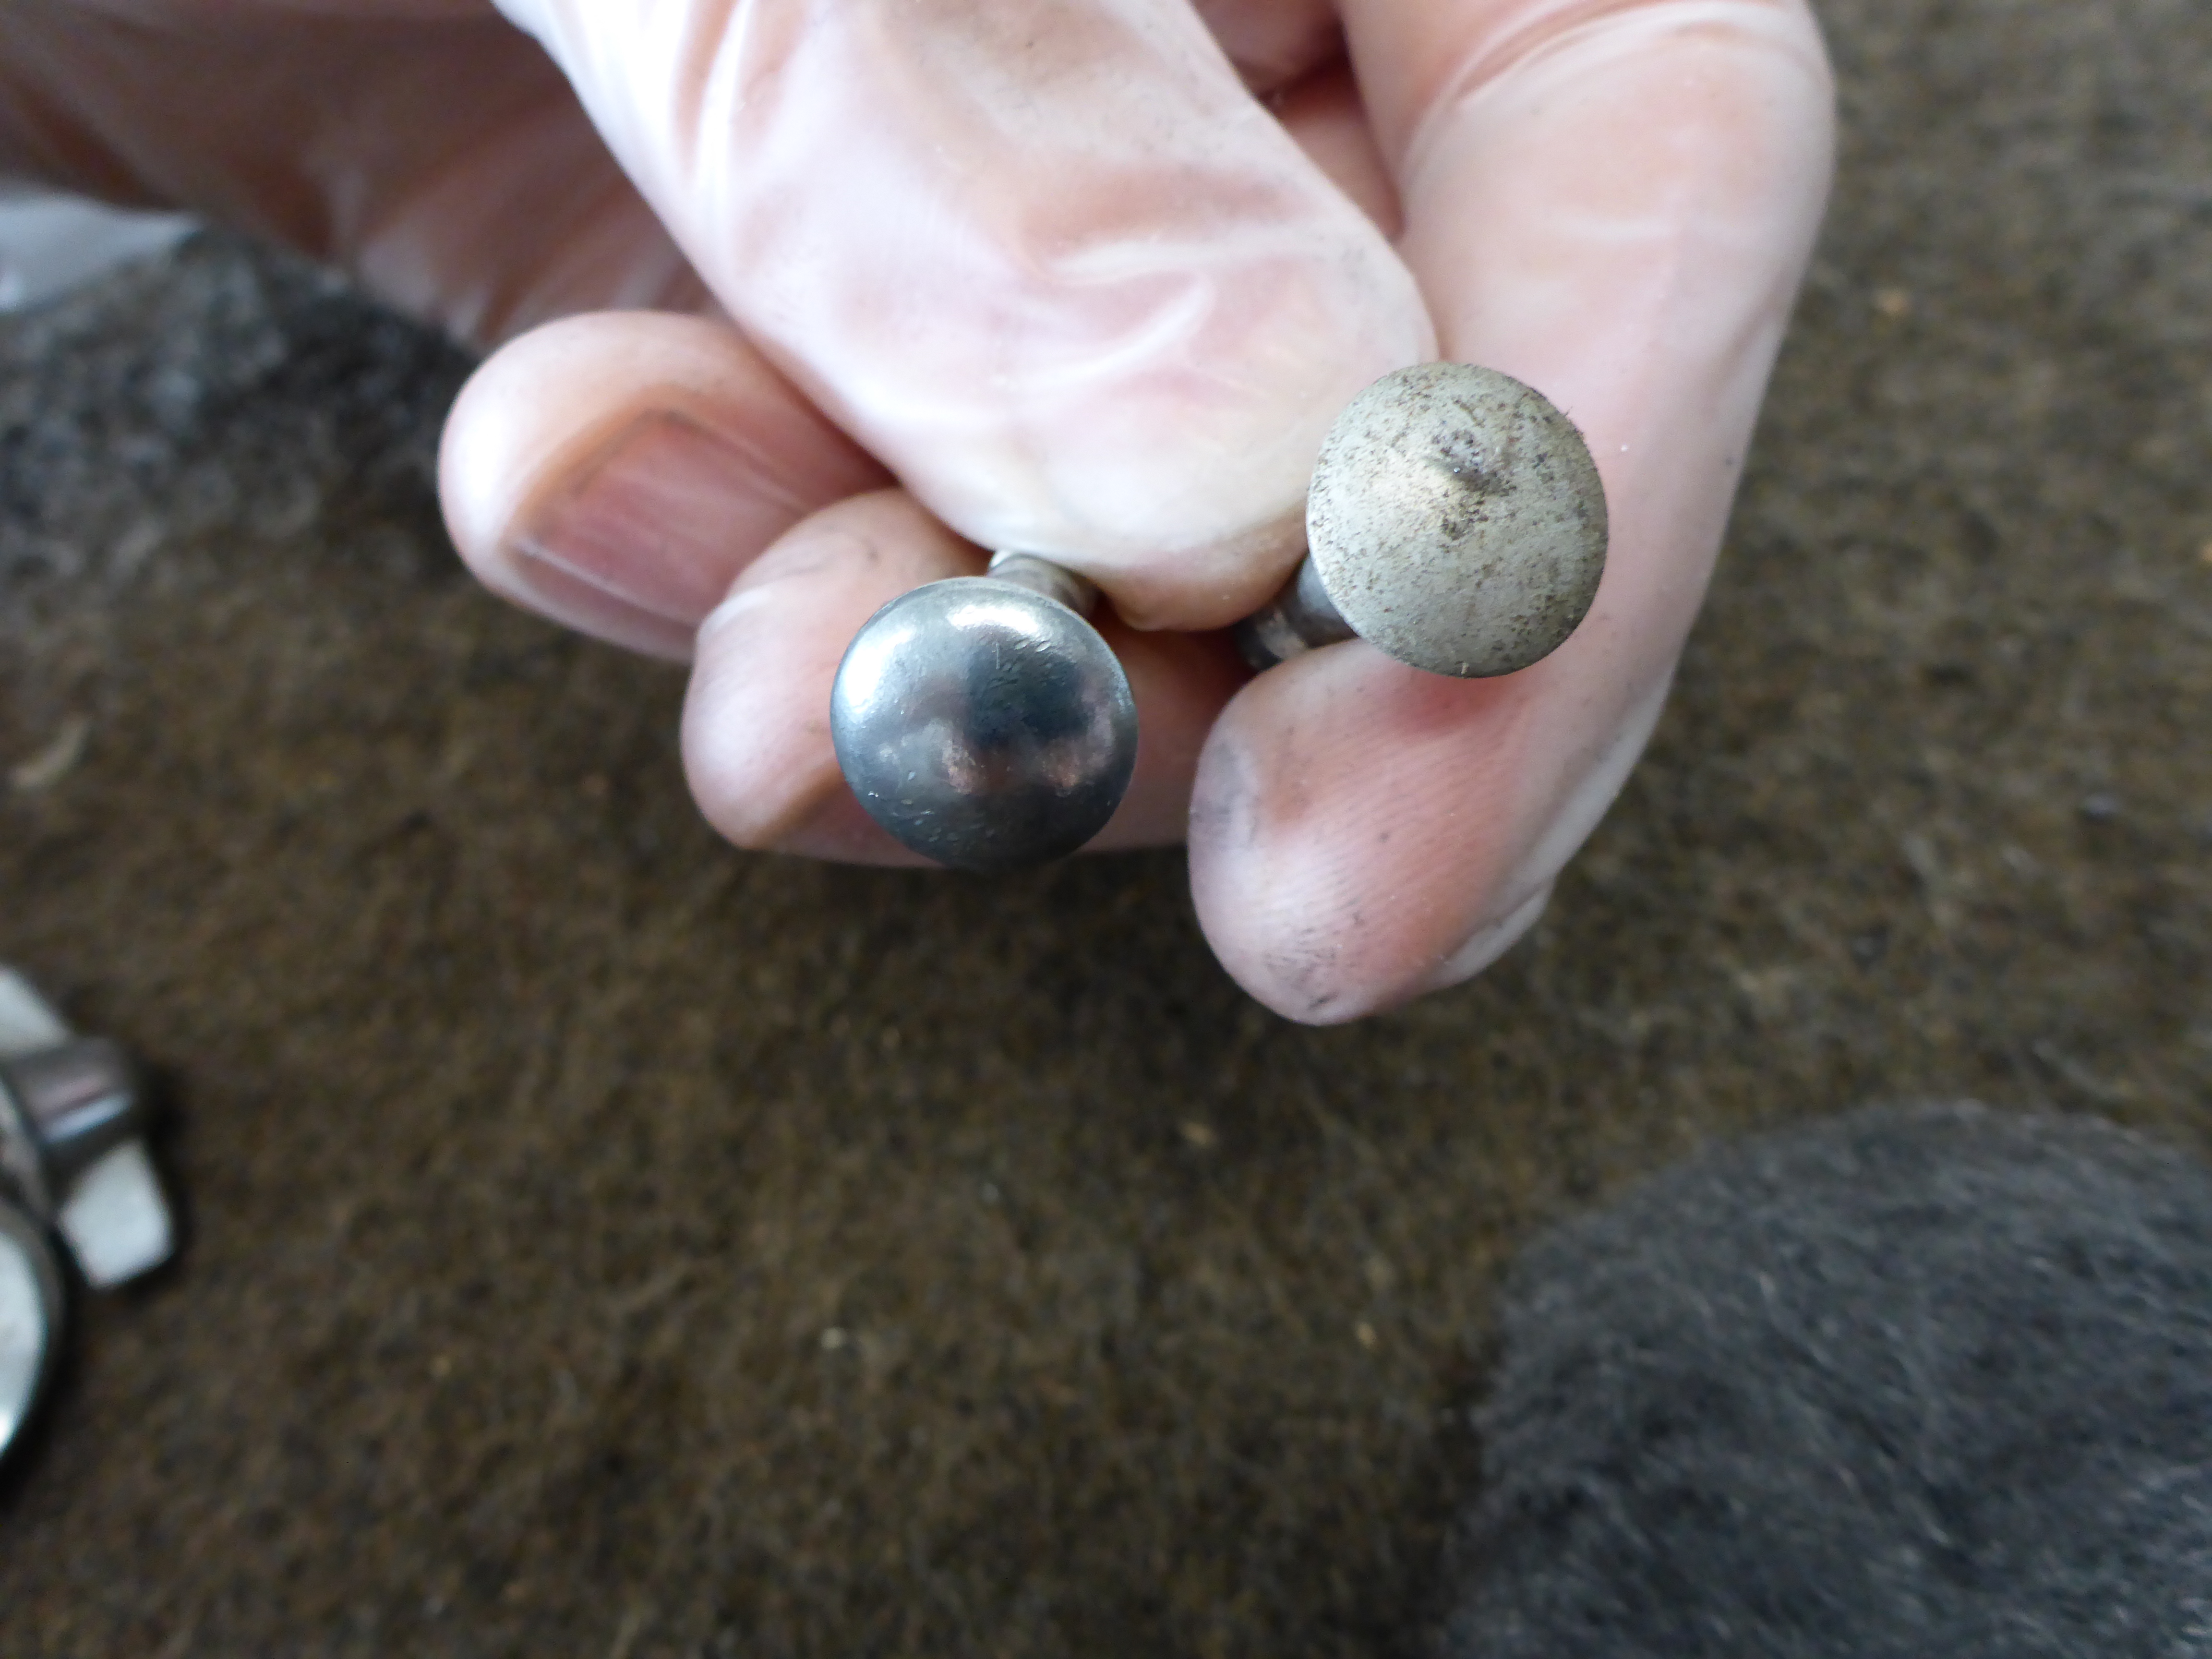
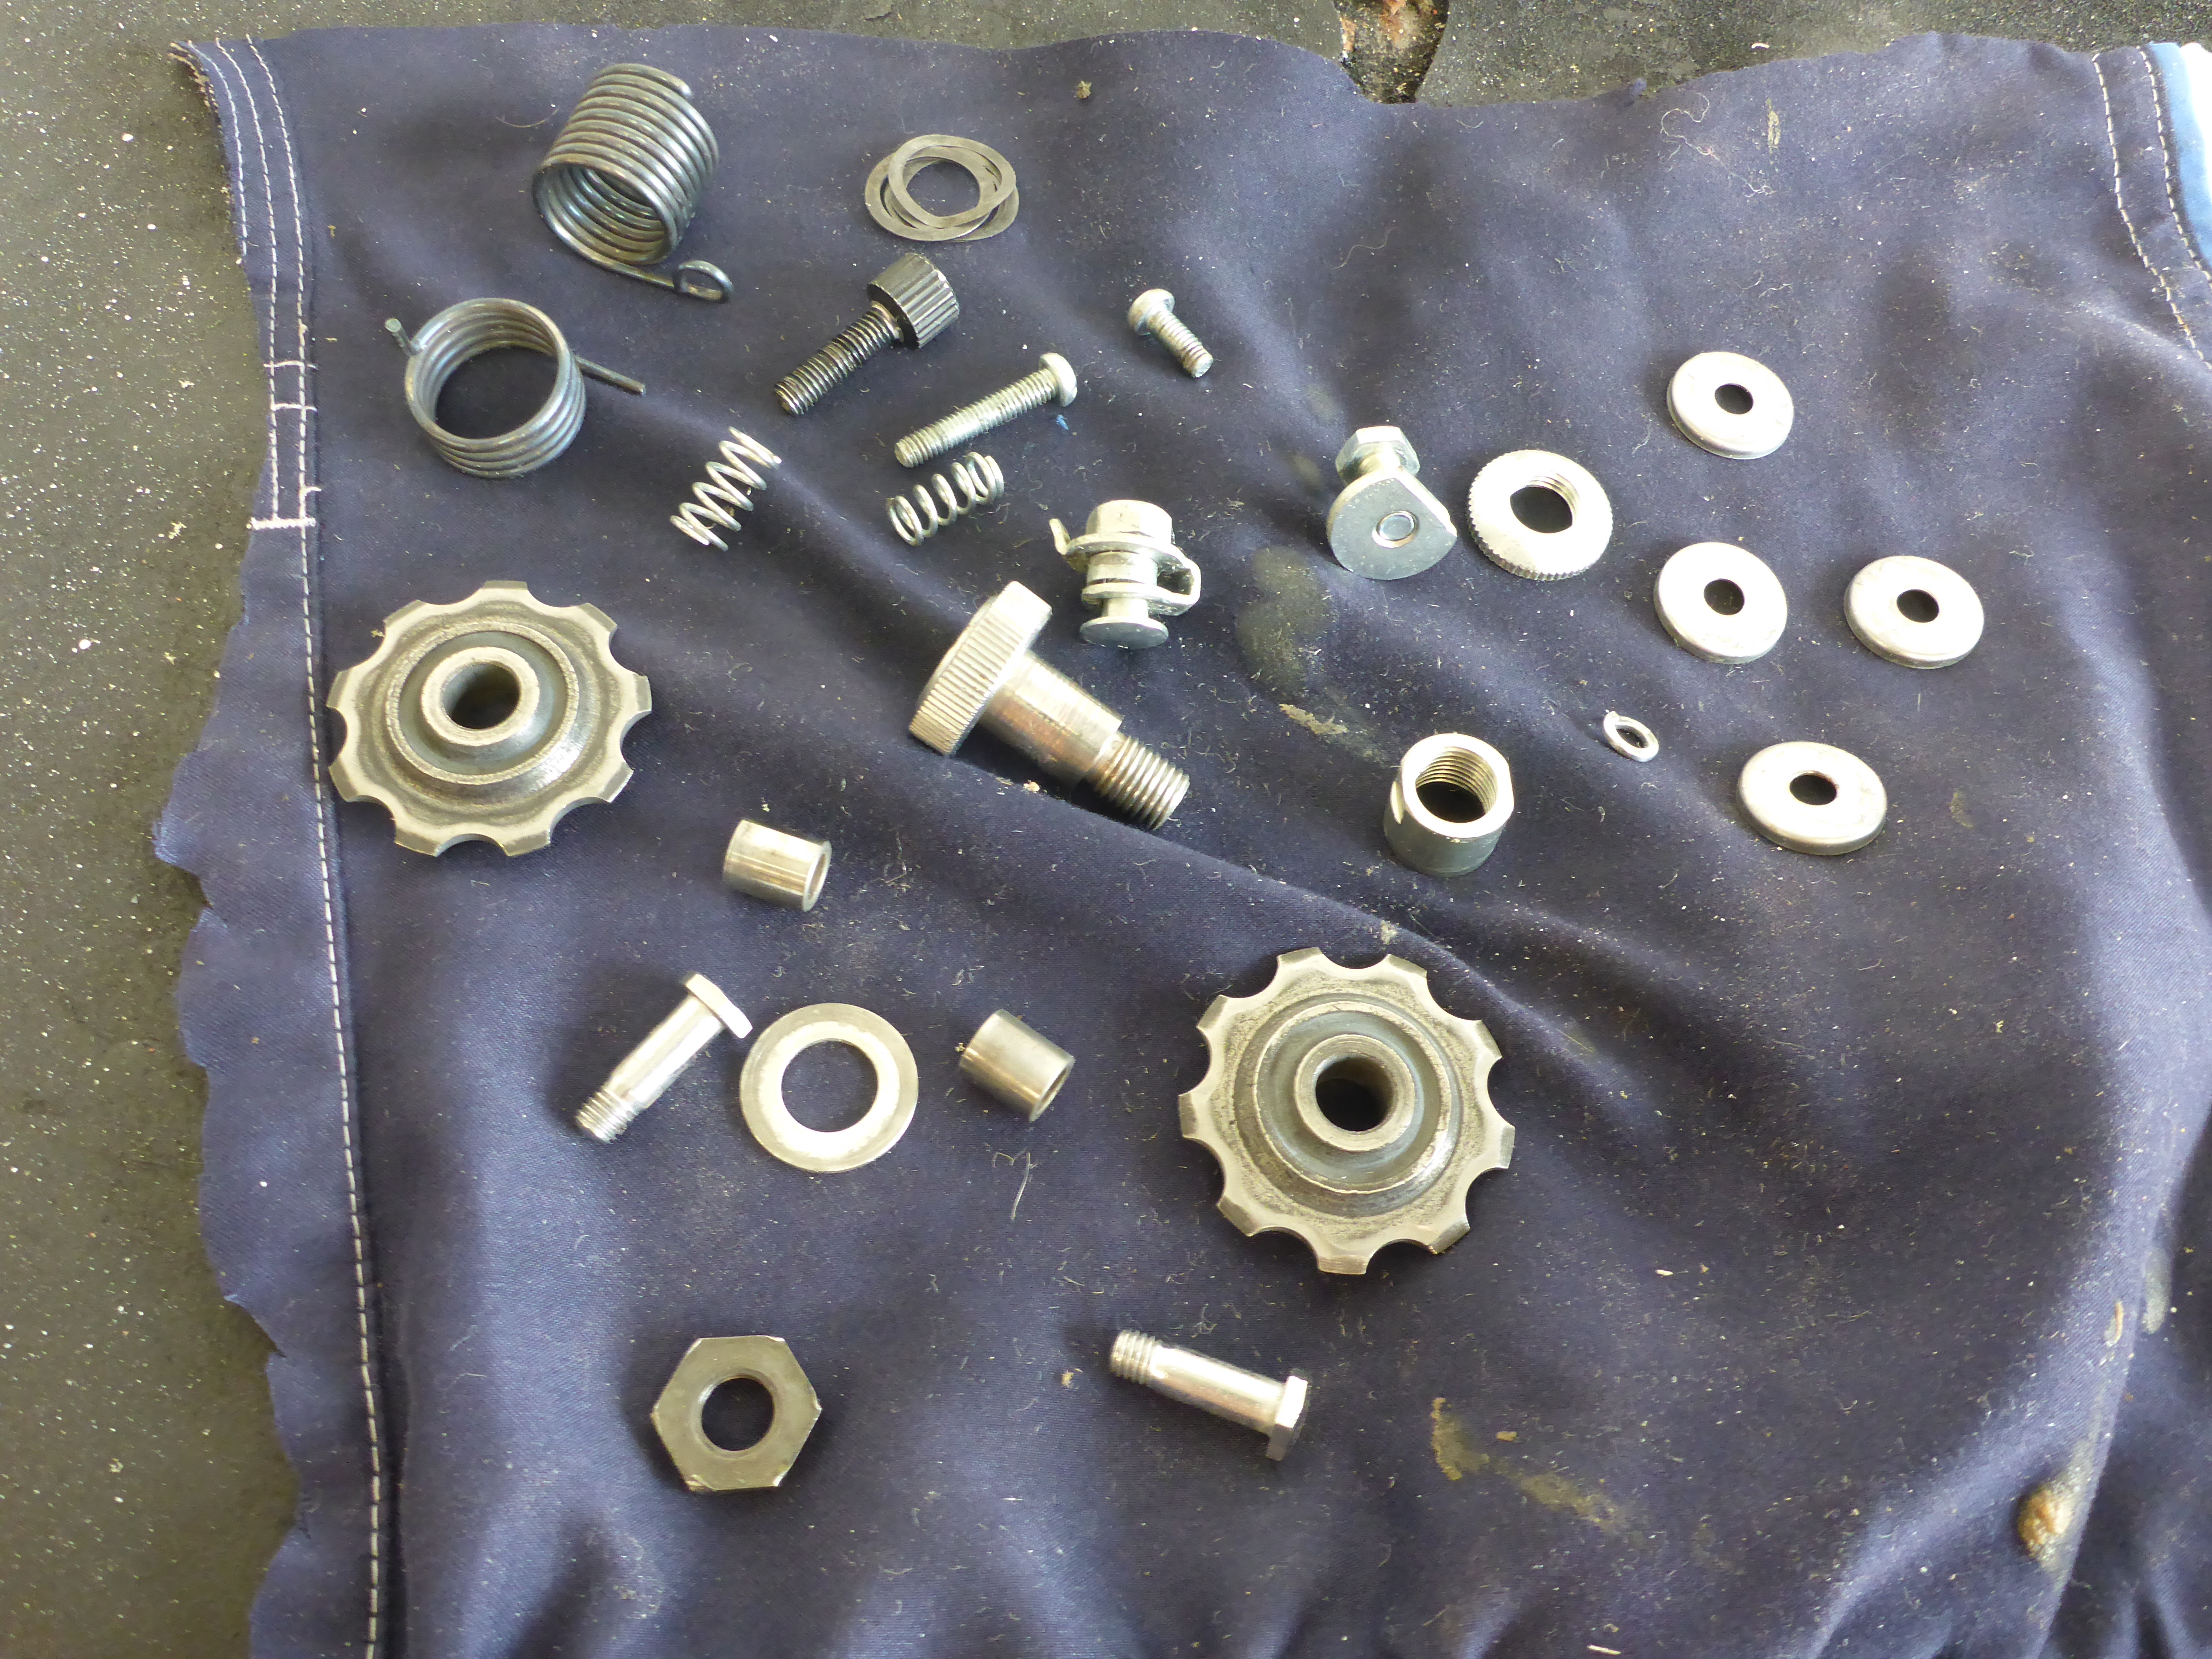
As I mentioned earlier, all the nuts, screws, gears, washers, and springs were individually polished with steel wool until they passed visual inspection. This was no small task and was not the most enjoyable part of the build. However, the contrast between the polished steel and powdercoated gloss black on all of the assemblies made the additional attention well worthwhile.
Cleaned vs Original
Assembled assemblies:

Front derailer before & after:
Front Schwinn badge fully blacked out with decals and then once installed:
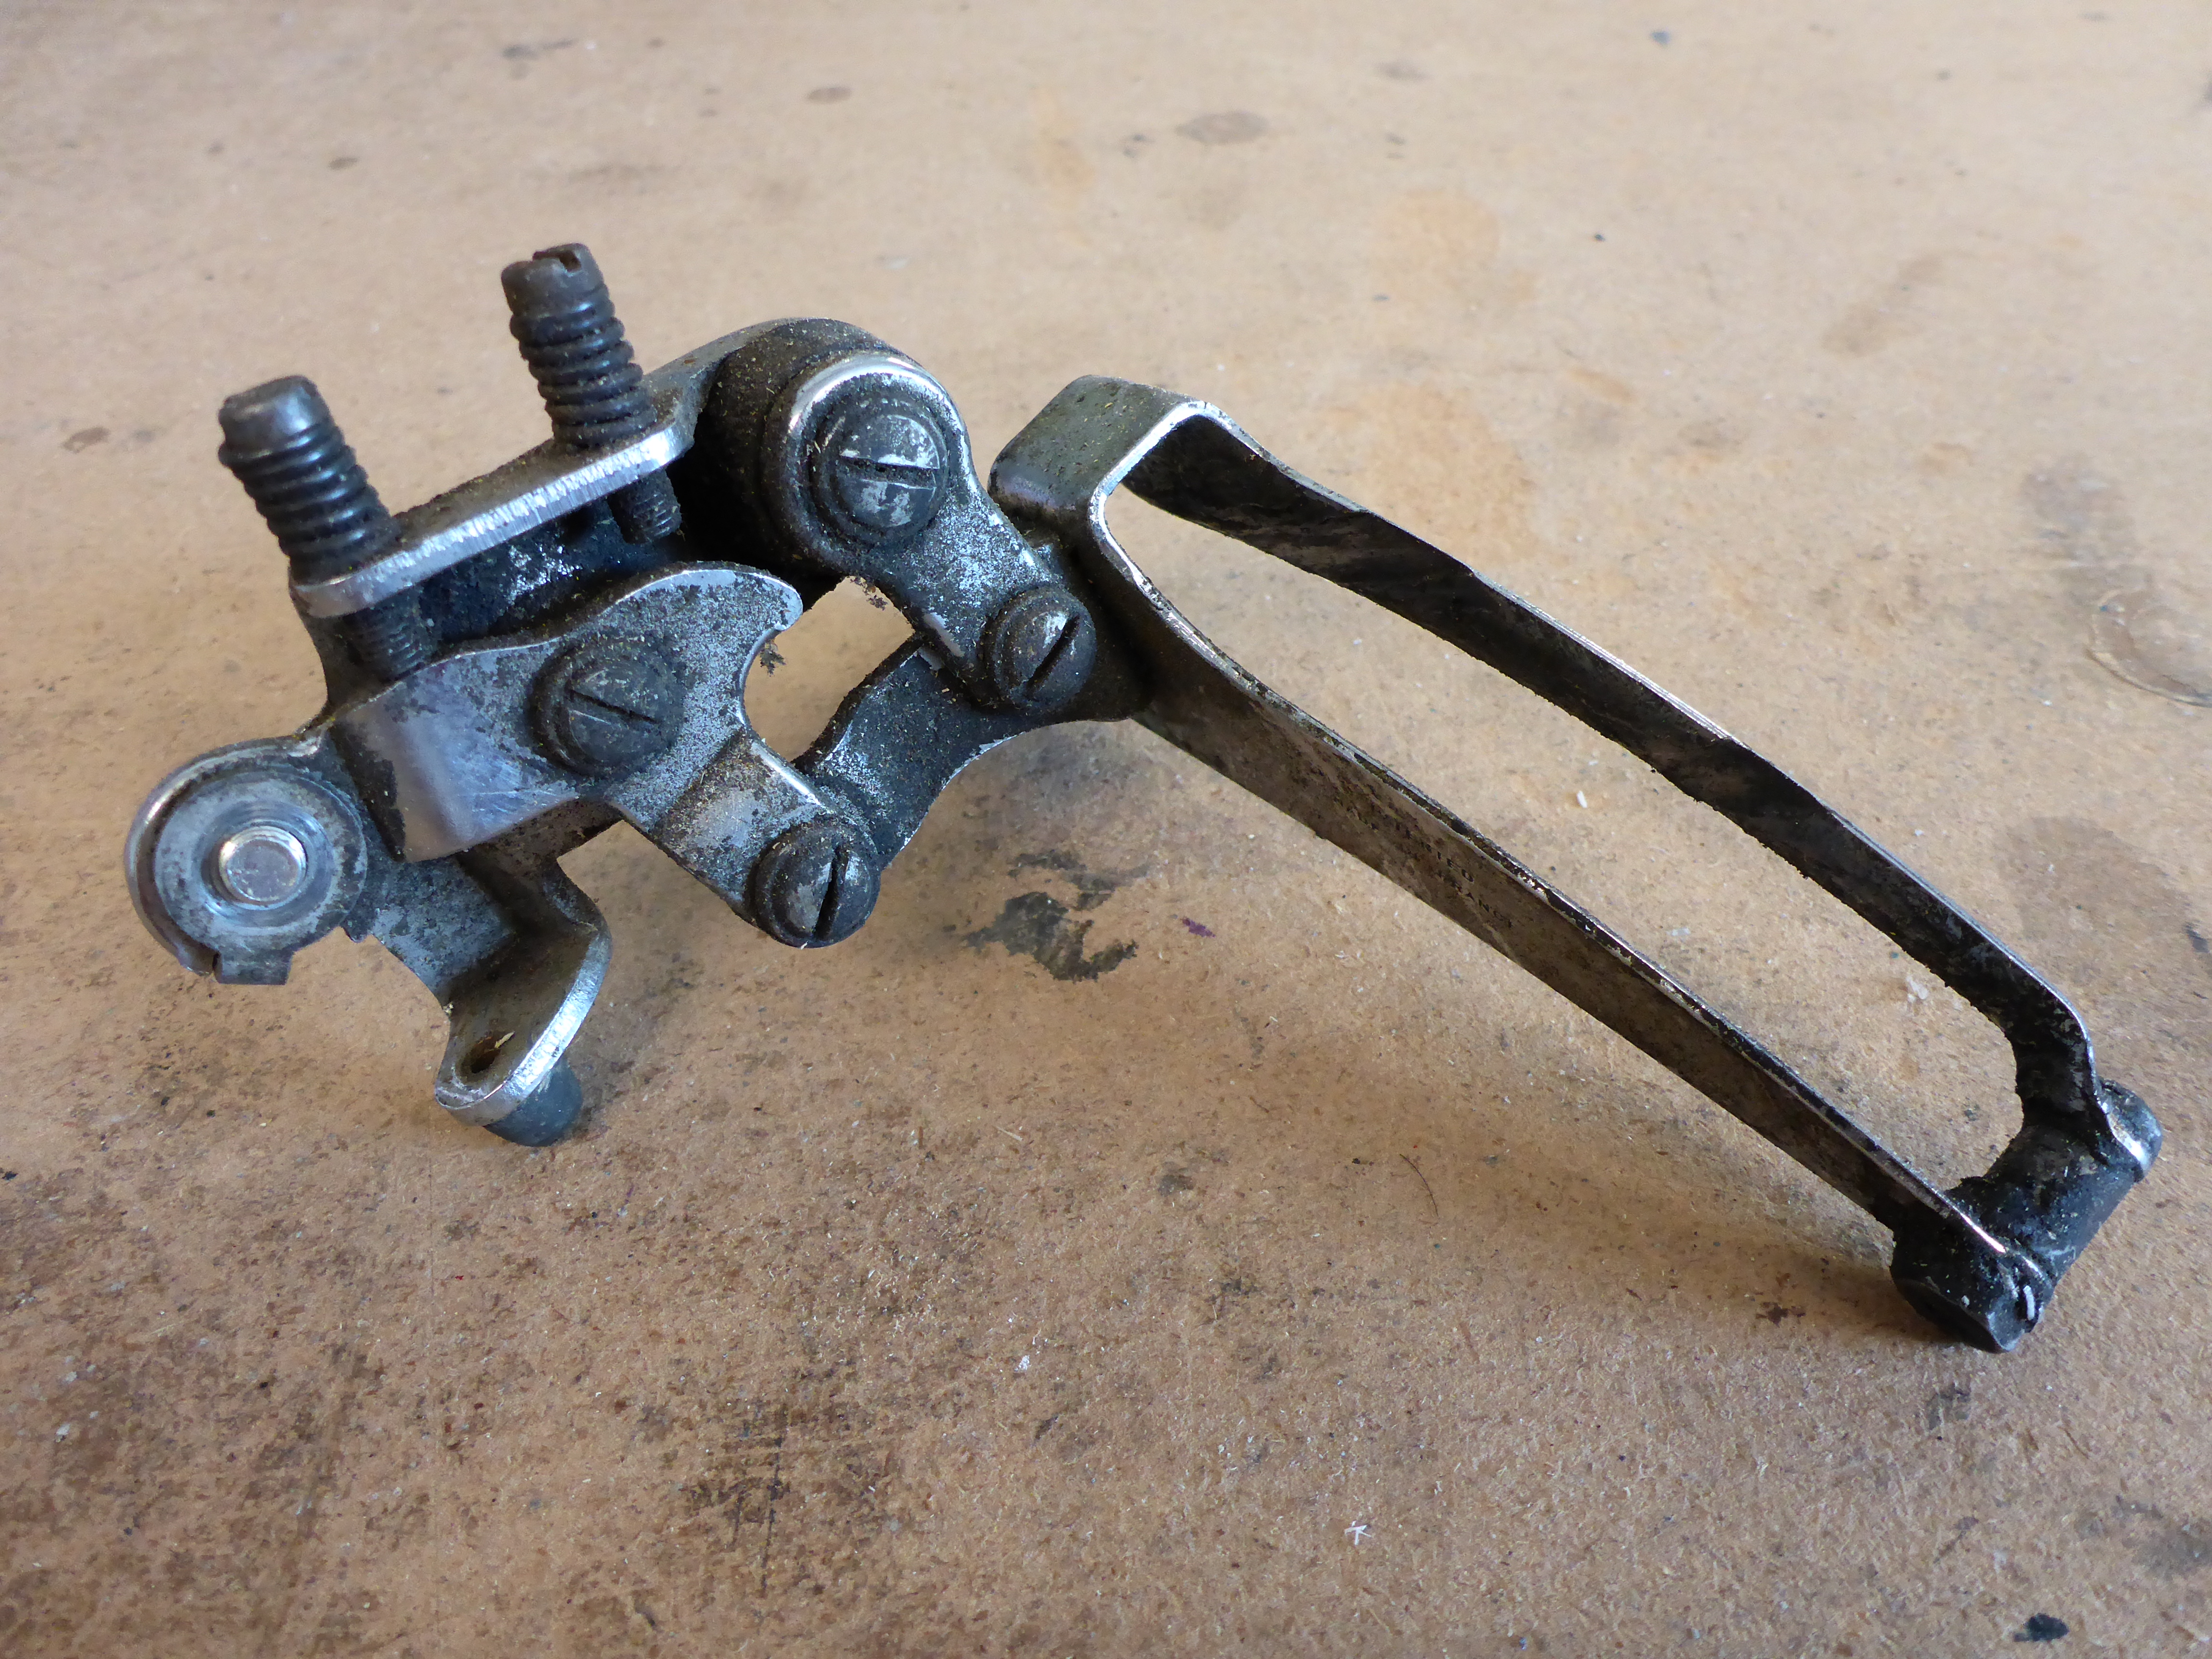
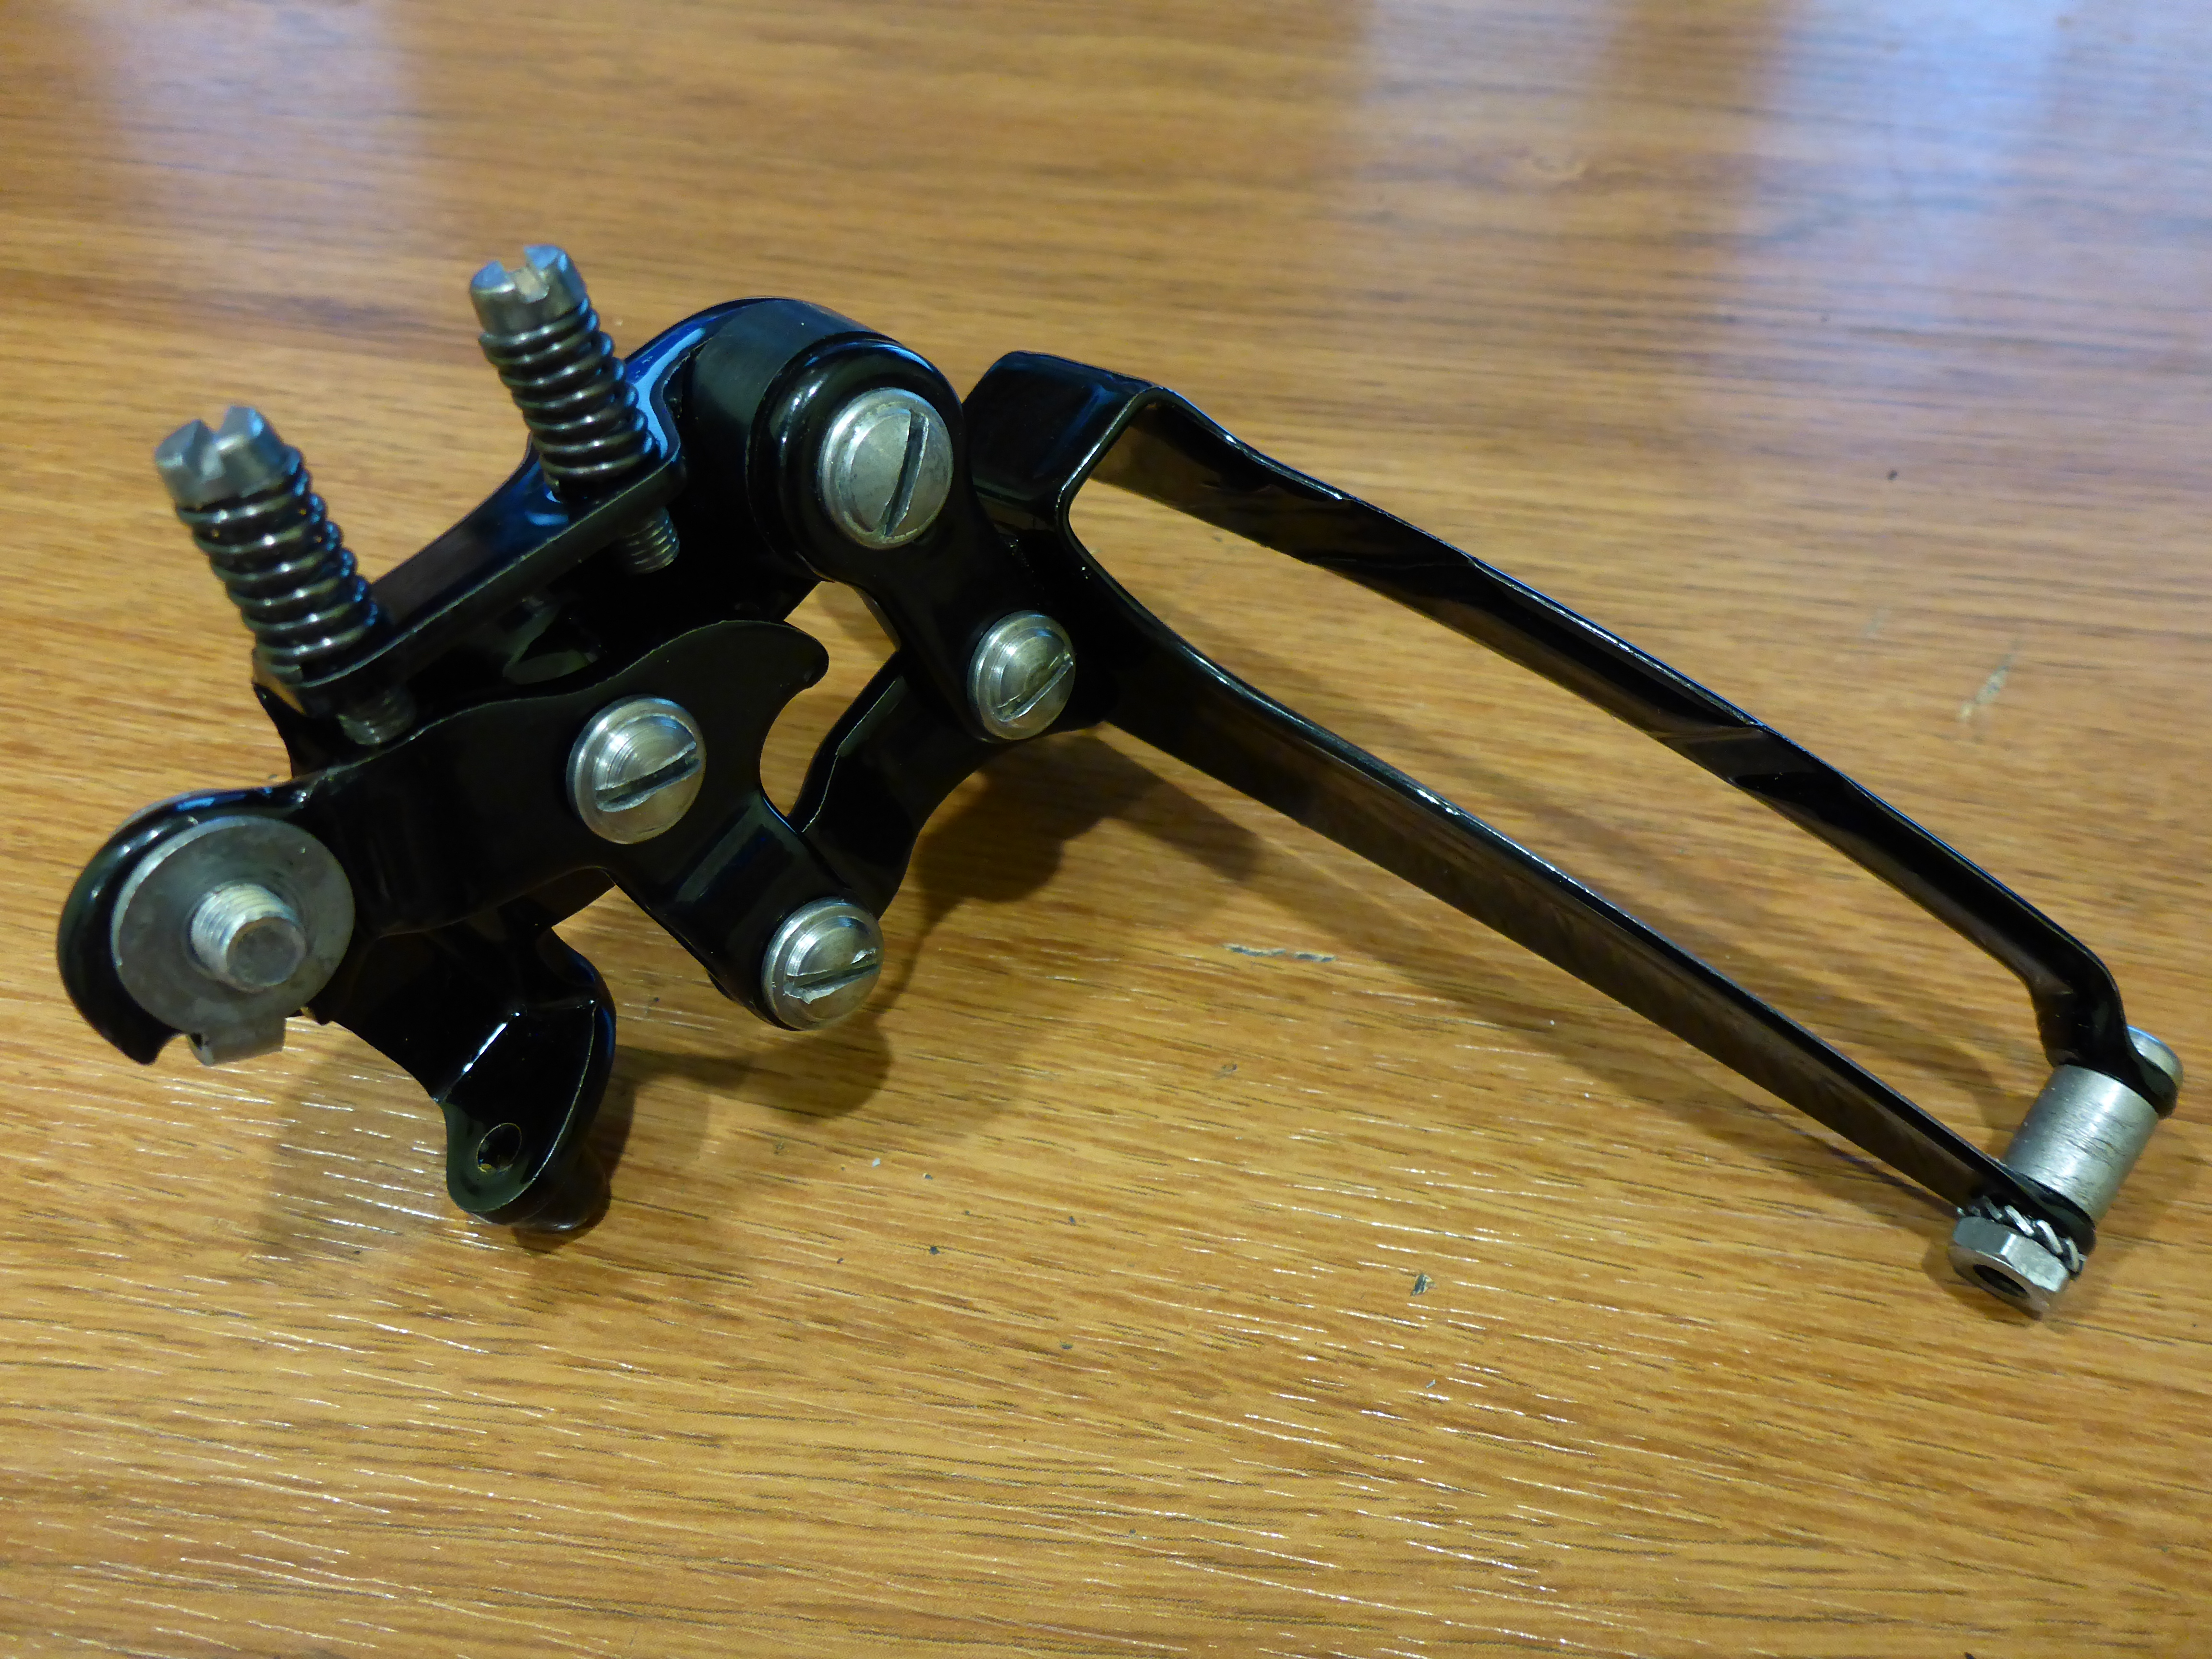
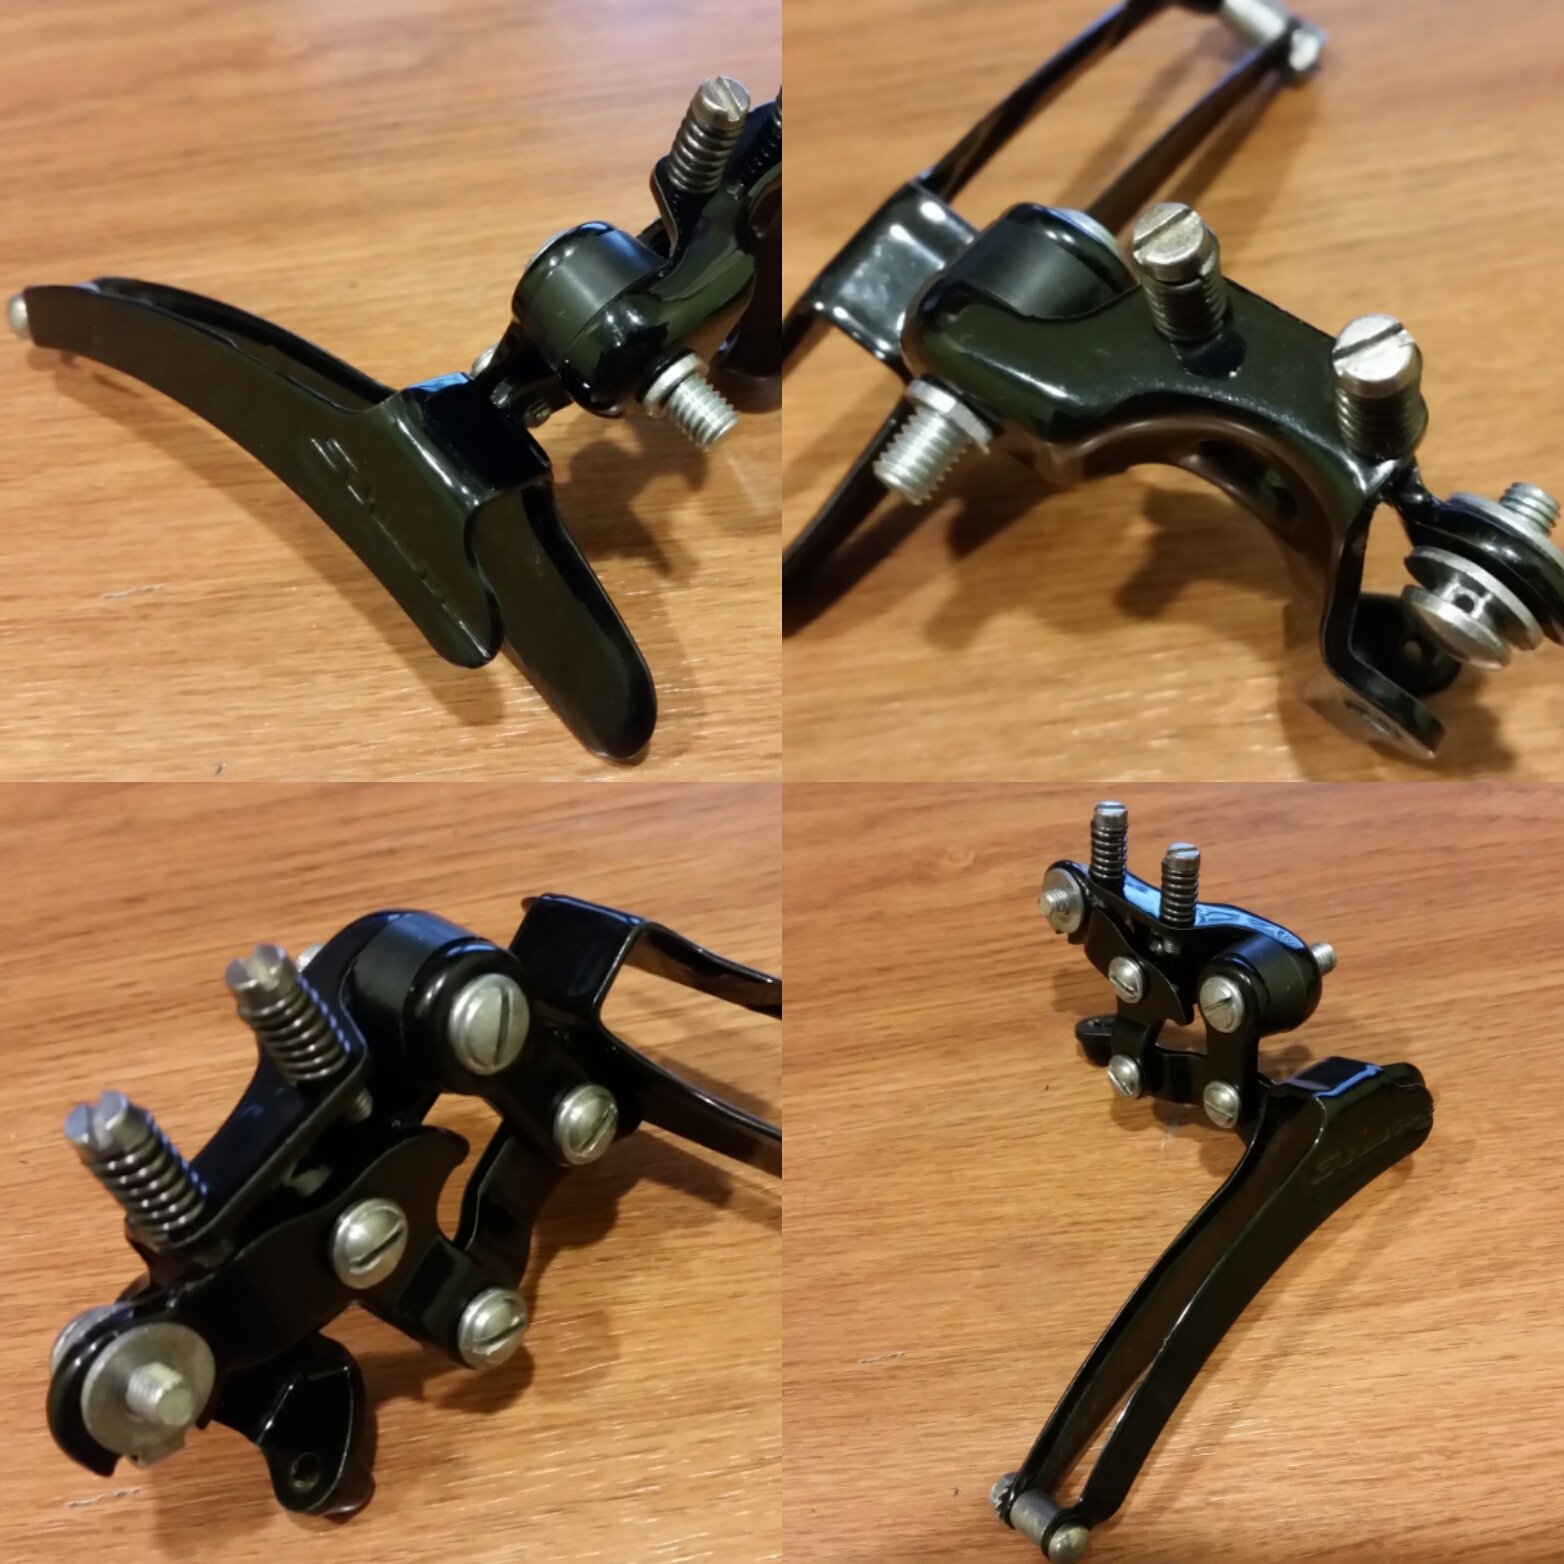
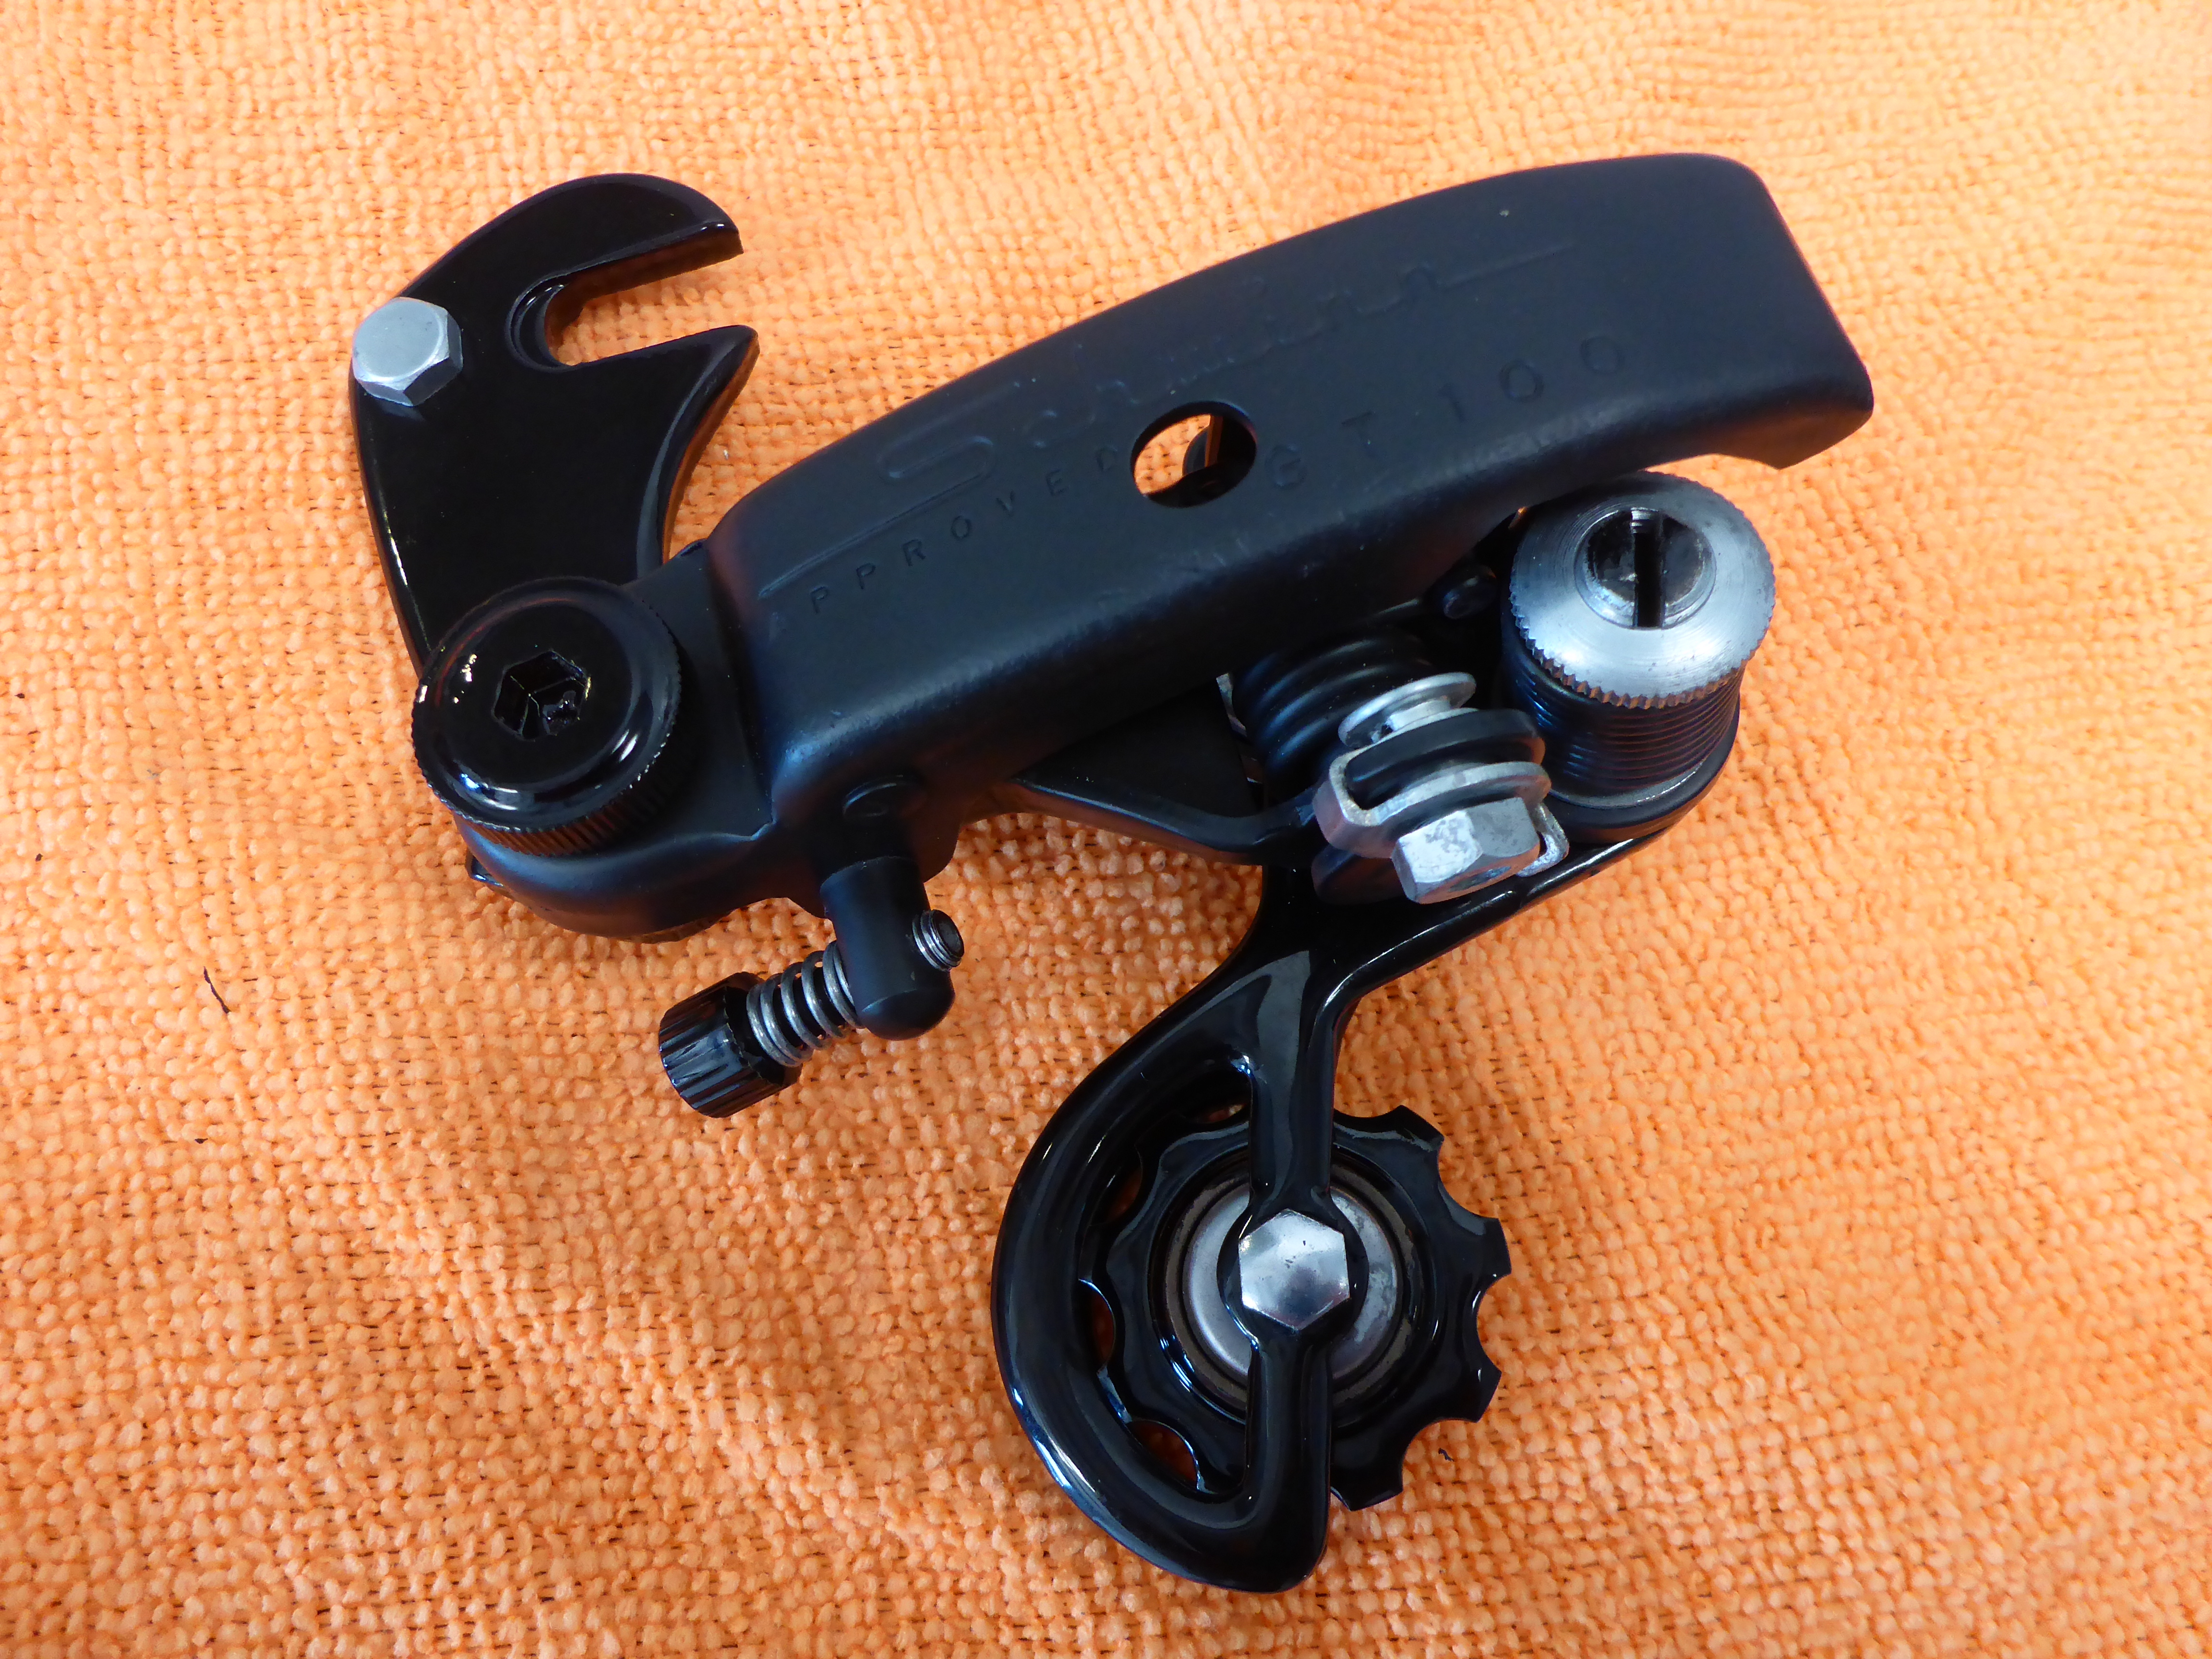
The rear derailer was a fun project in itself! Brad specifically told me that if I took it apart, he would not put that back together… So this one I documented very carefully because it was up to me to make sure it worked when reassembled!
Before:

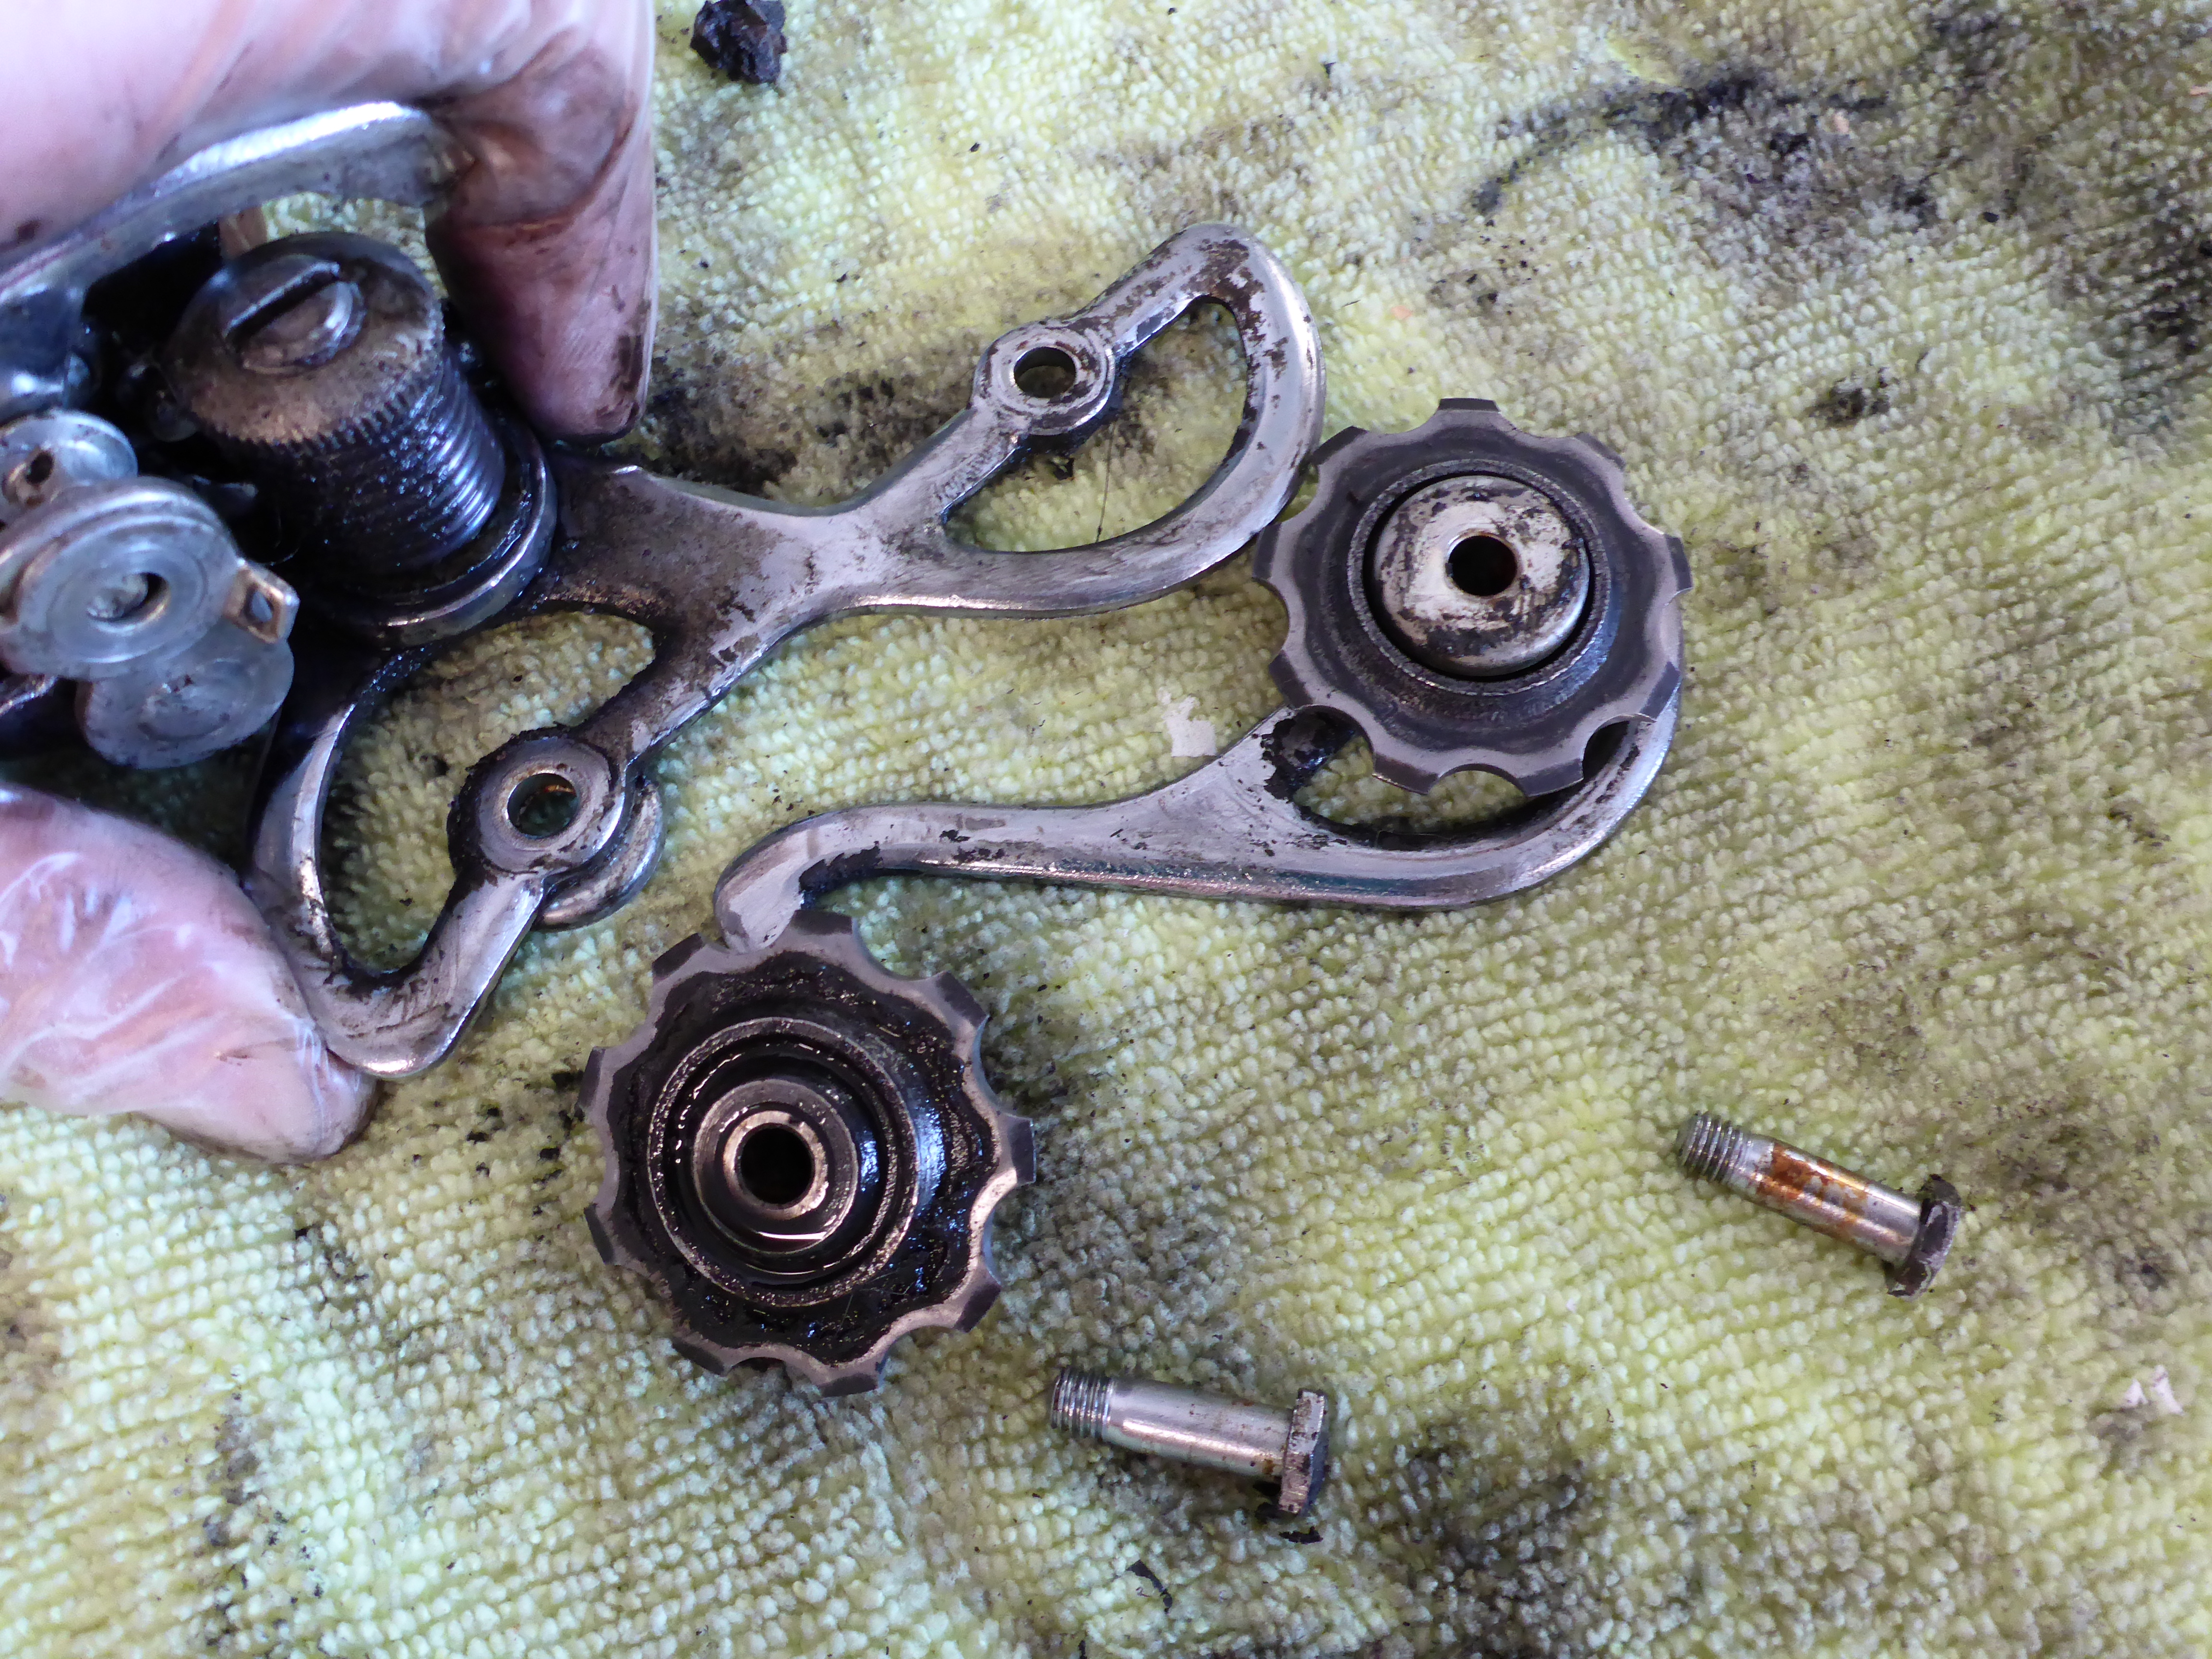
All the polished hardware on just this assembly:
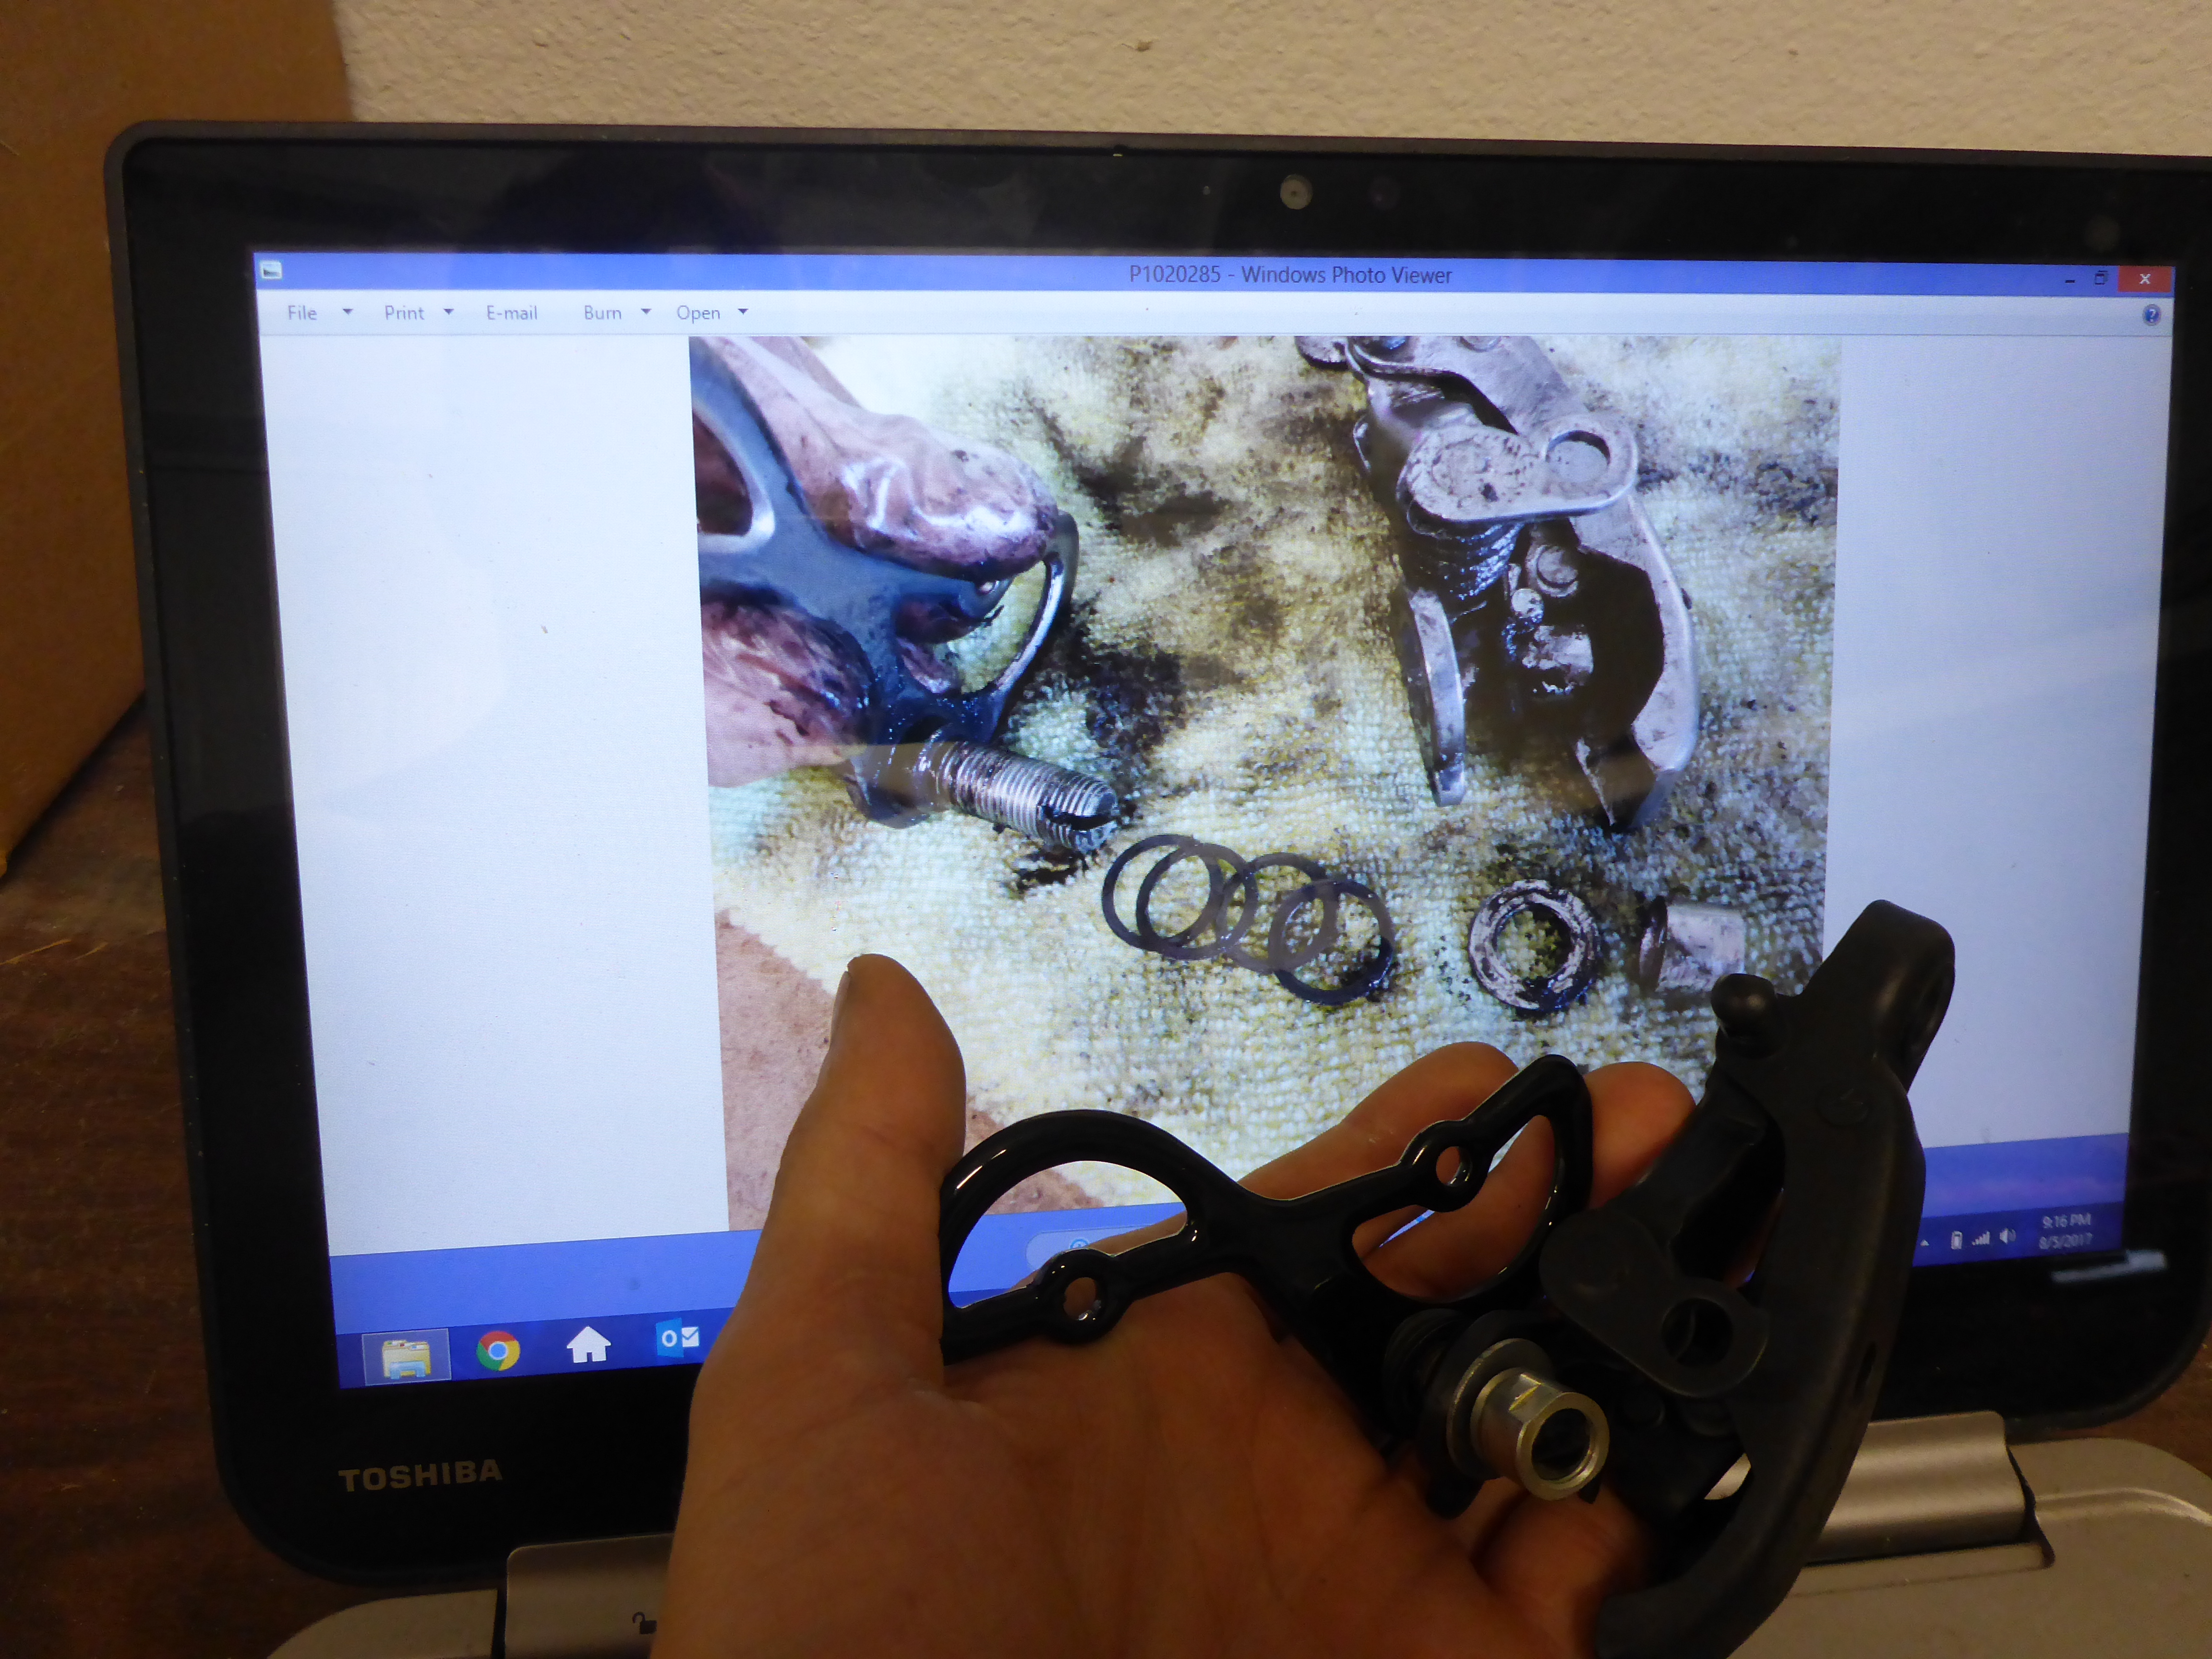
Using my picture references while doing reassembly:
Derailer assembled! … but I’m not happy quite yet. Two bolts and the gears clash. I sent those off along with some other collars to return looking like Wesley Snipes:
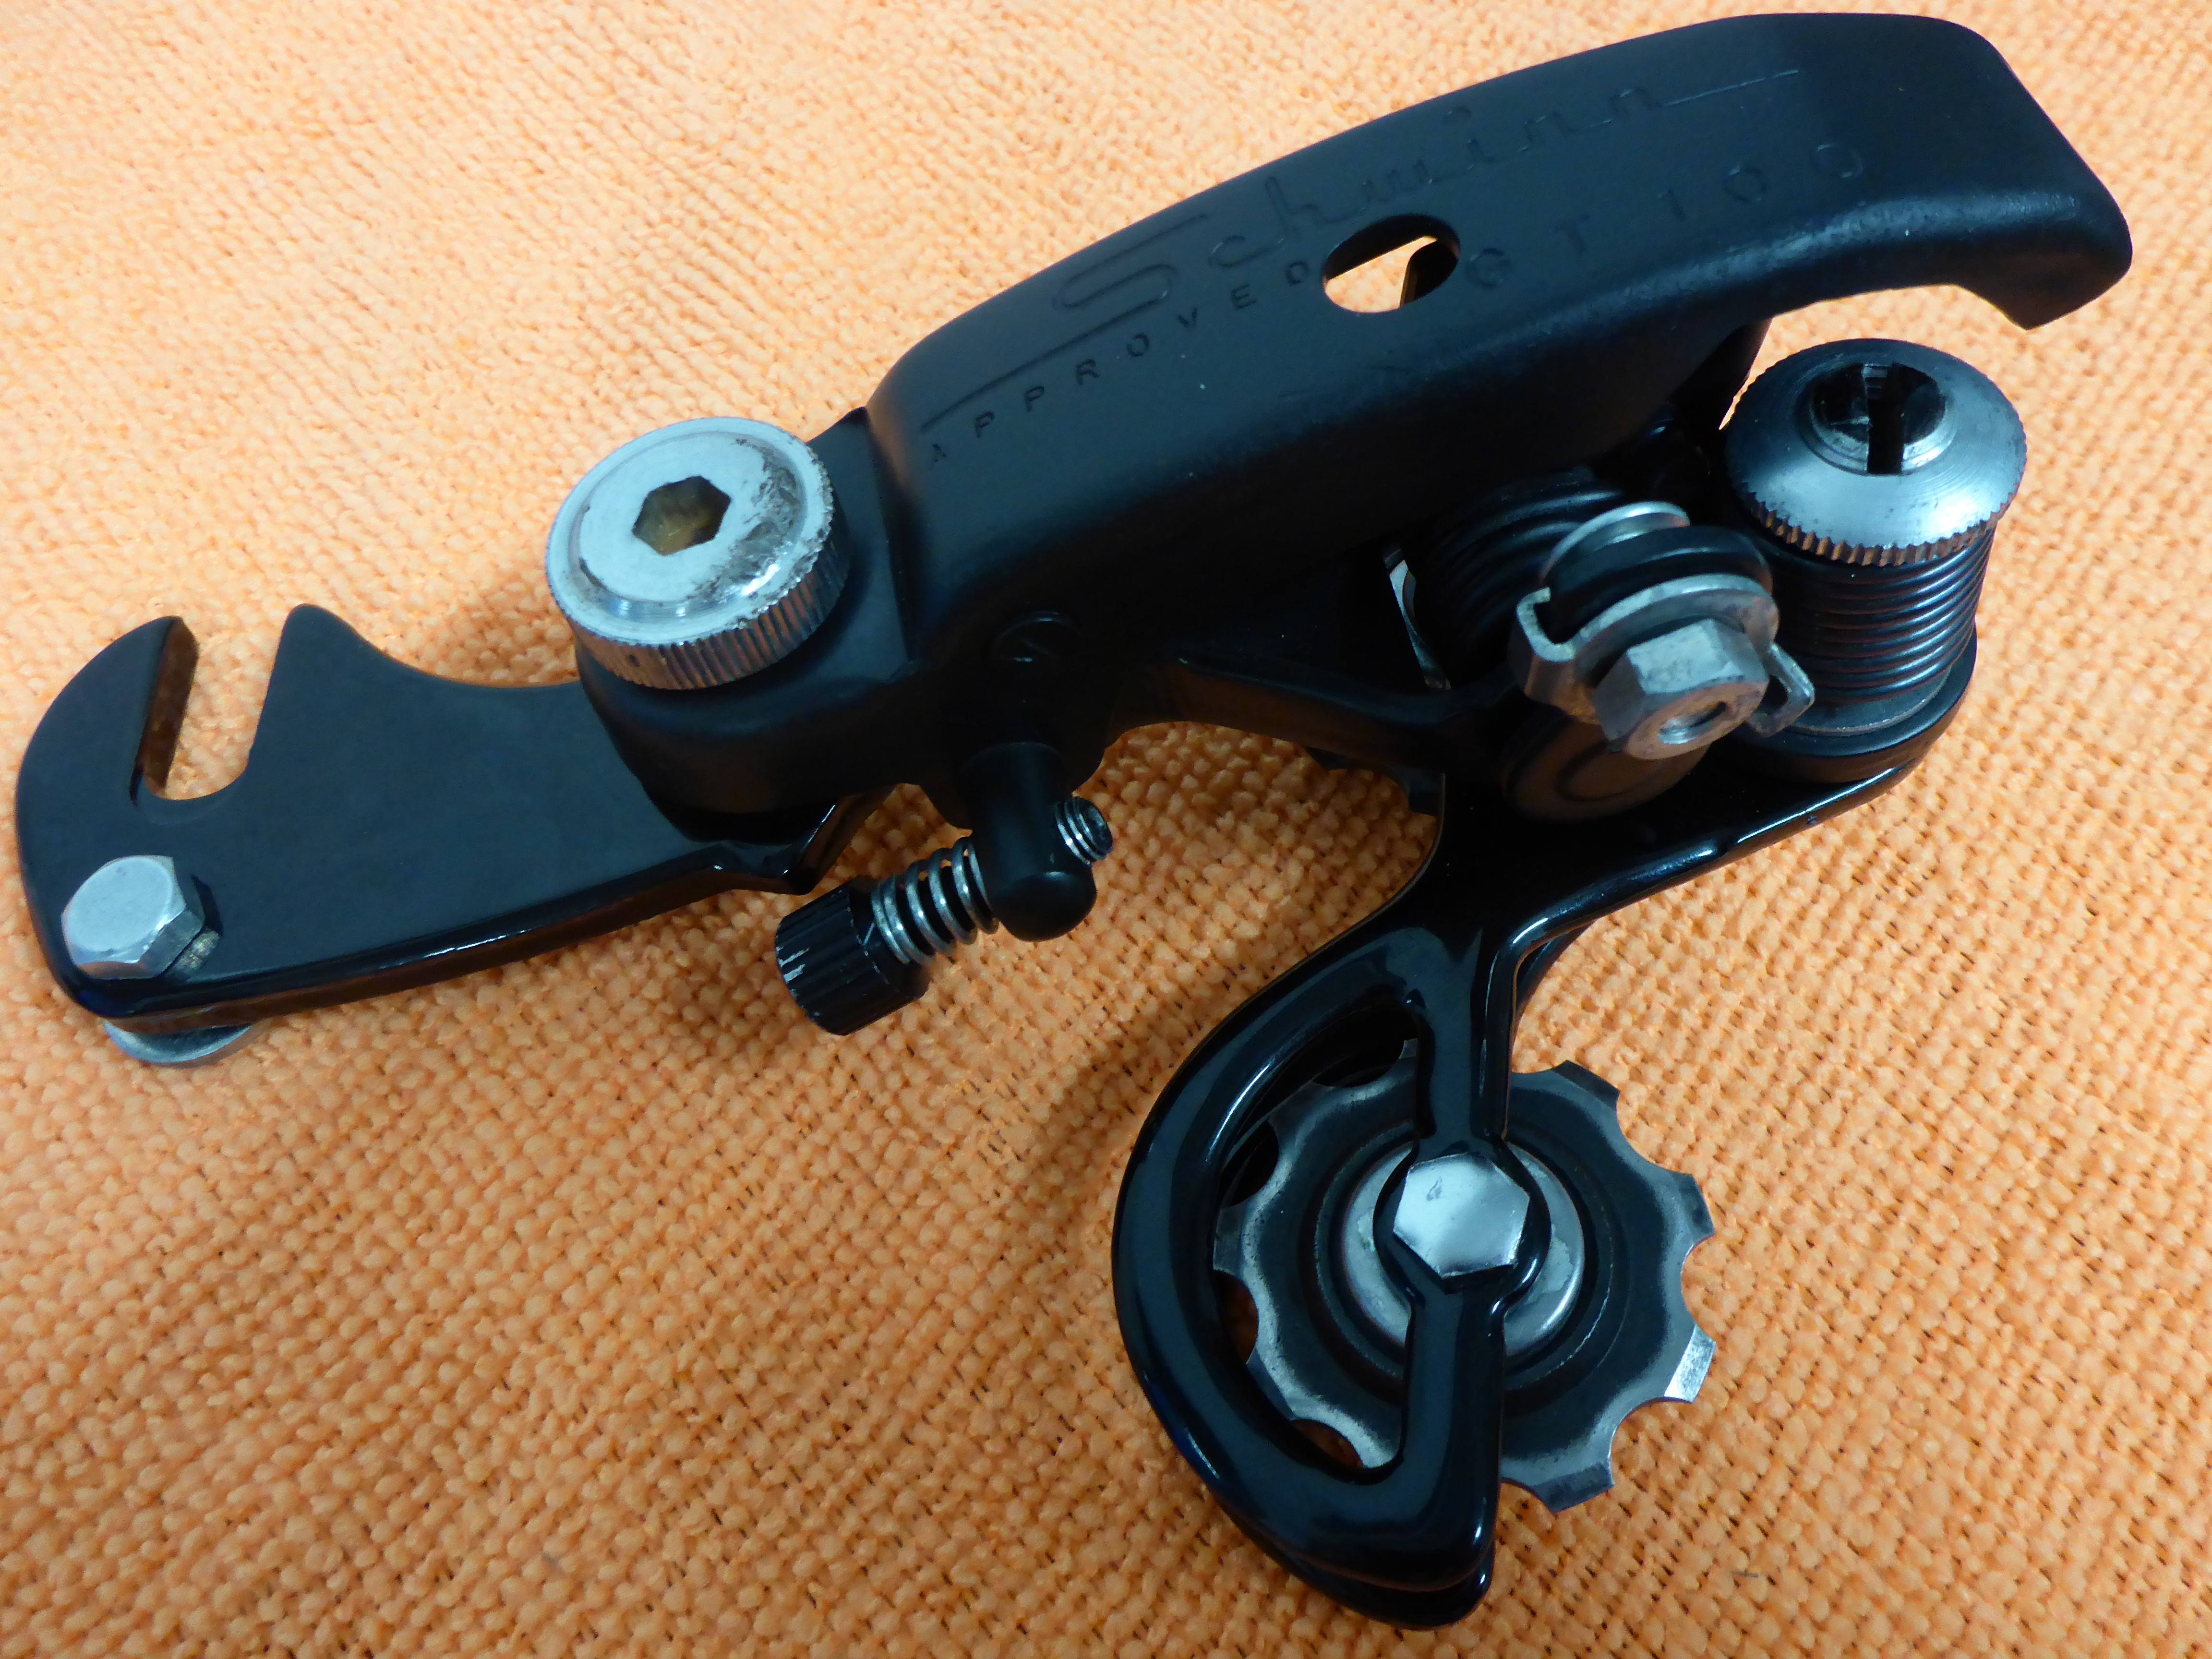
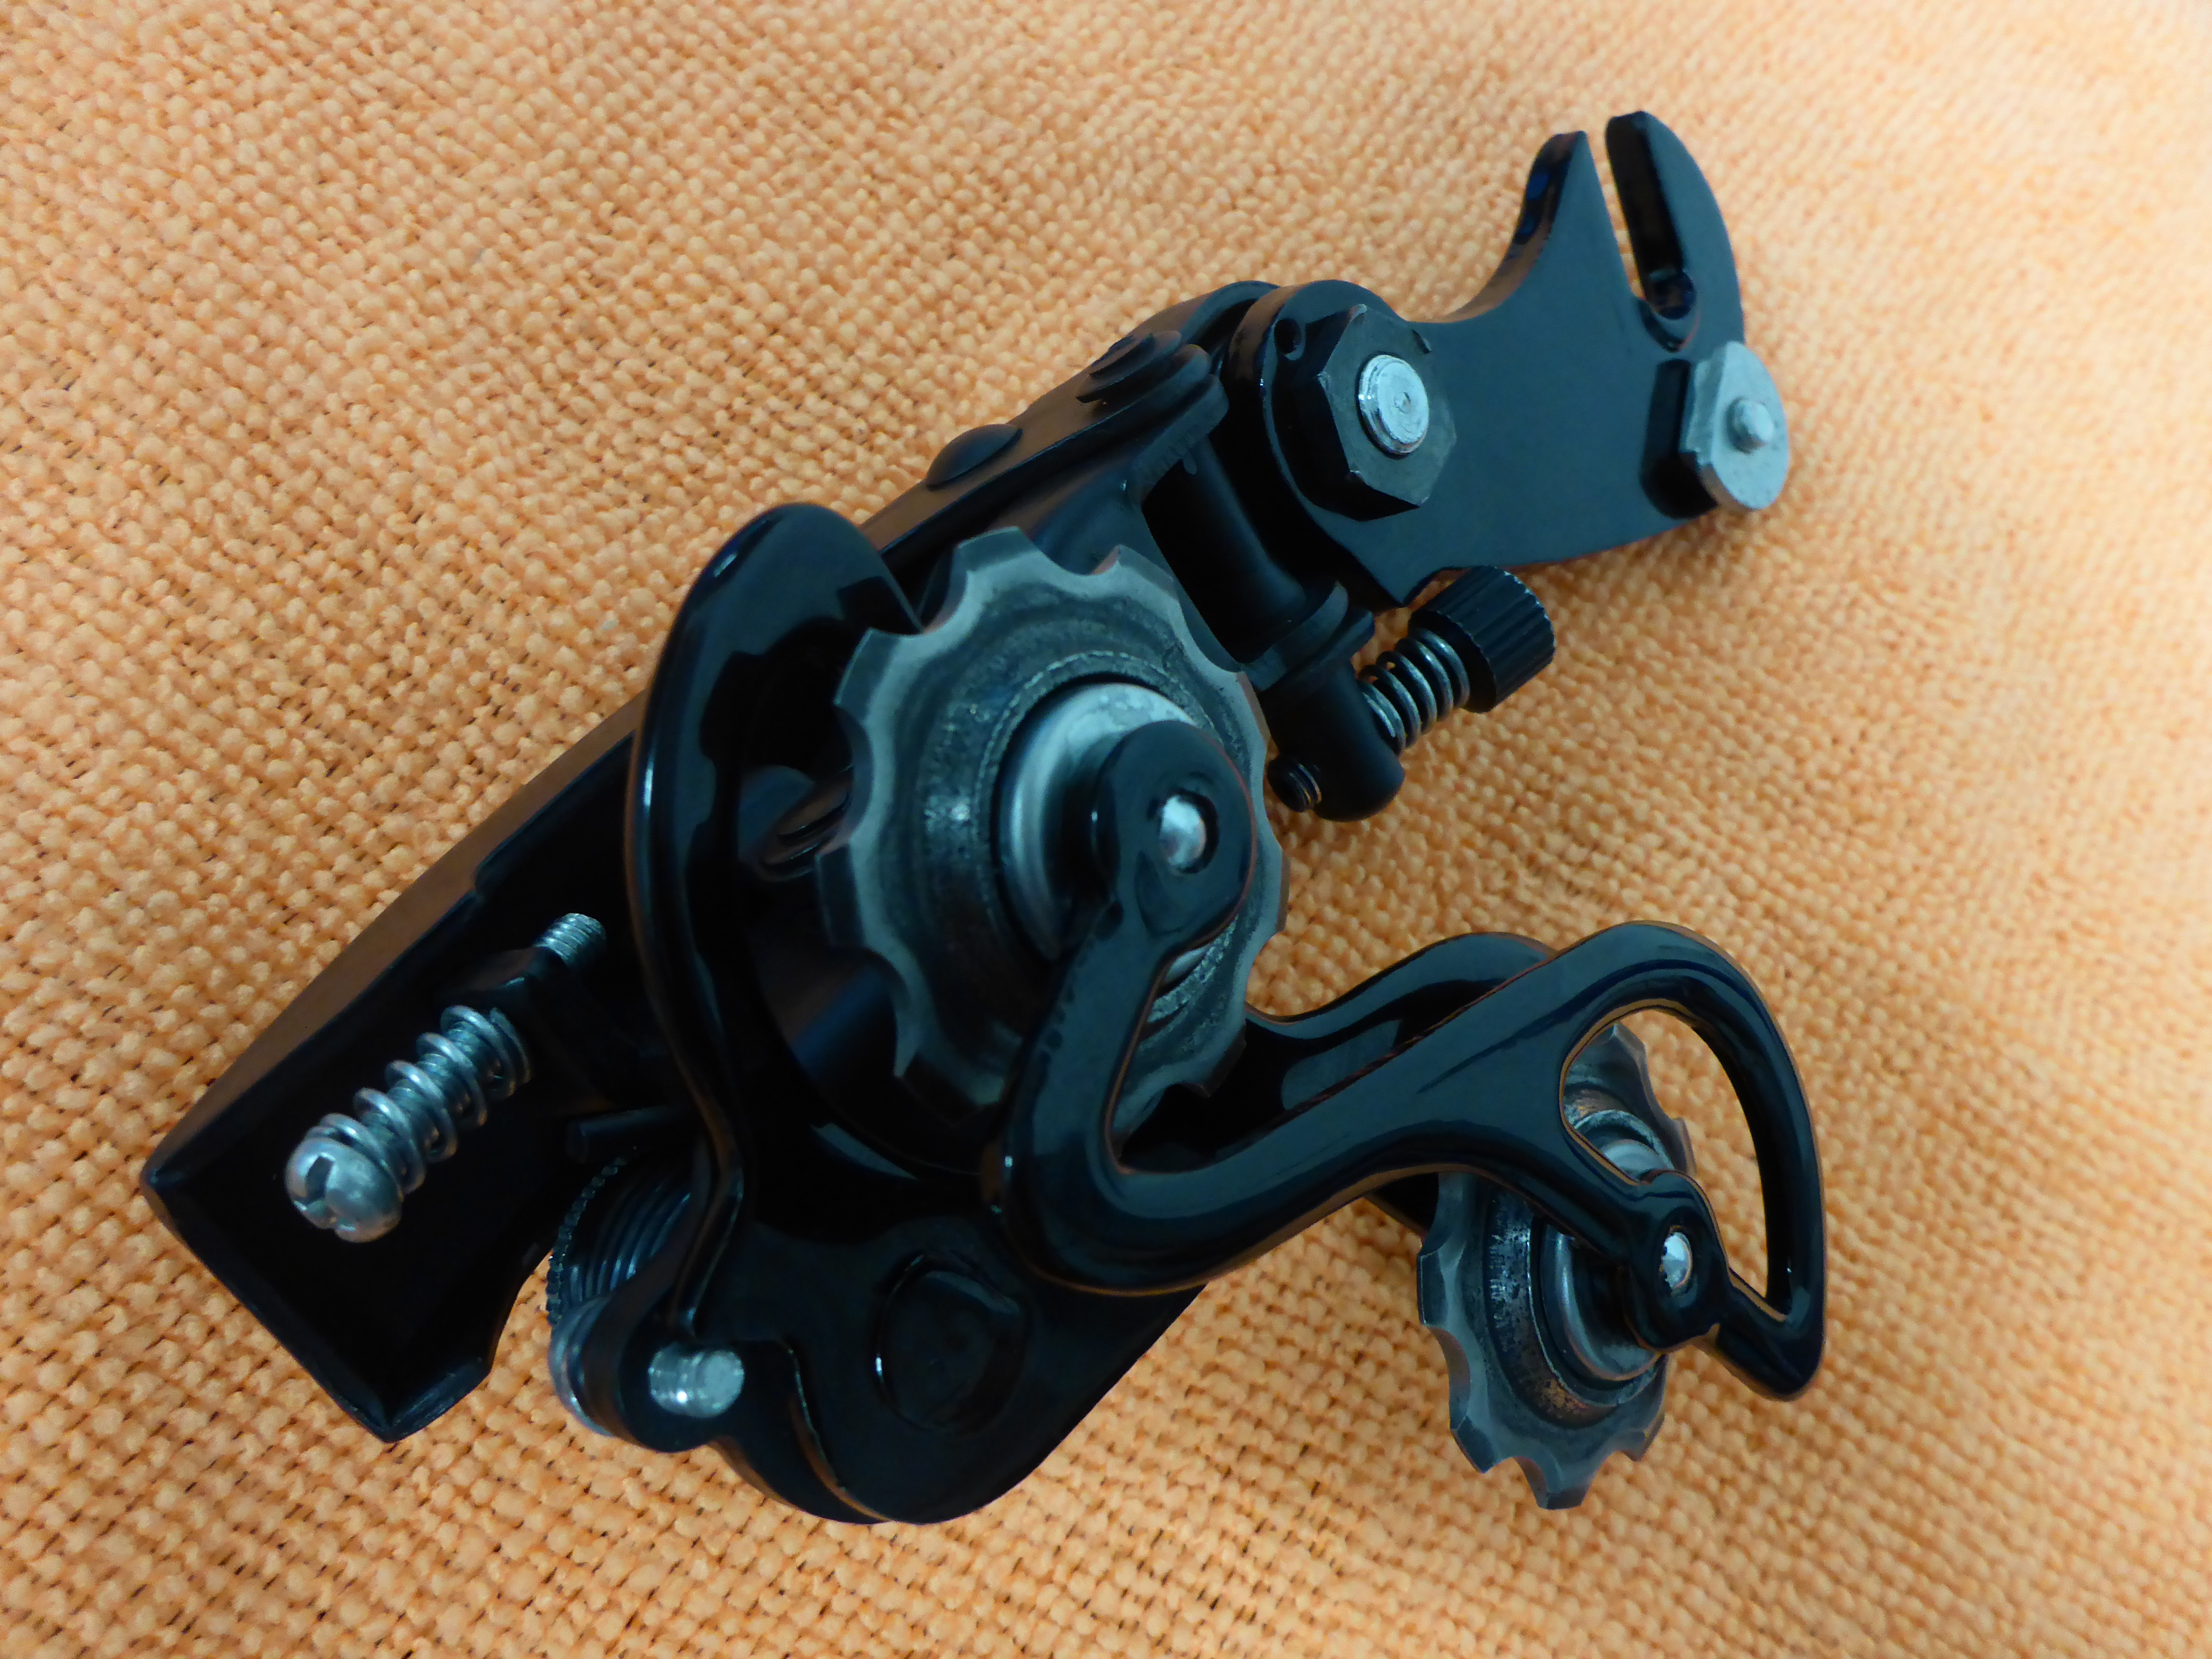


Now I’m pleased:

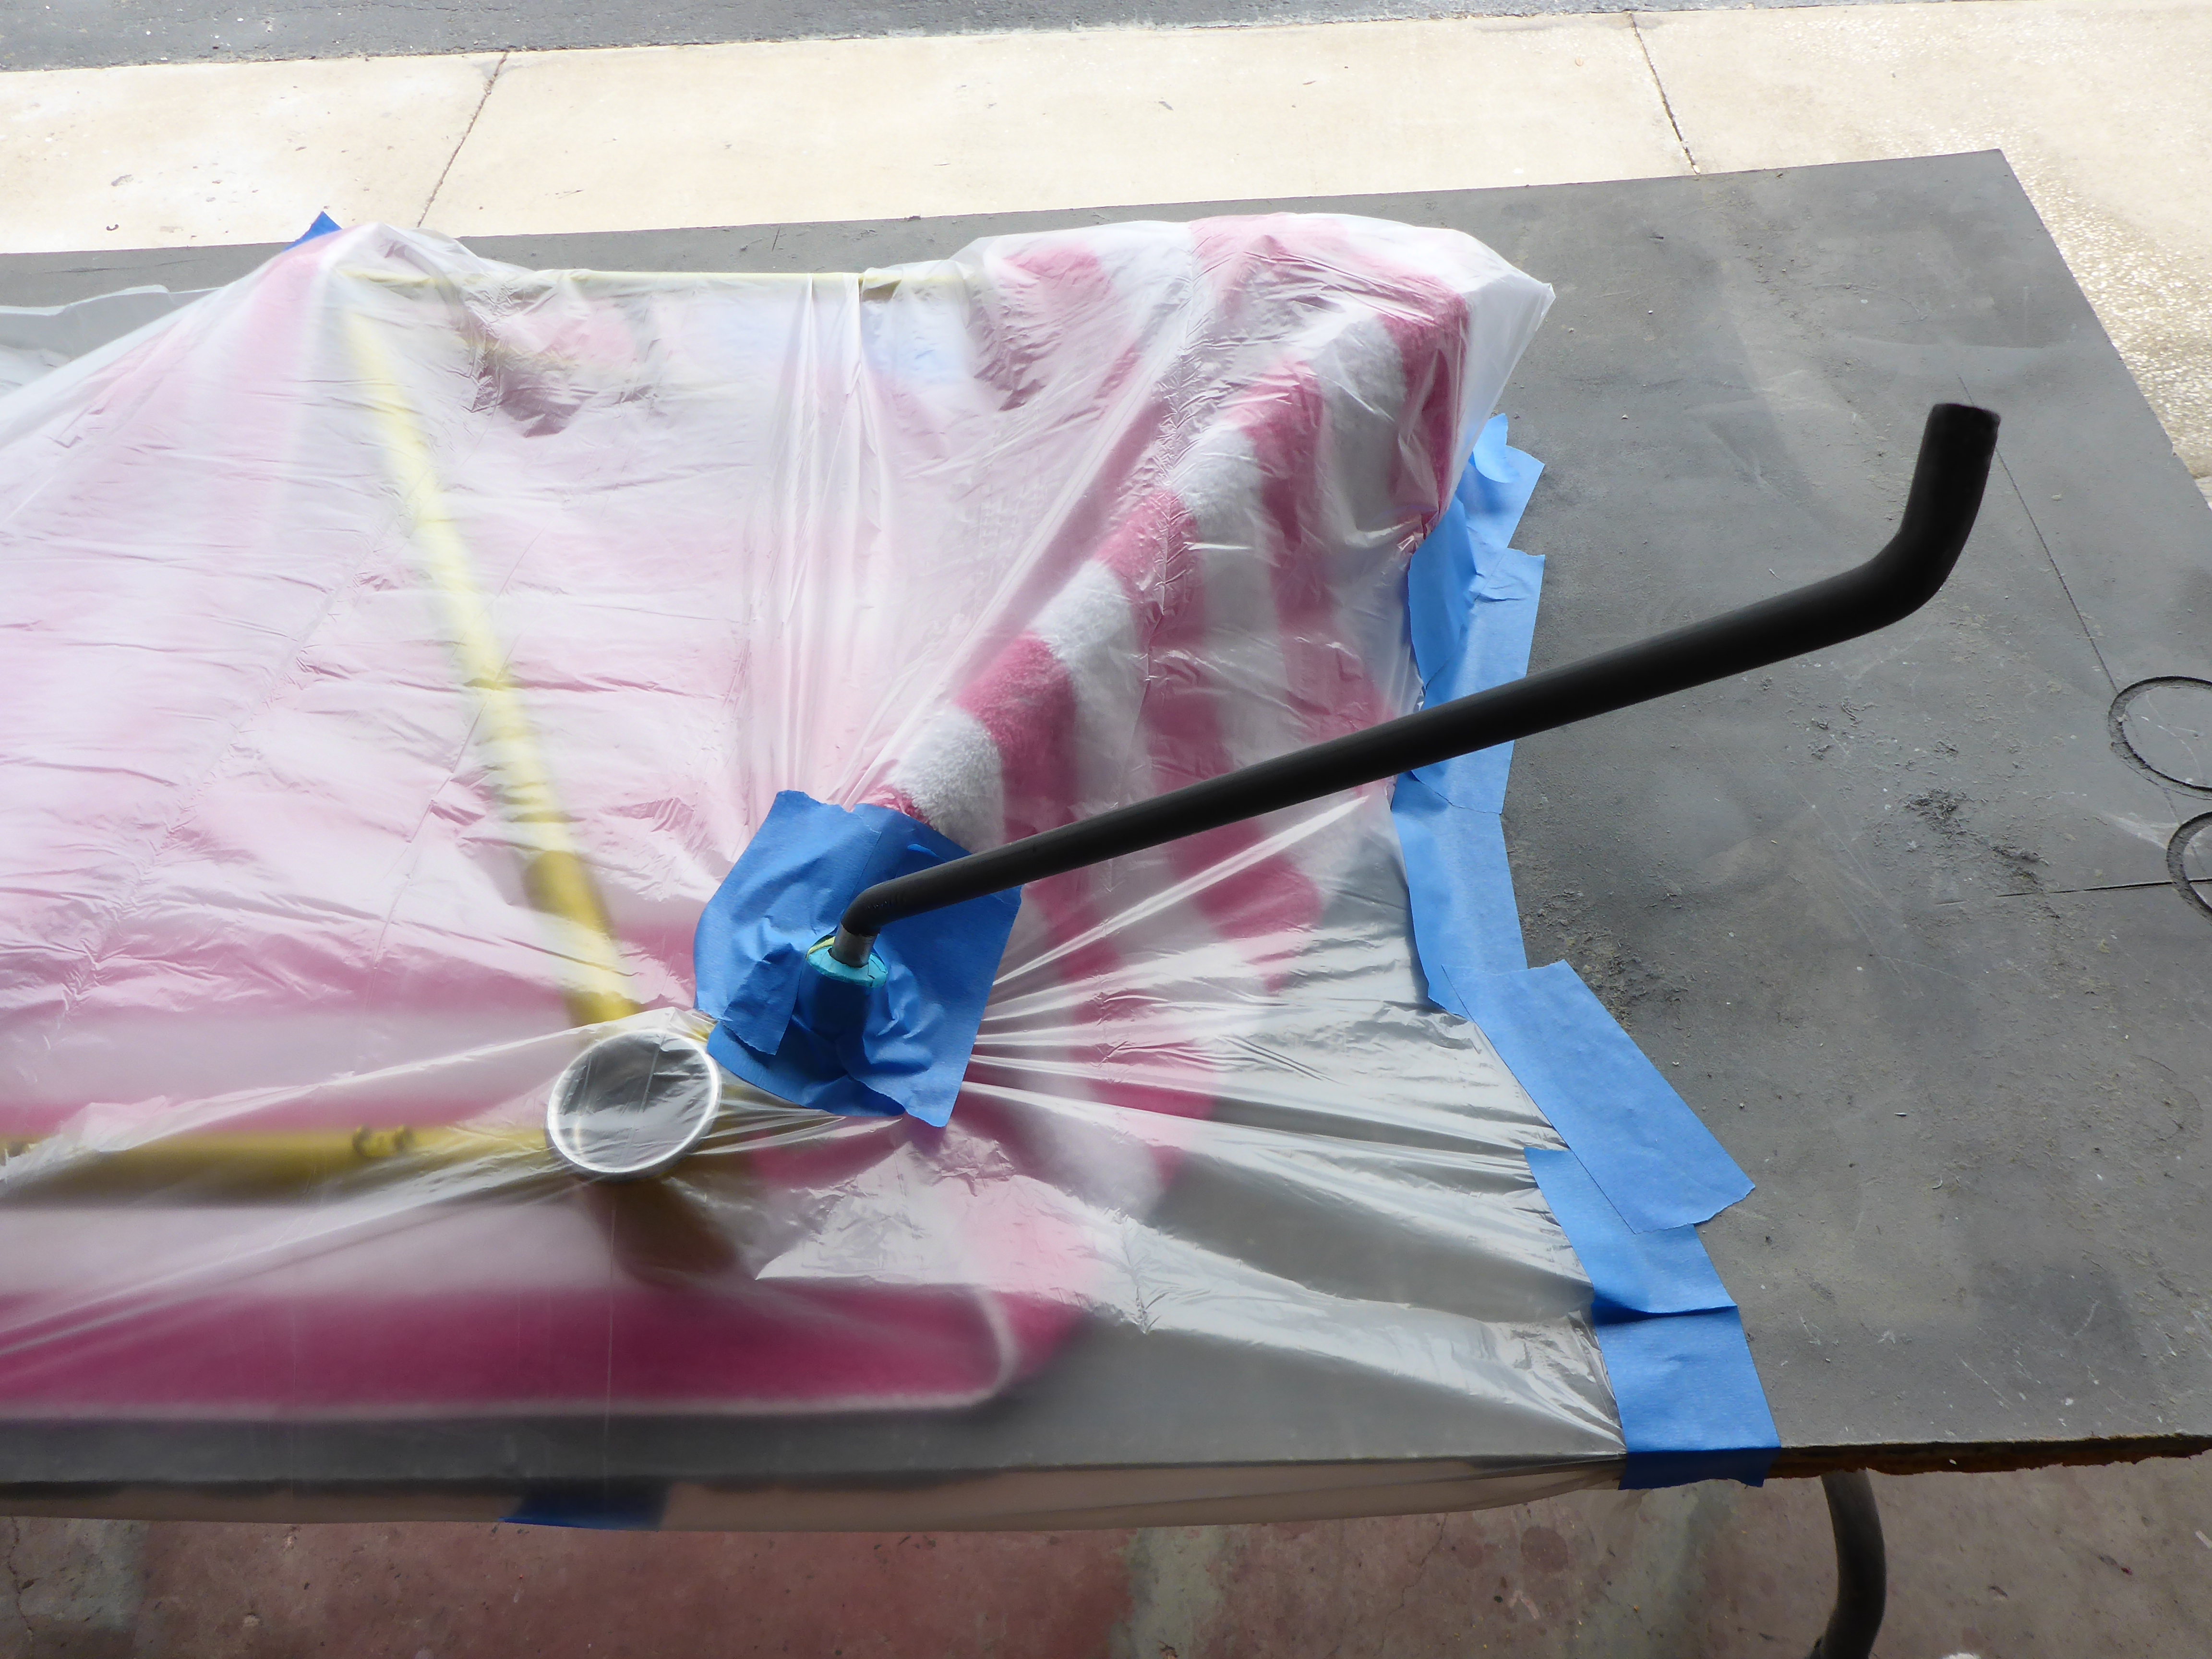
I took a bubble wrapped frame and a box full of bubble wrapped parts and assemblies over to Tarpon Tom’s for Brad to work his magic. I requested he take his time and give it as much extra attention as required to assemble it in a show-worthy fashion. He did not disappoint. Everything was meticulously put together in a timely manner with no corners cut.
Checking in: Temporary seat, no handlebar wraps, no chain, but mostly together:
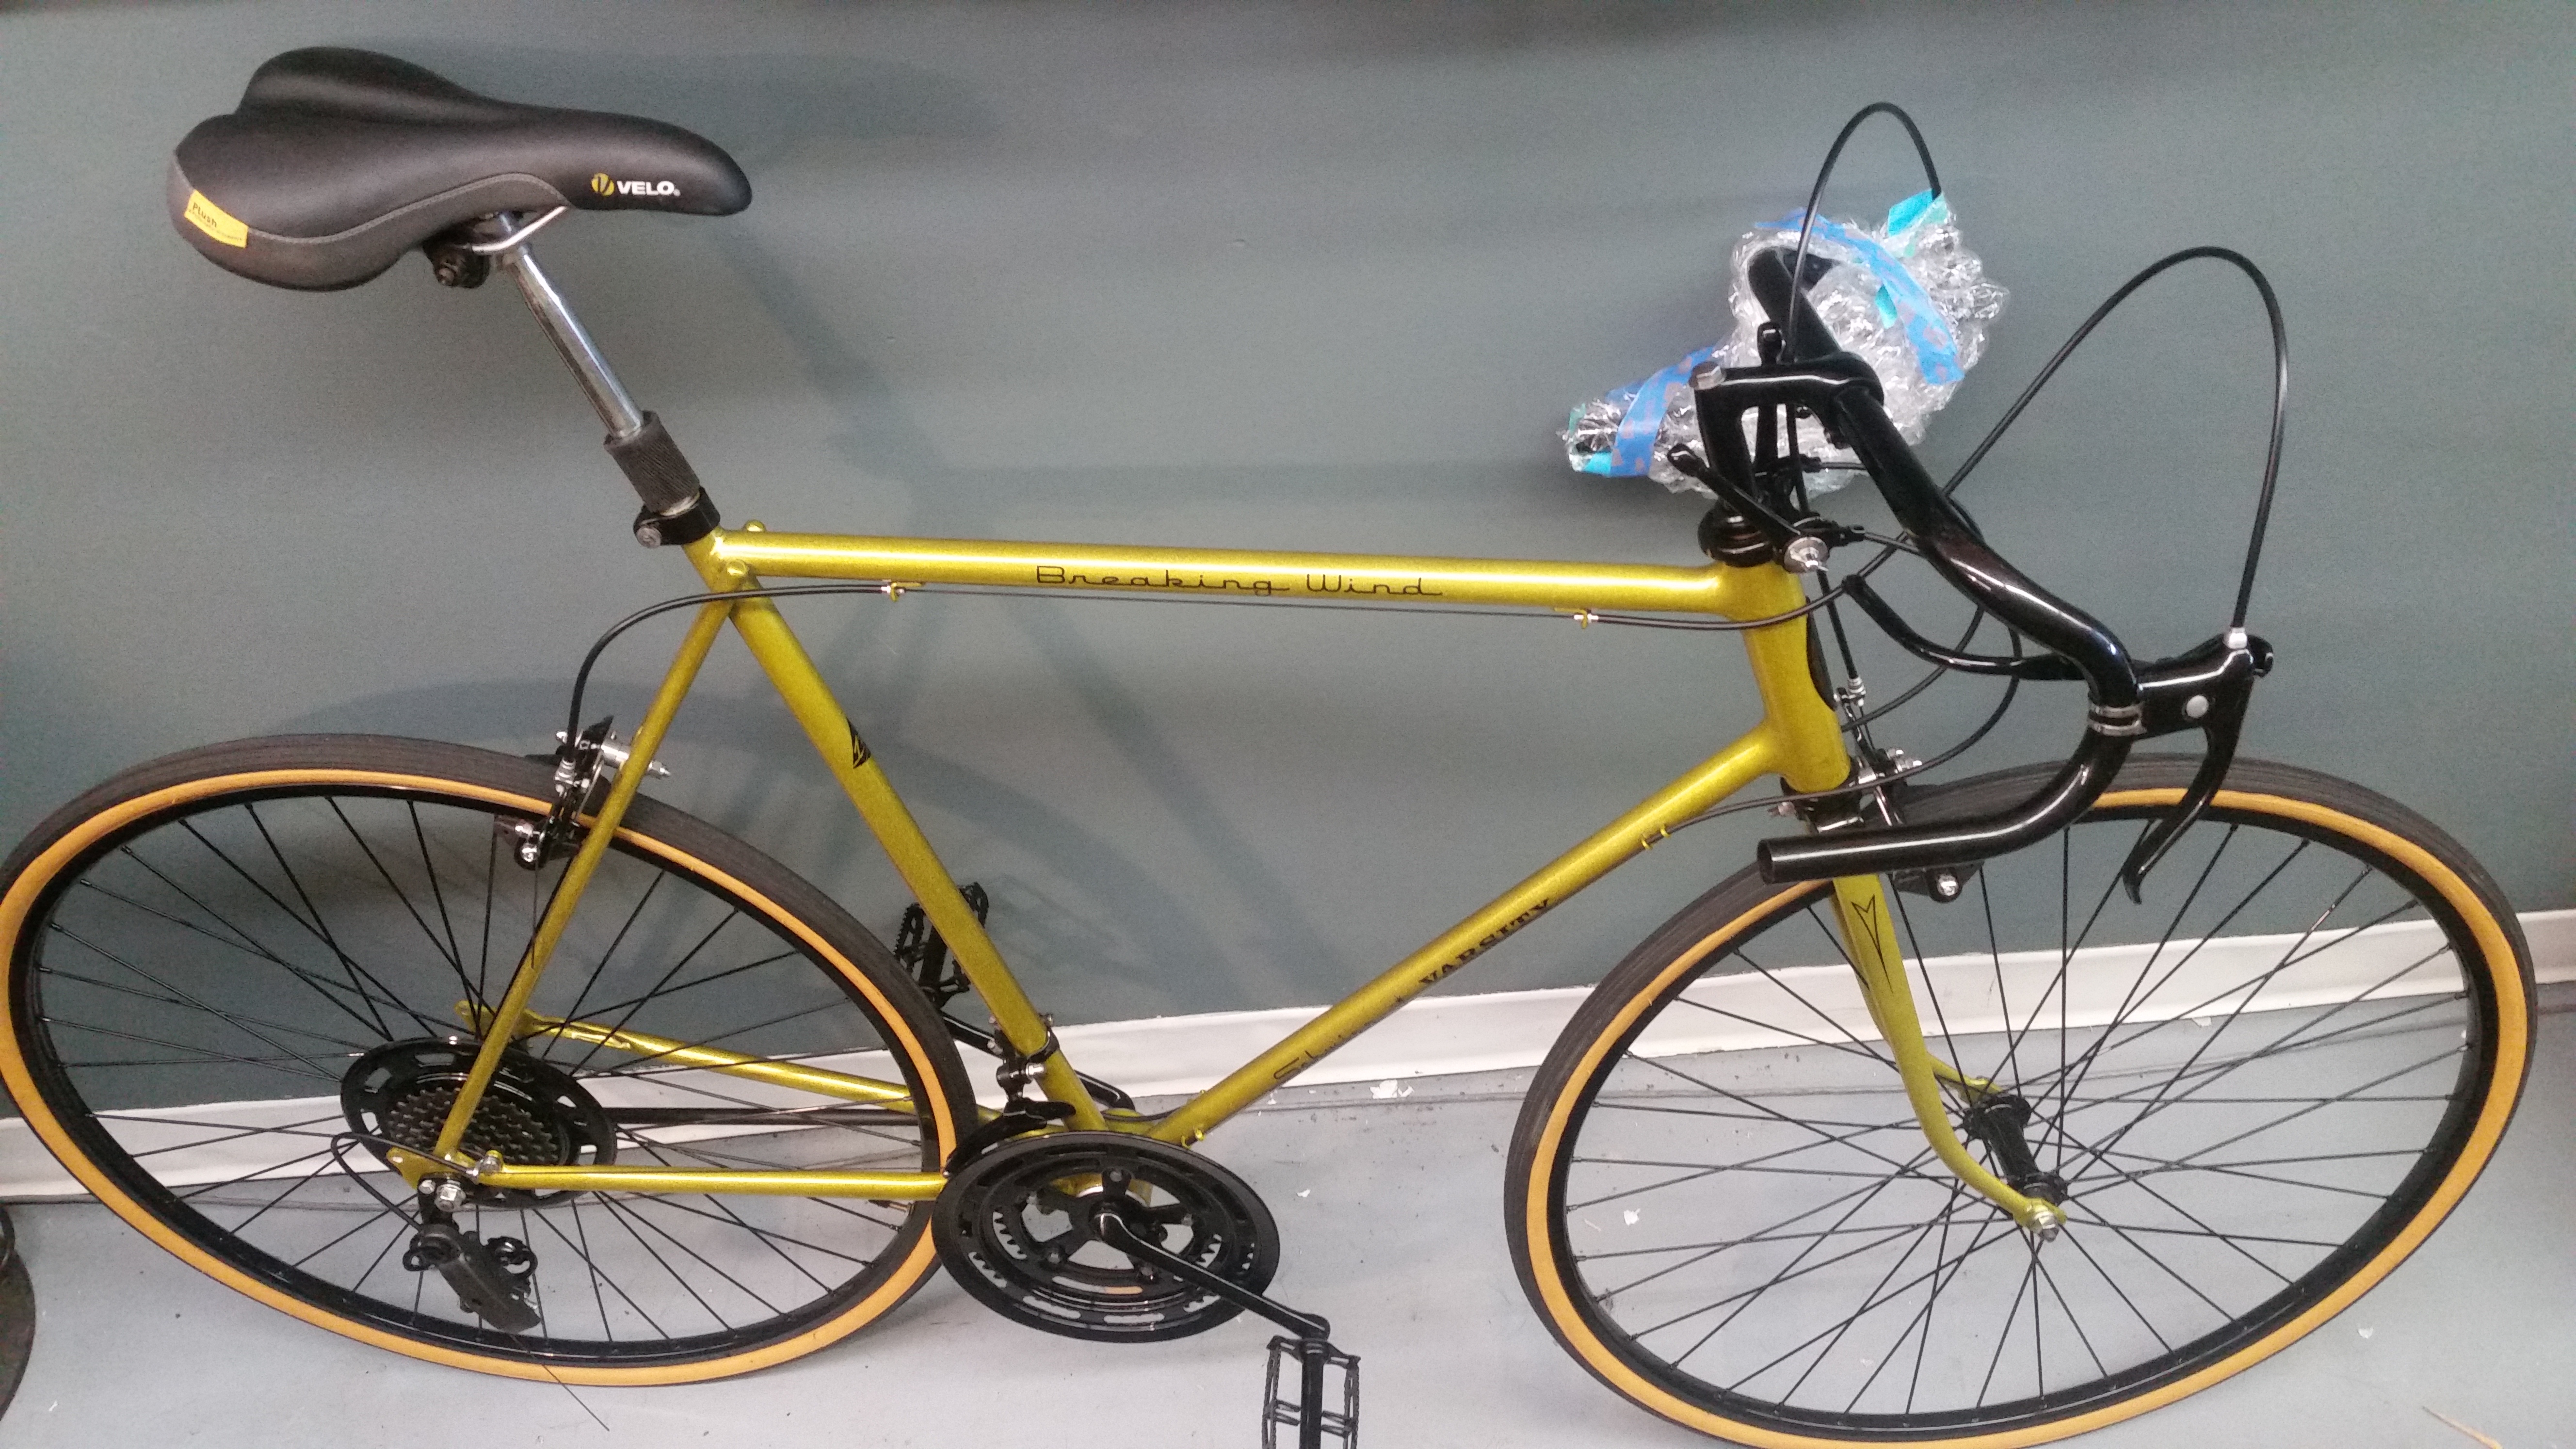
The following picture was taken in the parking lot on pickup day: bike is fully assembled and complete! Excellent work Brad! Bravo! Uncle Pat would love how it turned out.
The official deadline for completion was a car show where I had rented my first ever booth space. Both Jukeys and Breaking Wind got their debut to the world simultaneously next to a 10’x10′ canopy covering a variety of custom headlight builds for demonstration. We had a good time.


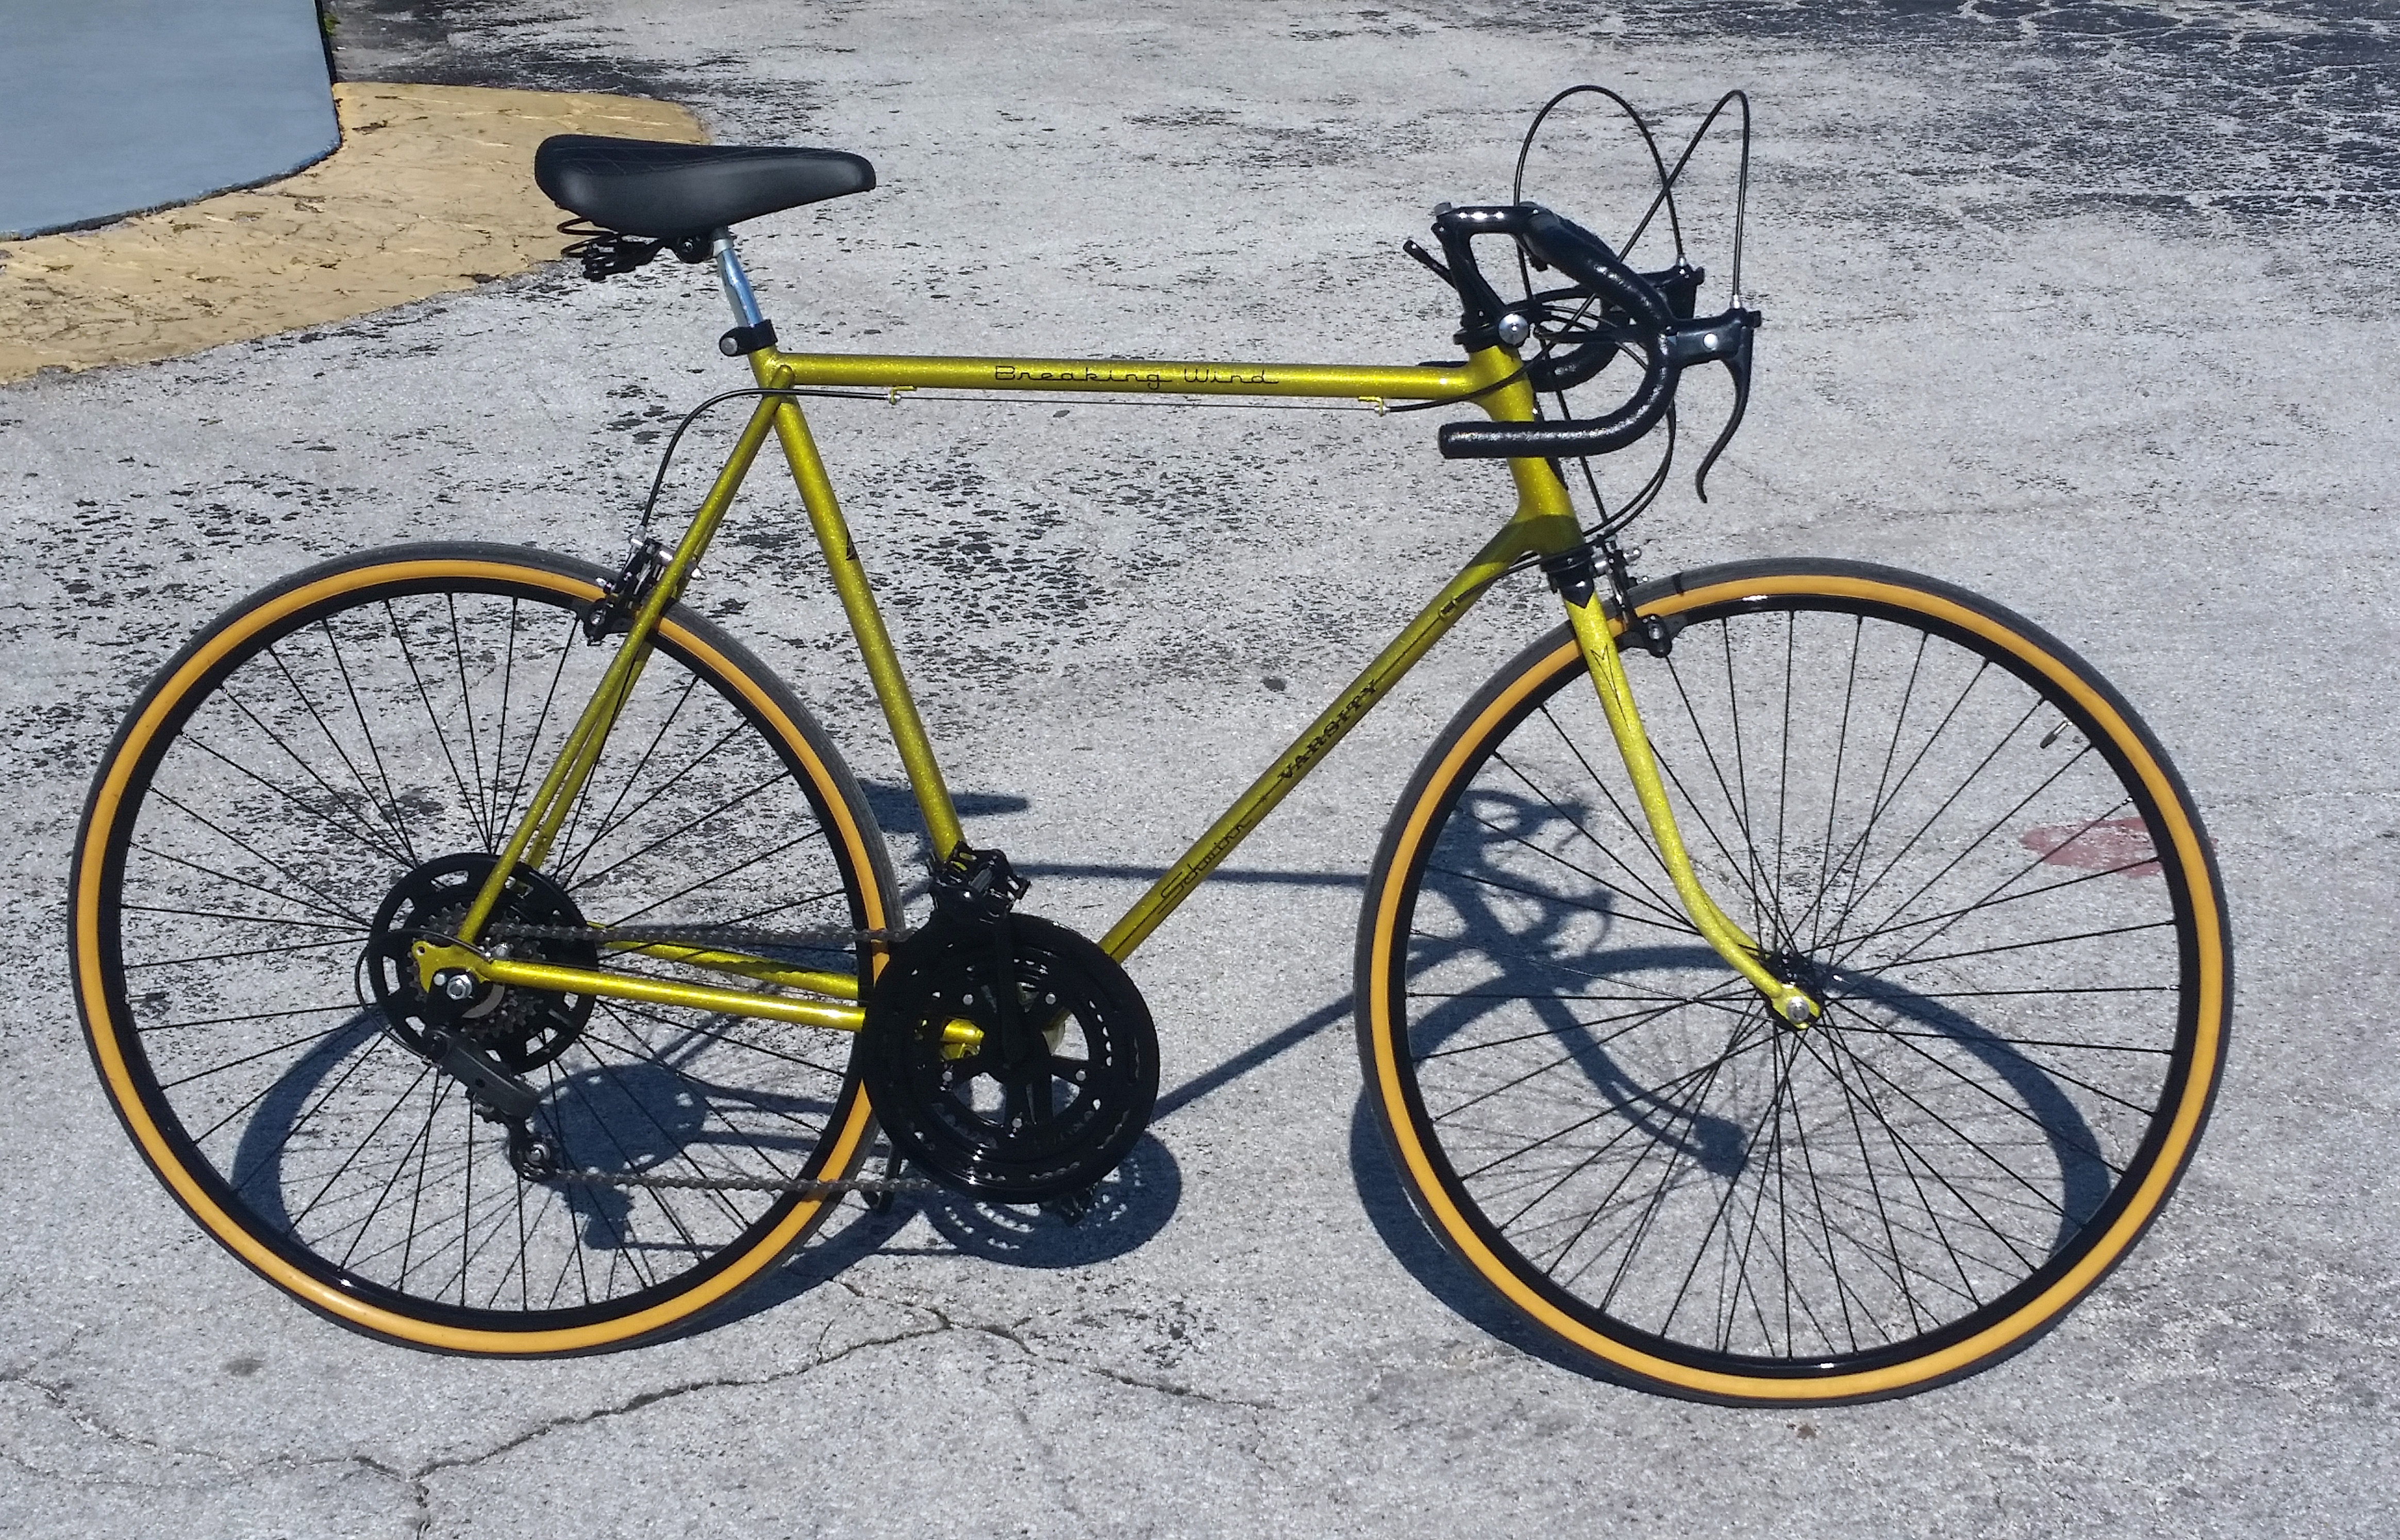
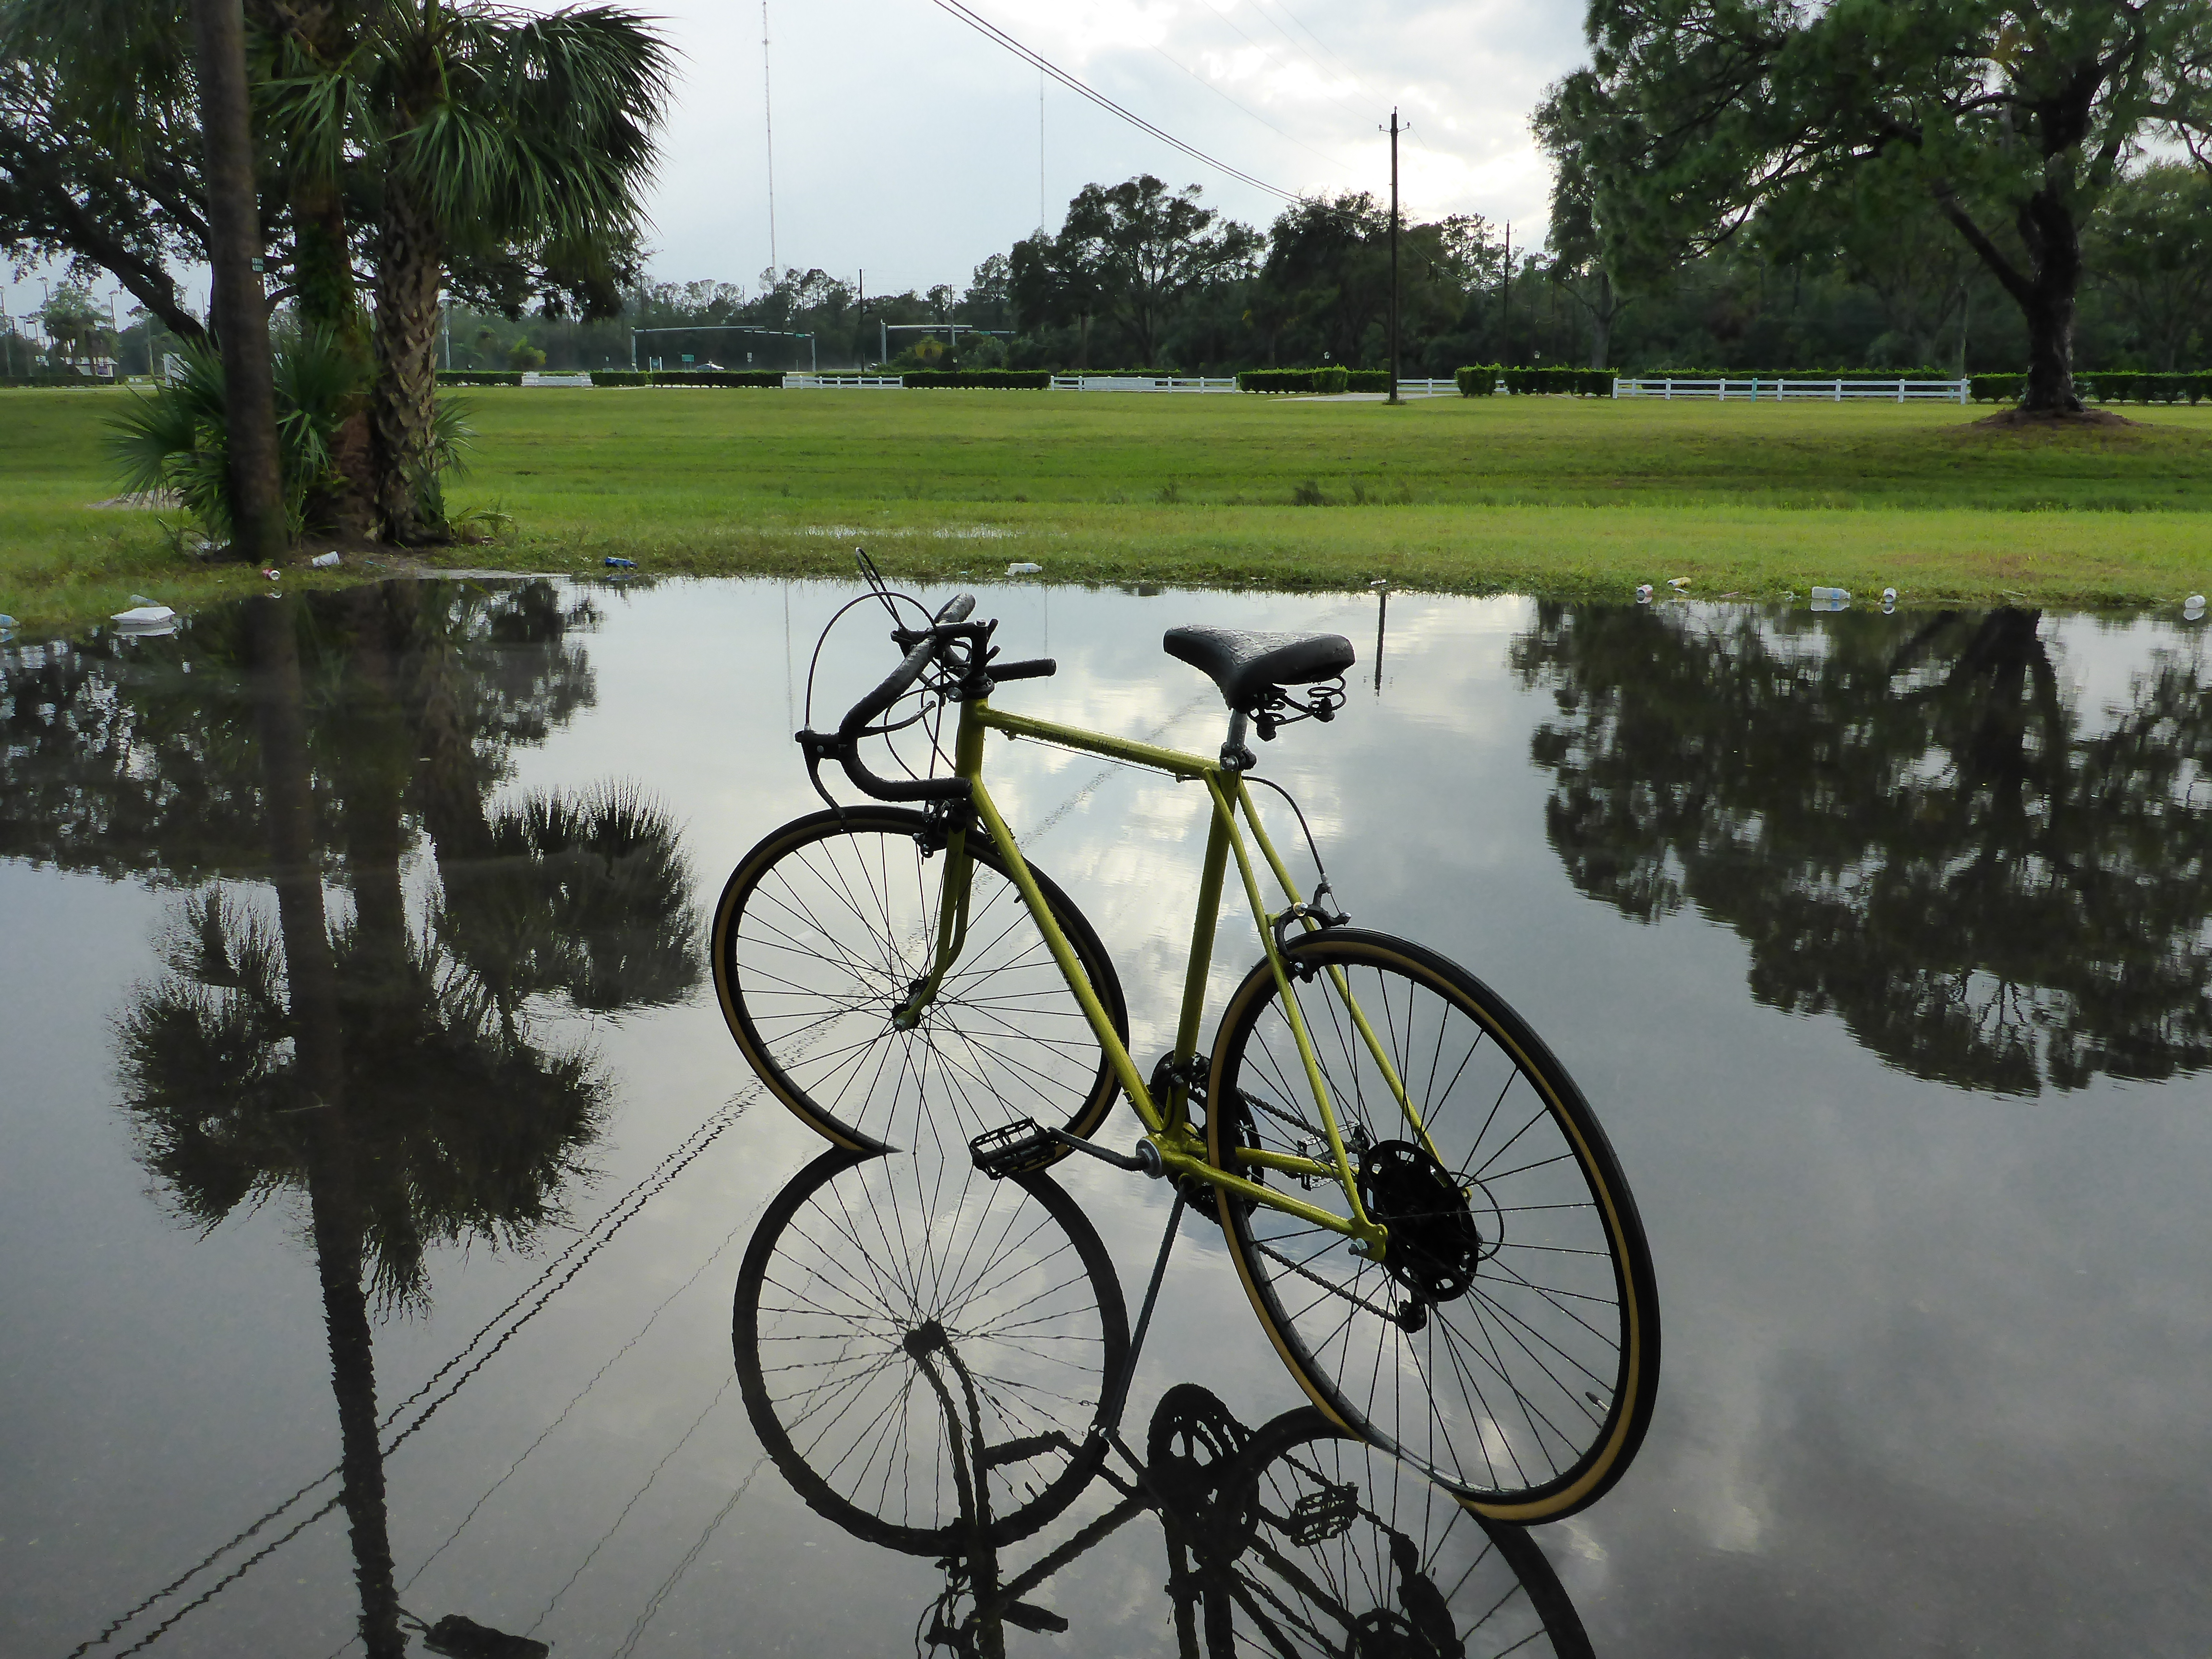
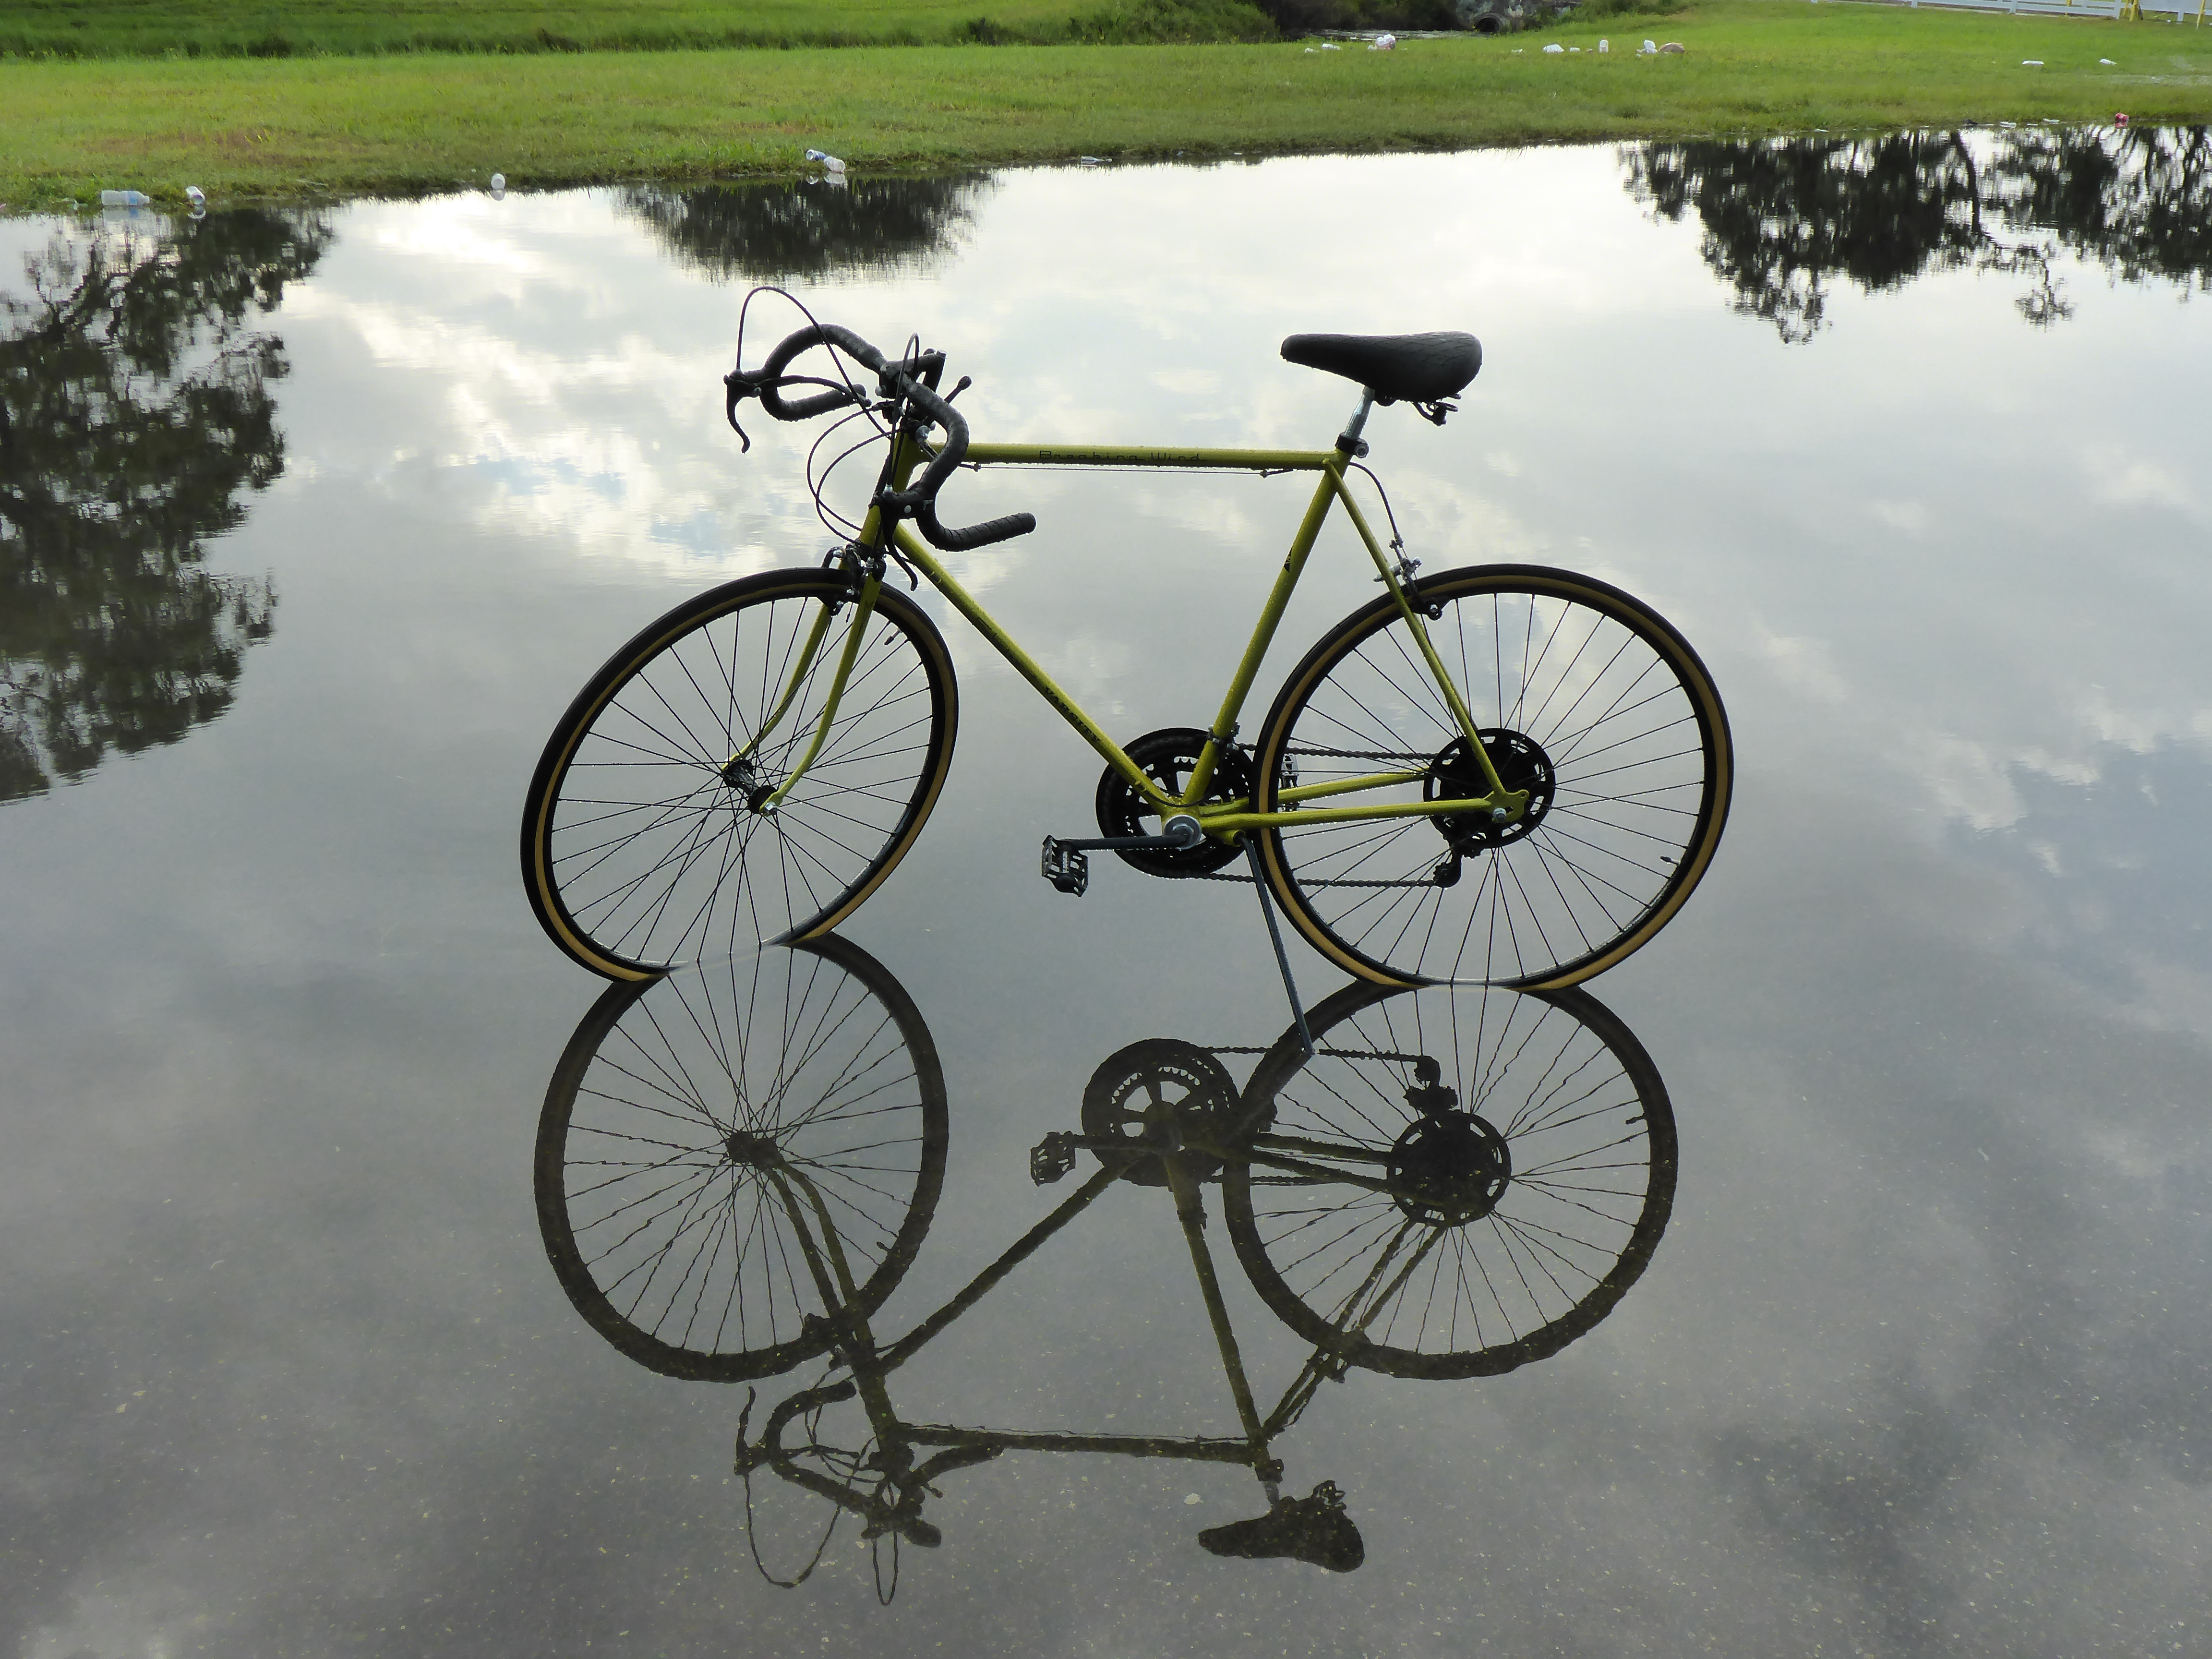
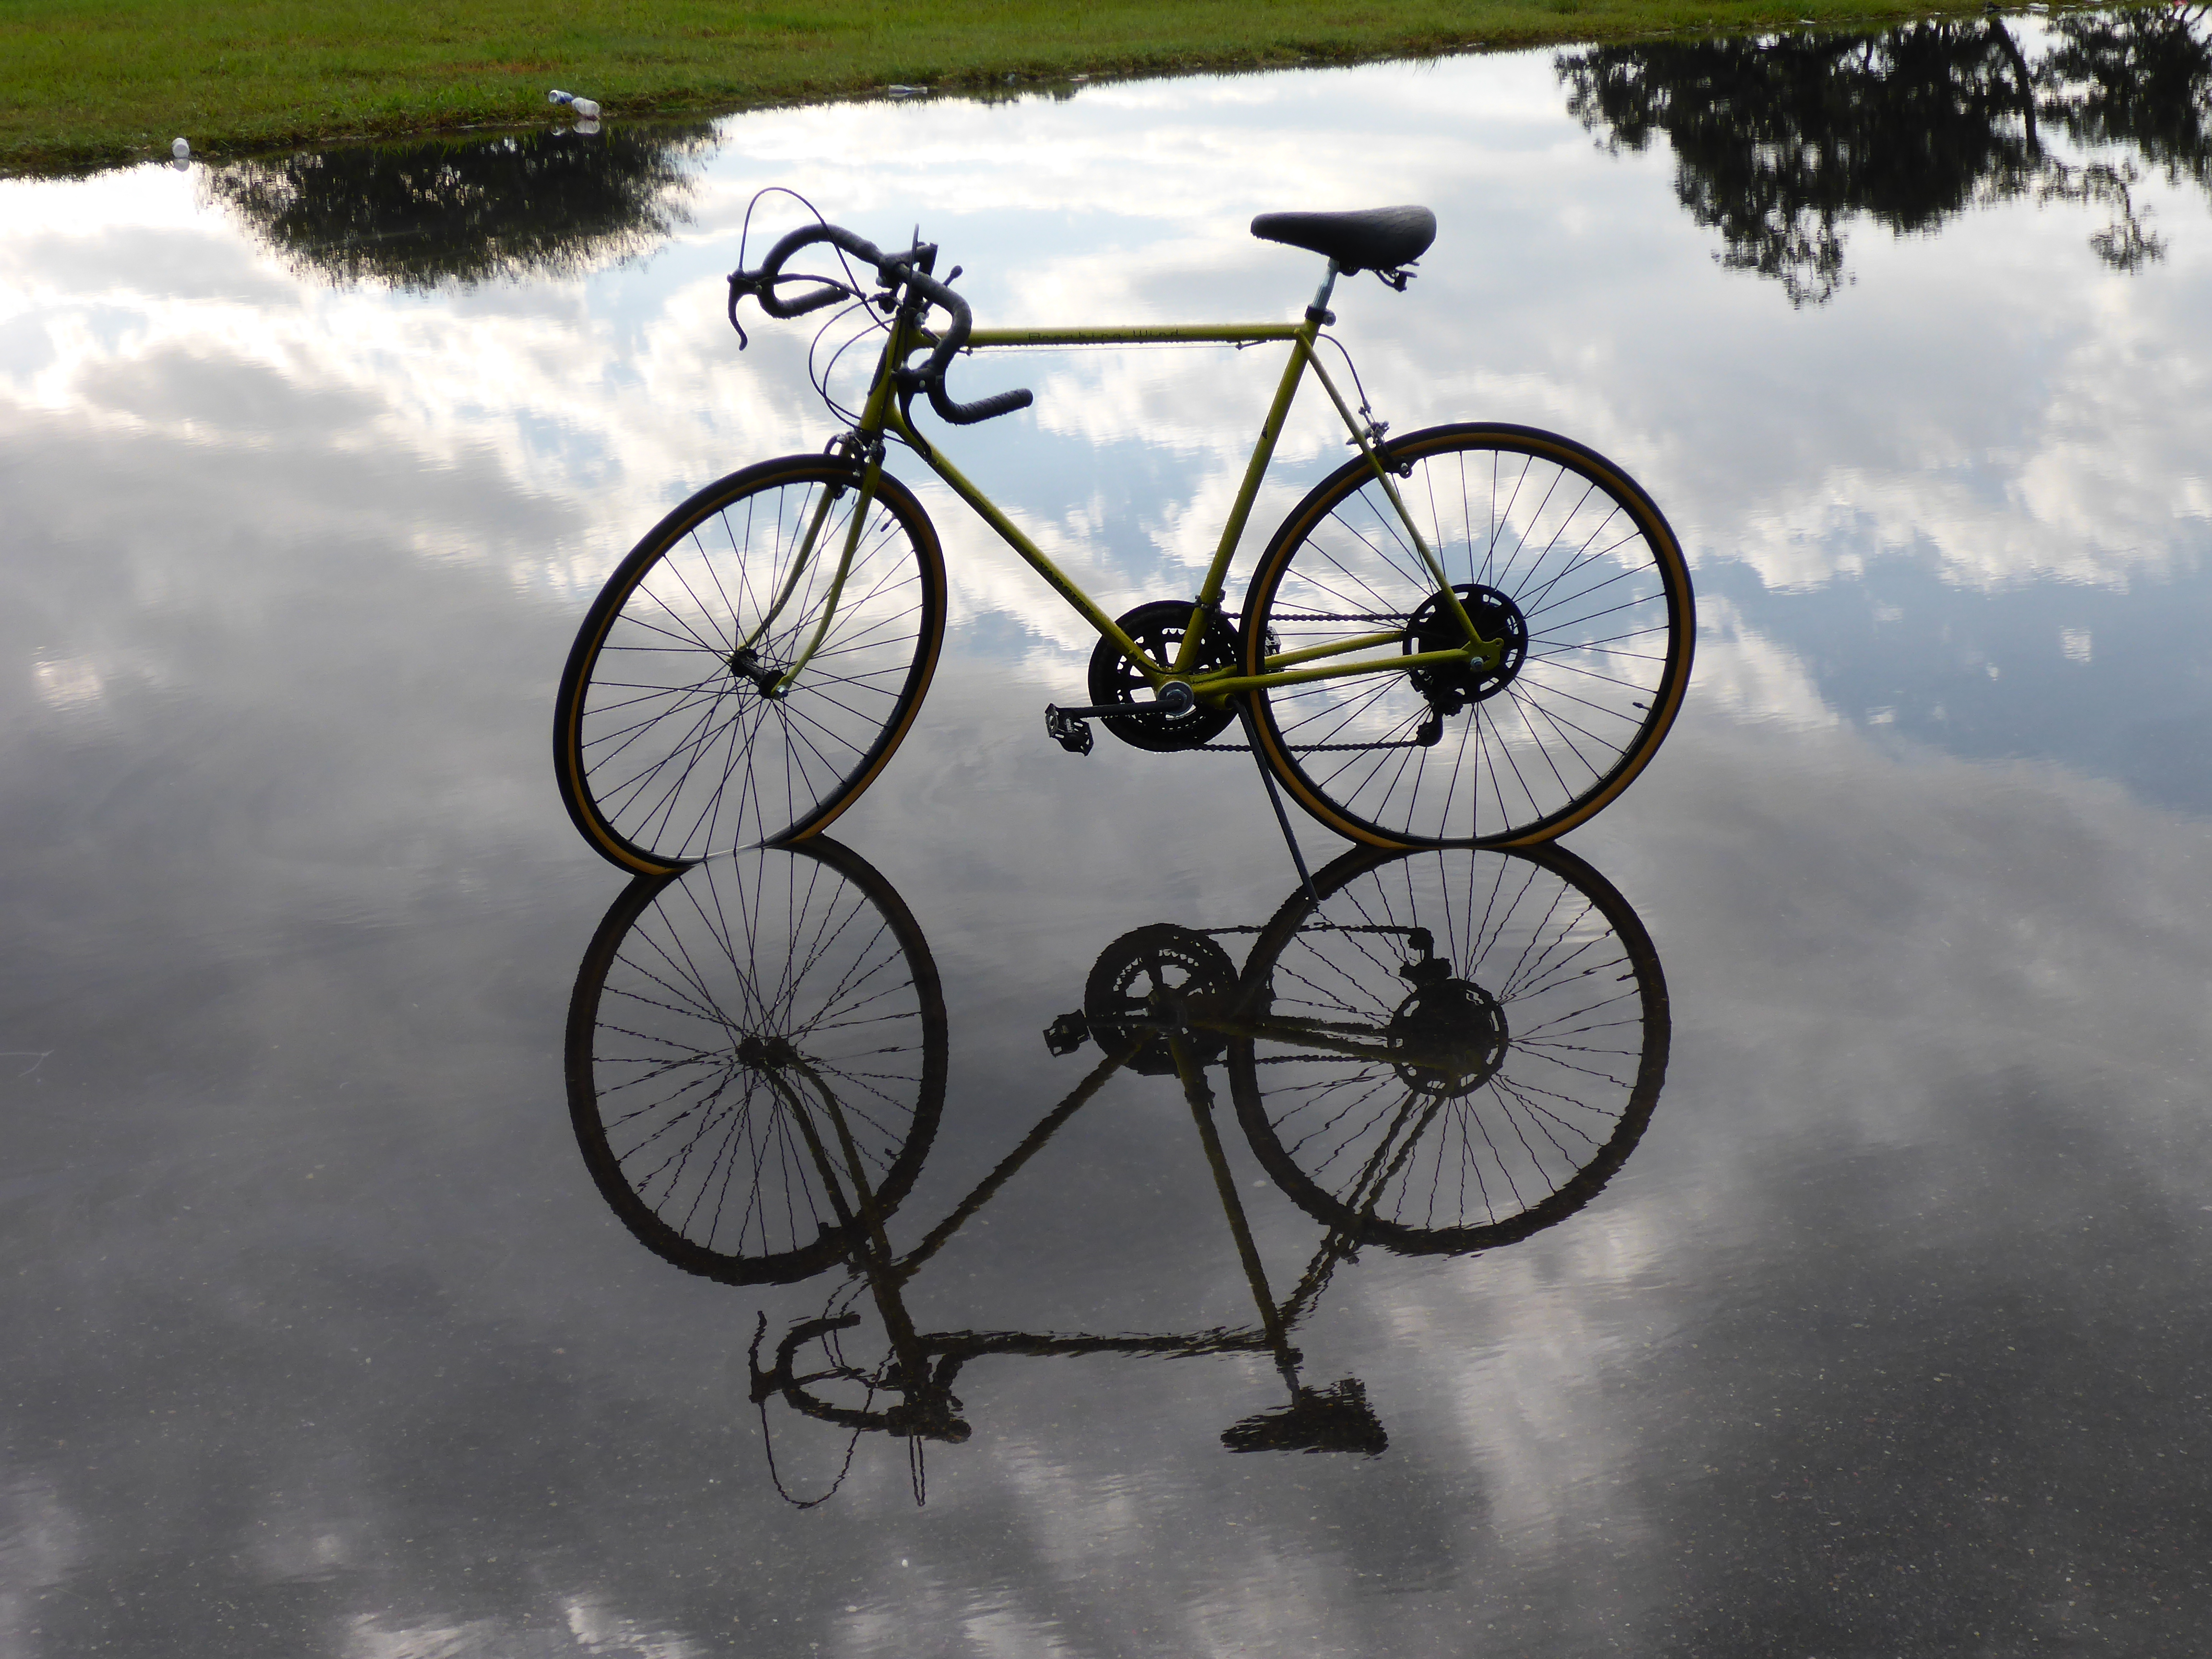
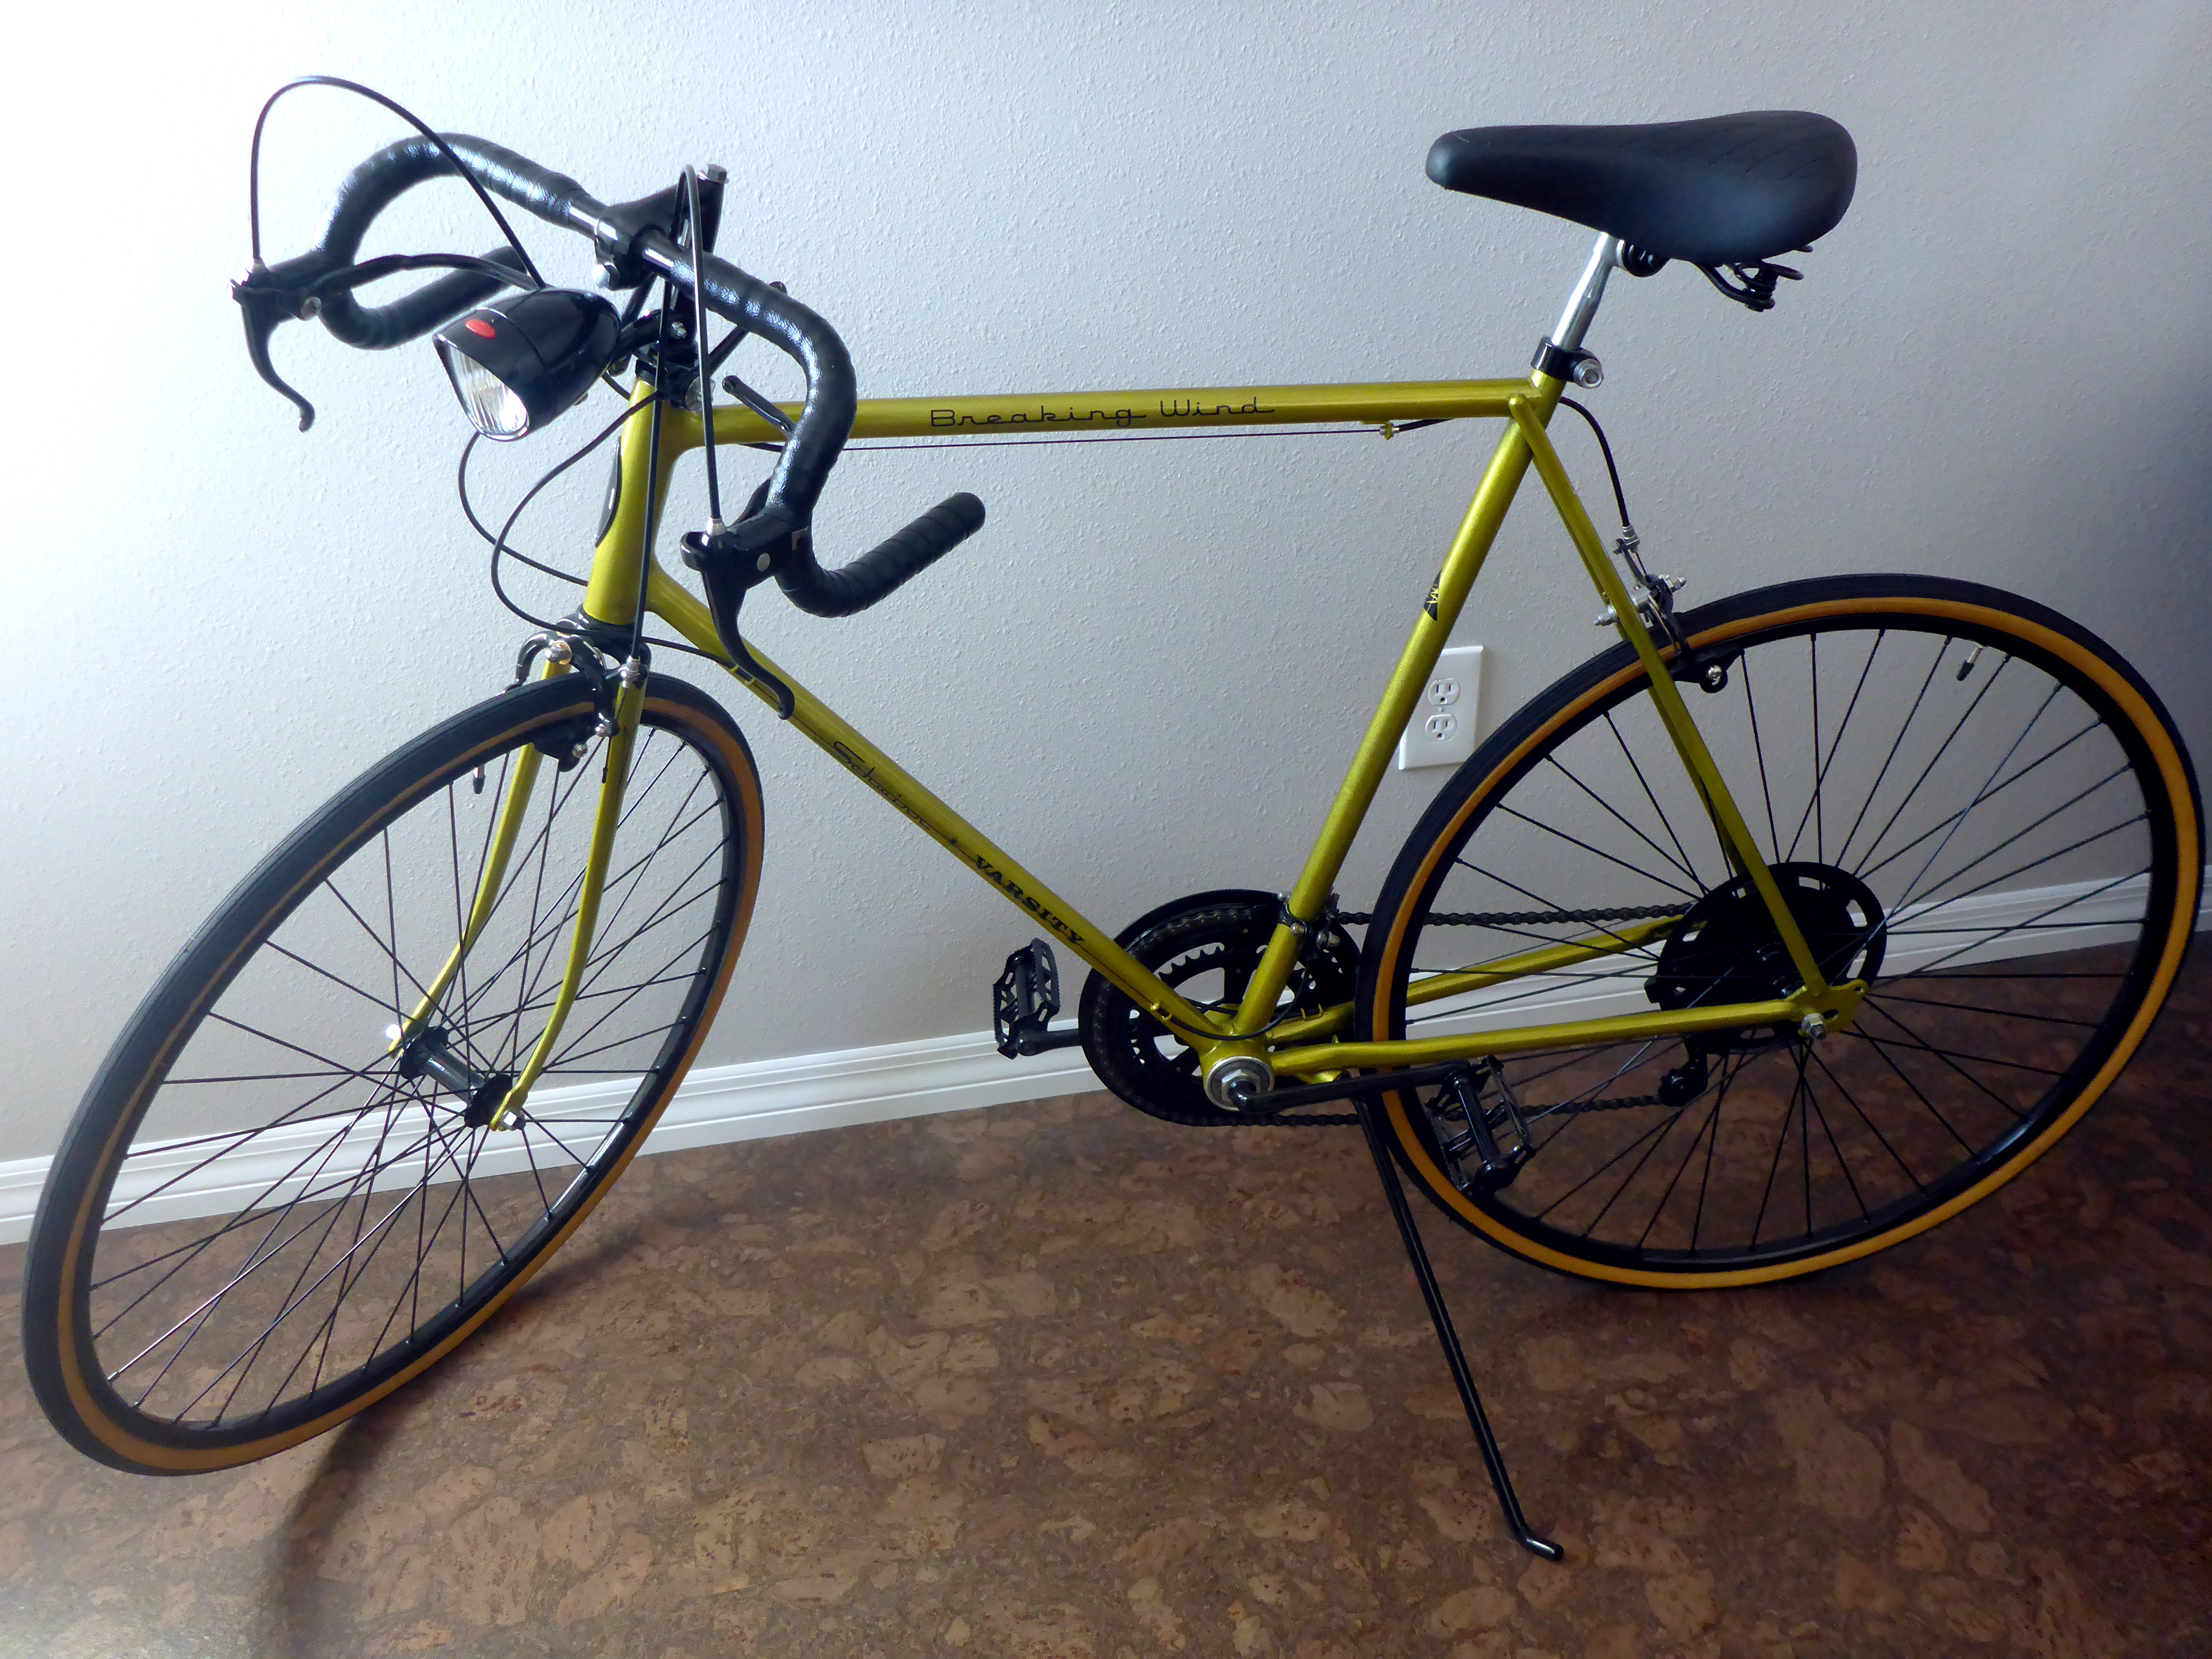
Also snapped some really cool pictures of Breaking Wind after that event:
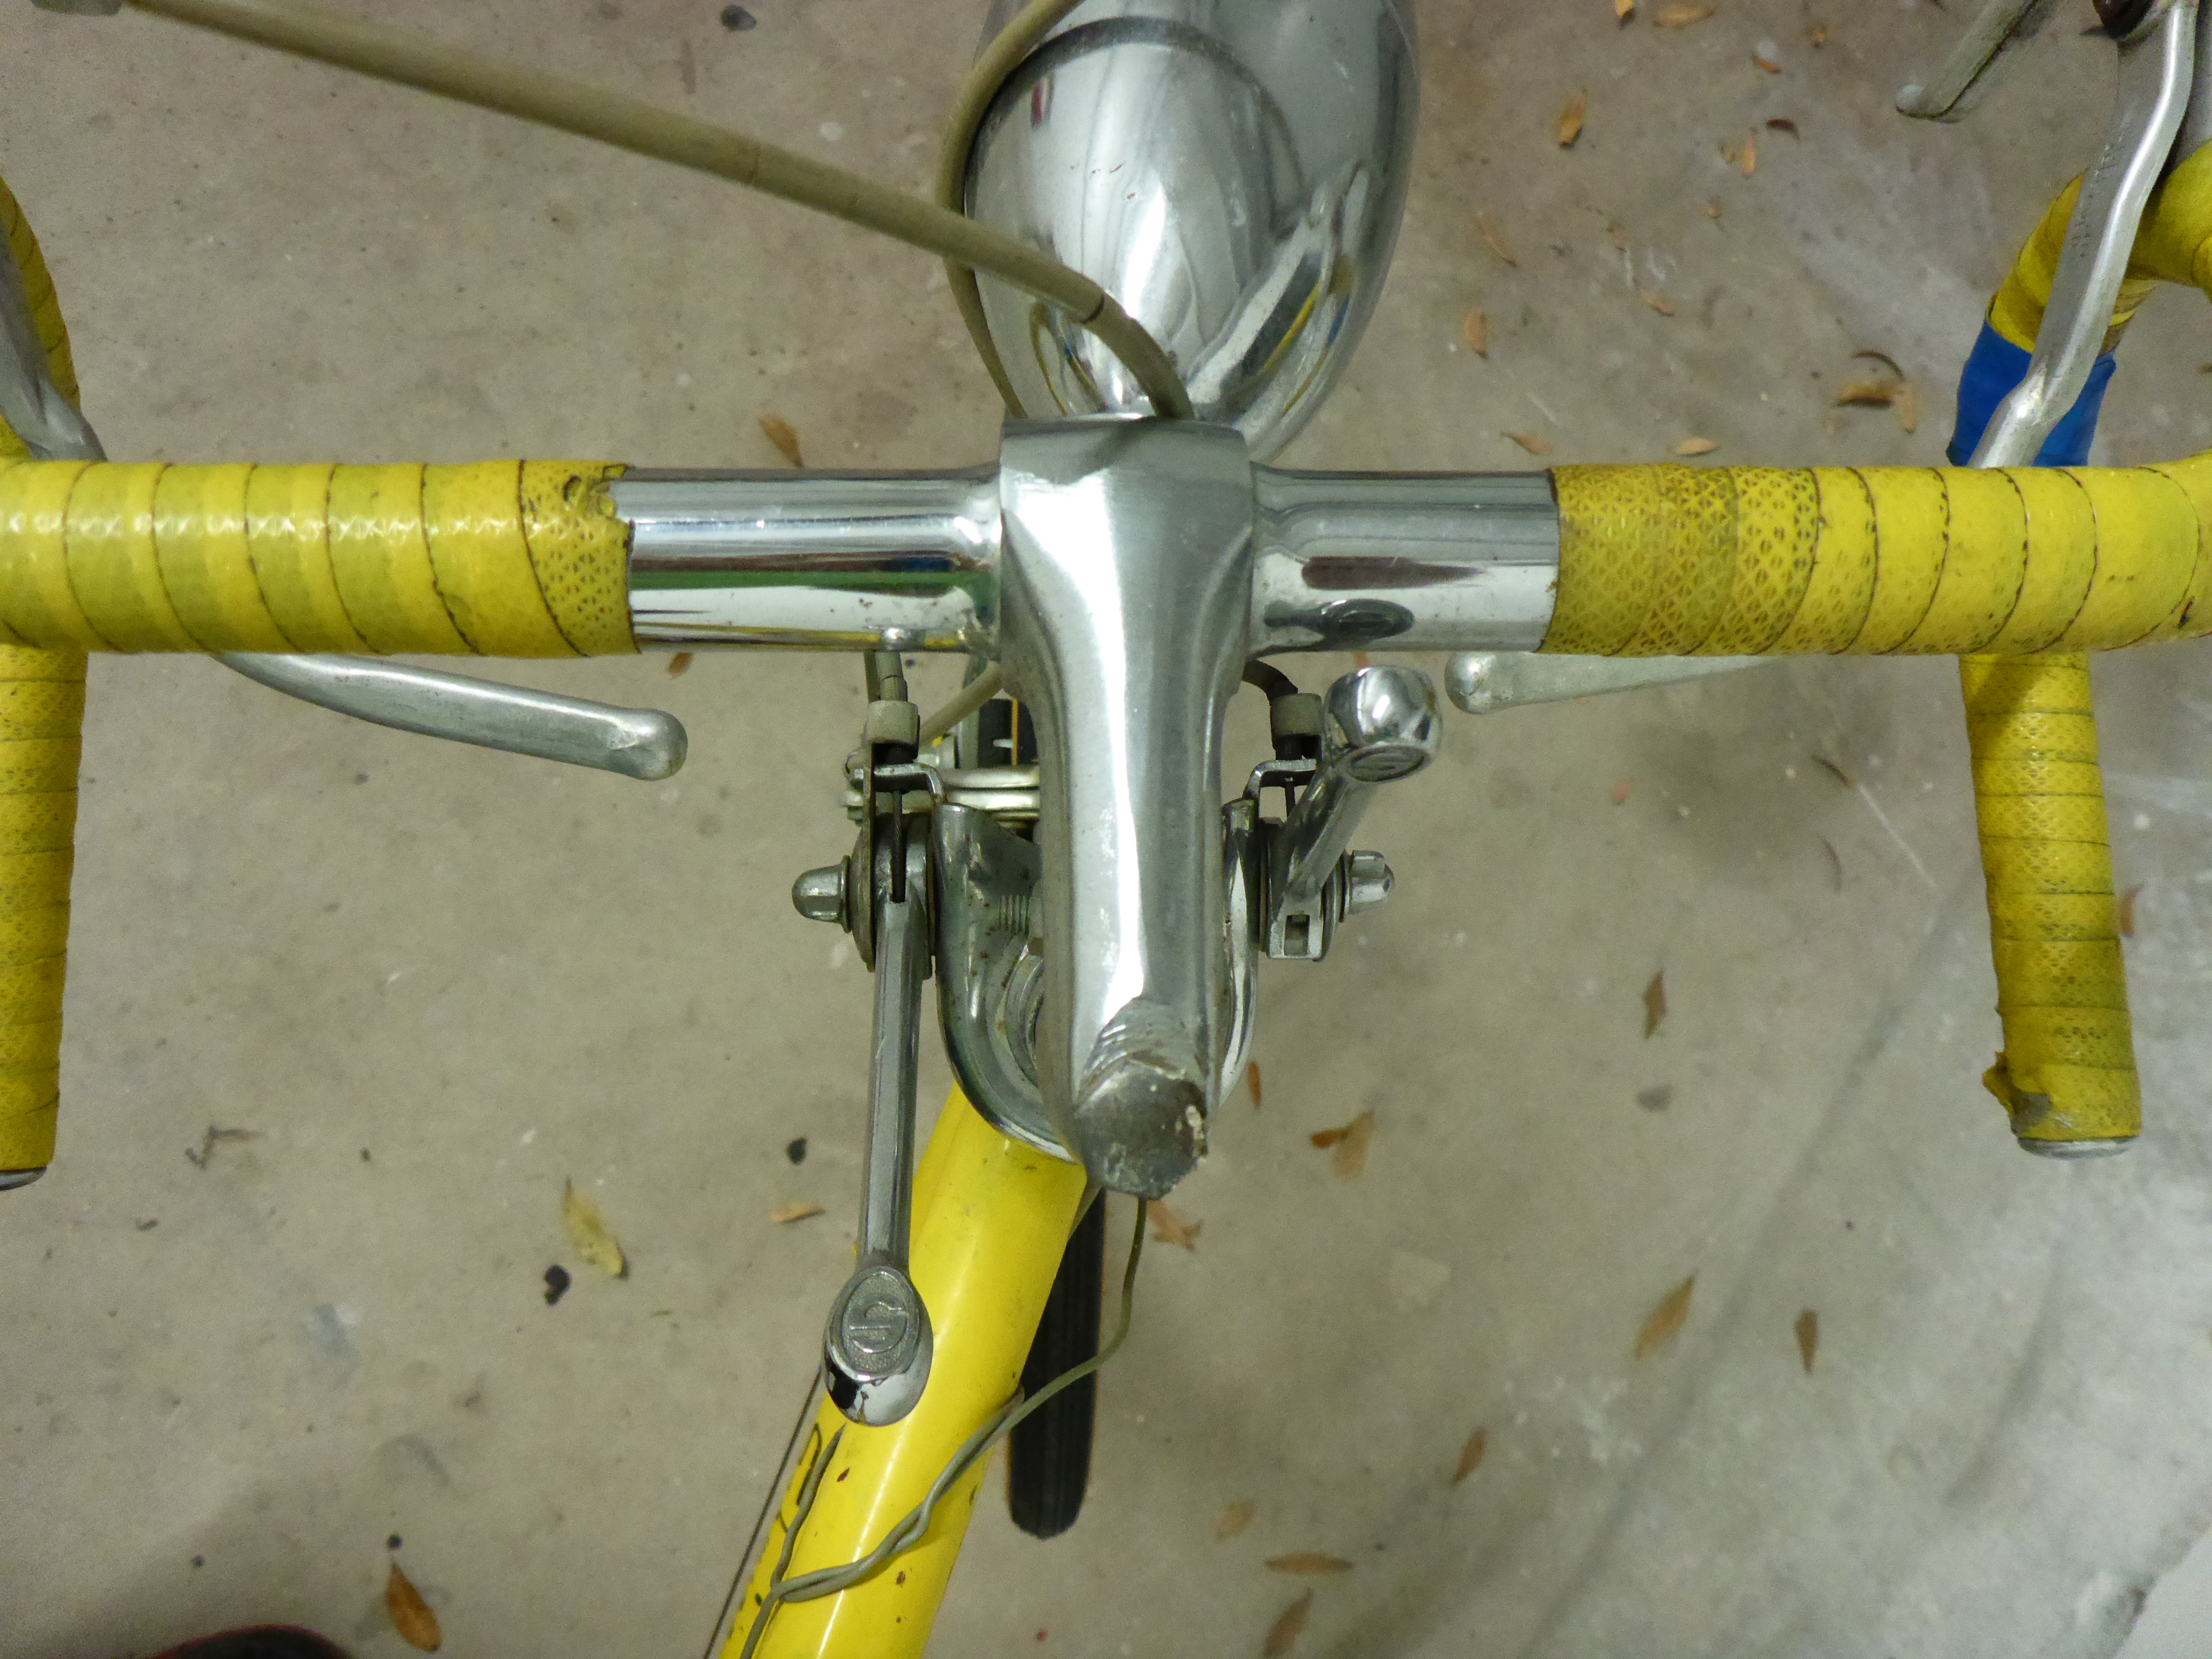
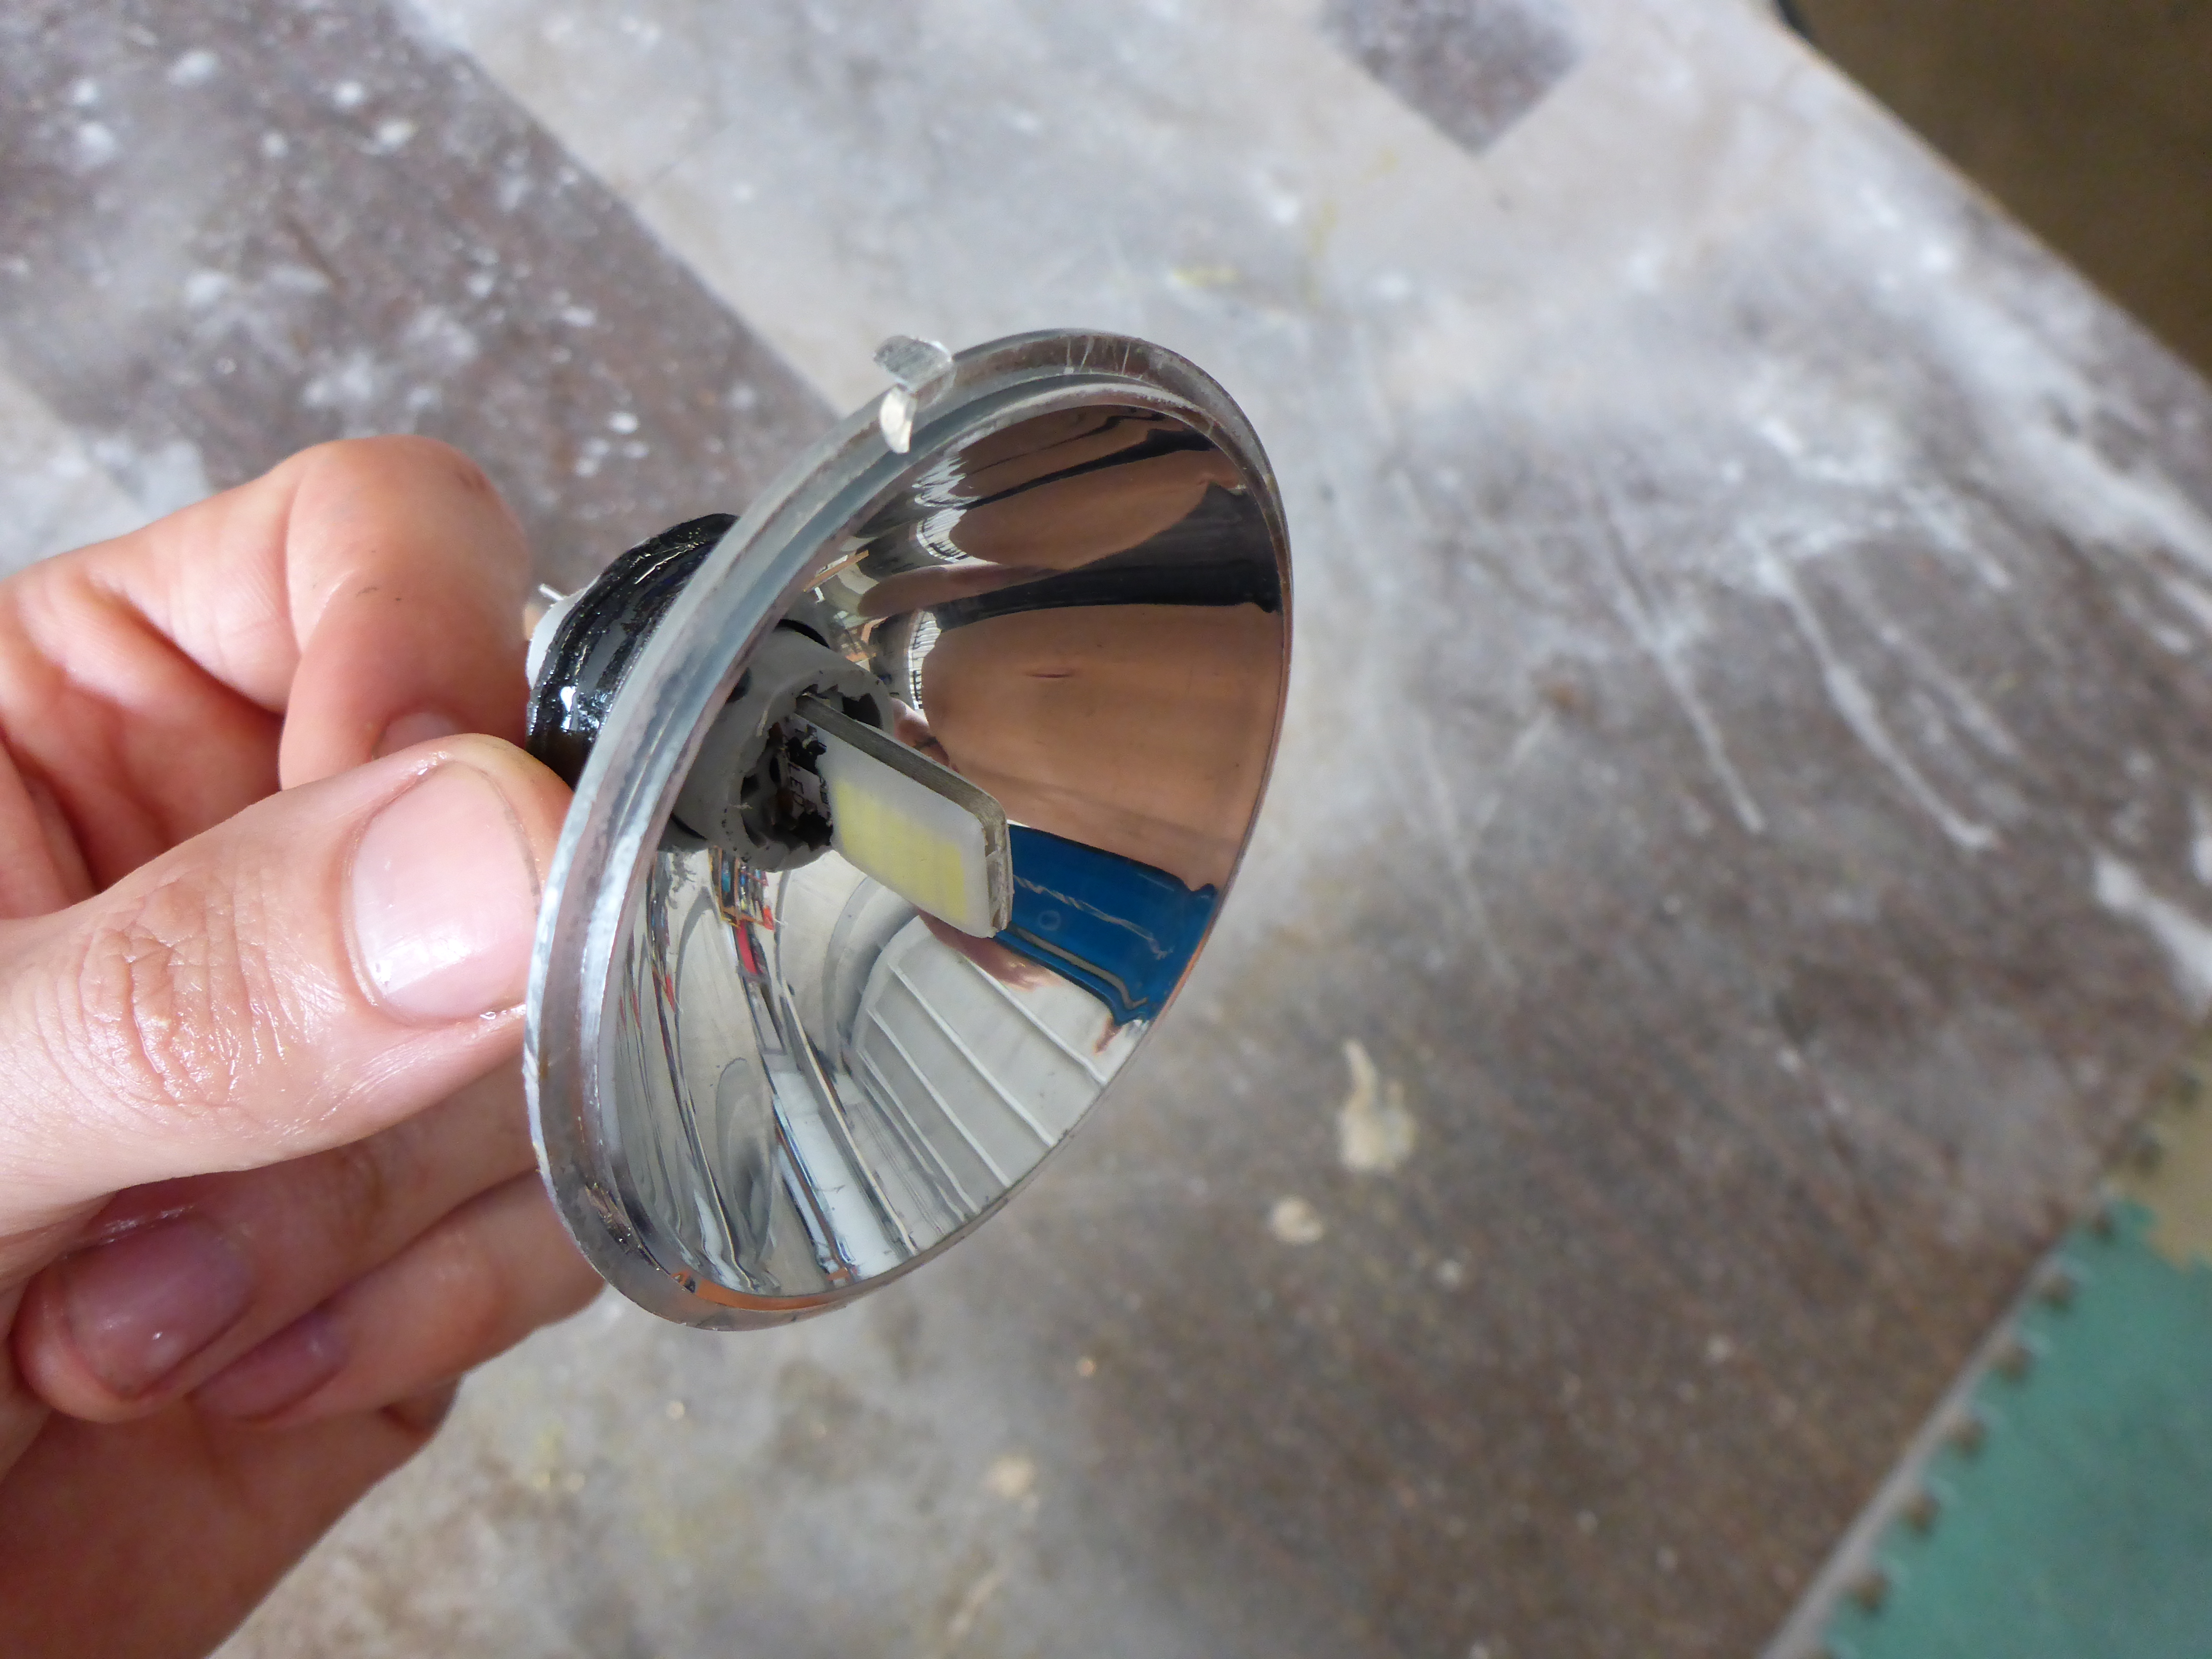
The final touch was lighting. As a lighting specialist, I just couldn’t let that classic beautifully styled headlamp go from this bicycle. It wasn’t an original Schwinn part, but it was something Uncle Pat had added to the bike with duct tape and pride. I kept the original housing and ditched the generator that strapped onto the rear wheel. I put a stealth black latching push button on the bottom of the headlight and a 12V power cell inside to control and power a Morimoto 194 LED bulb that I retrofitted into the housing. The result was flawless: providing an OEM appearance but with modern day lighting performance.
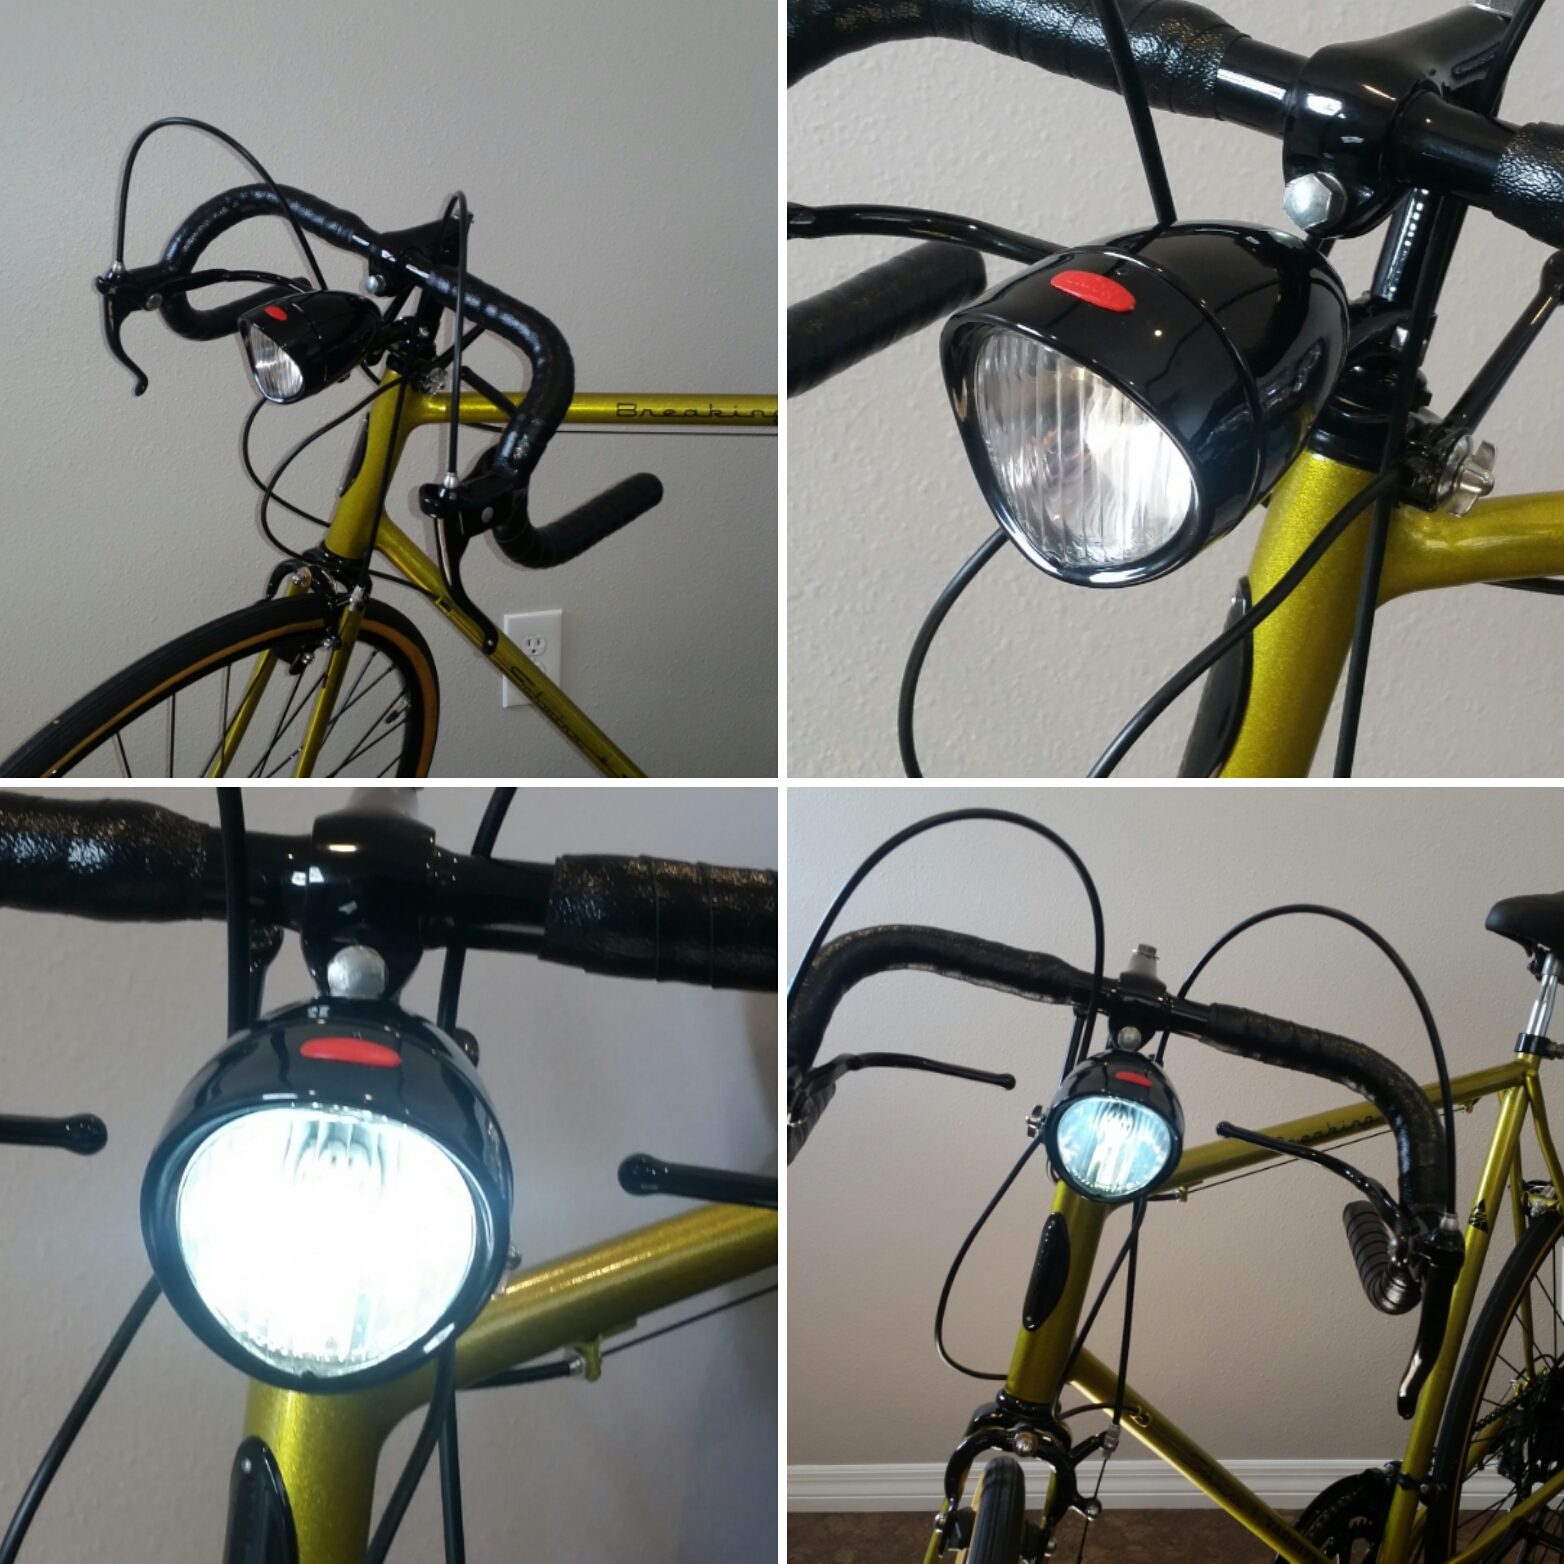
All in all, every mission was accomplished and Uncle Pat’s bike now proudly lives in my showroom in immaculate gorgeous condition in his honor.
I eventually intend on riding the length of the Pinellas Trail with Breaking Wind, but am in no rush to use the brakes and scuff up those flawless powdercoated wheels. 😀
All the love,

-13-